Table of Contents
Create invoices in Reckon One
Learn how to create customer invoices in Reckon One.
Create an invoice
To create an invoice:
- In the Day to day menu, select Invoices.
- Click Create.
Add customer, invoice and payment details
Complete the customer, invoice and payment details in the top section of the invoice (above the grid/table):
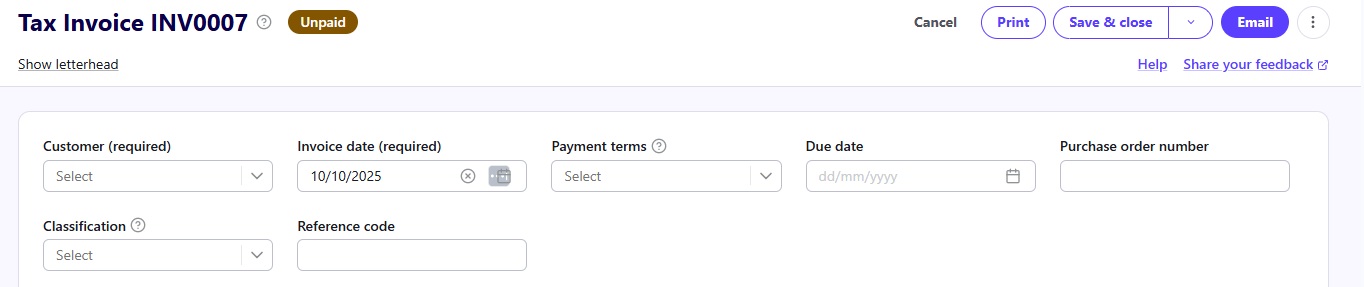
- Select or create a customer from the Customer dropdown menu. Click View details to see customer information (including their outstanding balance, remaining credit limit and last payment details).
- (Optional) Adjust or add the remaining payment invoice details:
- Invoice date (it defaults to today’s date).
- Enter Payment terms to specify the number of days from the invoice date that payment is due, or accept the default if there is one.
- Accept the default Due date (determined by the Payment terms), or enter a new one.
- Enter a Purchase order number if you are creating the invoice from purchase orders.
- If classifications are enabled, you can enter a Classification to track the invoice to a particular location, department, cost centre, or other category you choose. You can also enter classifications against individual line items in the invoice, which can then be seen in financial reports.
- Enter a Reference code, if you wish, to keep track of the transaction. This may be an internal code, bank transfer code, code for a specific project, or some other tracking code.
- If the invoice reminders feature is enabled for the book and customer, you will see a Reminders dropdown menu. Use this to enable invoice reminders for the invoice, if you wish.
Once you save an invoice that has invoice reminders enabled for it, reminders will be automatically sent when the invoice meets the reminder criteria. For example, if you have a reminder created for 1 day prior to the due date, and you create a new invoice with a due date of tomorrow, a reminder will be sent to the customer as soon as you save the invoice.- Enter information against any custom invoice fields.
Add details of goods and services
Next, add details of the goods or services you're selling, using the grid.
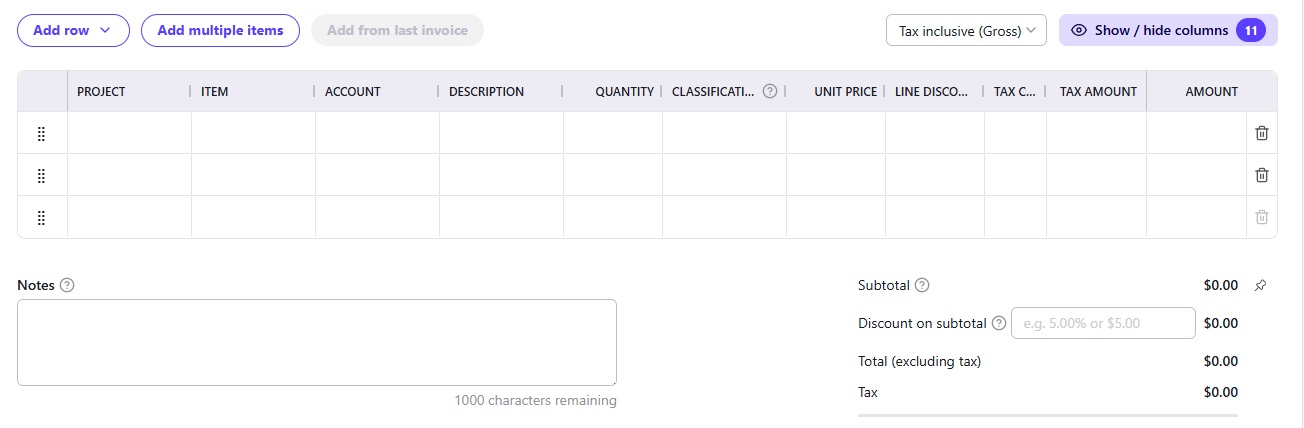
You must enter either an Item, an Account, or a Description In each row (unless it’s a text-only row). The Subtotal, Tax and Total at the bottom of the grid is auto-calculated for you as you add information.
If there are time and/or expenses for the invoice, you will see a blue alert letting you know. Learn how to add timesheet data and employee expense claims to an invoice.
Customise the information shown in the table
When adding goods or services, the columns that appear depend on your Reckon One plan and settings. Click on the Show/hide columns button to customise the columns you see while entering data.
Choose whether the amounts include or exclude tax
Use the dropdown next to the Show/hide columns button to choose whether amounts in the table are Tax exclusive (net) or Tax inclusive (gross).
Add and remove rows
Click Add row to add brand new rows (including text-only rows) or click Add from last invoice to see a list of rows from your last invoice to add.
To remove a row, click on the Remove item icon (rubbish bin) at the end of the row. An Invoice must have at least one row and you cannot remove the last available row.
Add multiple items
To add multiple items in one go, click Add multiple items. You can set a default account to populate when you enter a Description and Amount.
Apply a discount to the whole invoice
- (Optional) To apply a discount to the whole invoice, enter a dollar (for example, $5) or percentage (for example, 5%) amount in the Discount on subtotal field in the invoice totals on the bottom right hand corner of the screen.
Attach a file to the invoice
- (Optional) To attach one or more files to an invoice, drag them over to the invoice or click anywhere on the attachment section. Each file must be 25 MB or smaller. The supported file types are doc, docx, xls, xlsx, tiff, pdf, jpg, jpeg, png and gif.
- To include the attachments when the invoice is emailed, turn on the Shared toggle. By default, the toggle is turned off for each file that you attach.
- To delete an attachment, select the Remove item icon (rubbish bin) next to the file.
Save the invoice
- Select the Save button in the top right, or select the arrow next to the Save button and choose one of the options in the dropdown menu:
- Save & new to save and create a new blank invoice
- Save & close to save and return to the invoice overview screen
Change invoice template
If you've selected a default invoice template, this will automatically apply when you create an invoice. To change the invoice template:
- From the invoice creation screen, click on the Actions menu (3 dots) and select Change template.
- Then select the relevant template.
You can also manage templates from the invoice creation screen:
- From the invoice creation screen, click on the Actions menu (3 dots) and select Change template.
- Select Manage templates.
Read more
- Learn how to use invoice approvals
- Learn how to send customer invoices
- Learn how to edit customer invoices