Maintain employee pay setup
Employee pay setup allows Reckon Payroll app users to create pay runs with configured pay items for their employees. Employee pay setup can be done when adding an employee, or at any time from the Pay setup tab in the employee record.
Pay setup - adding an employee
When adding an employee to your book, after entering the employee's details and their leave entitlements, you can add Pay items to their record.
To add the items:
- Tap Configure pay setup
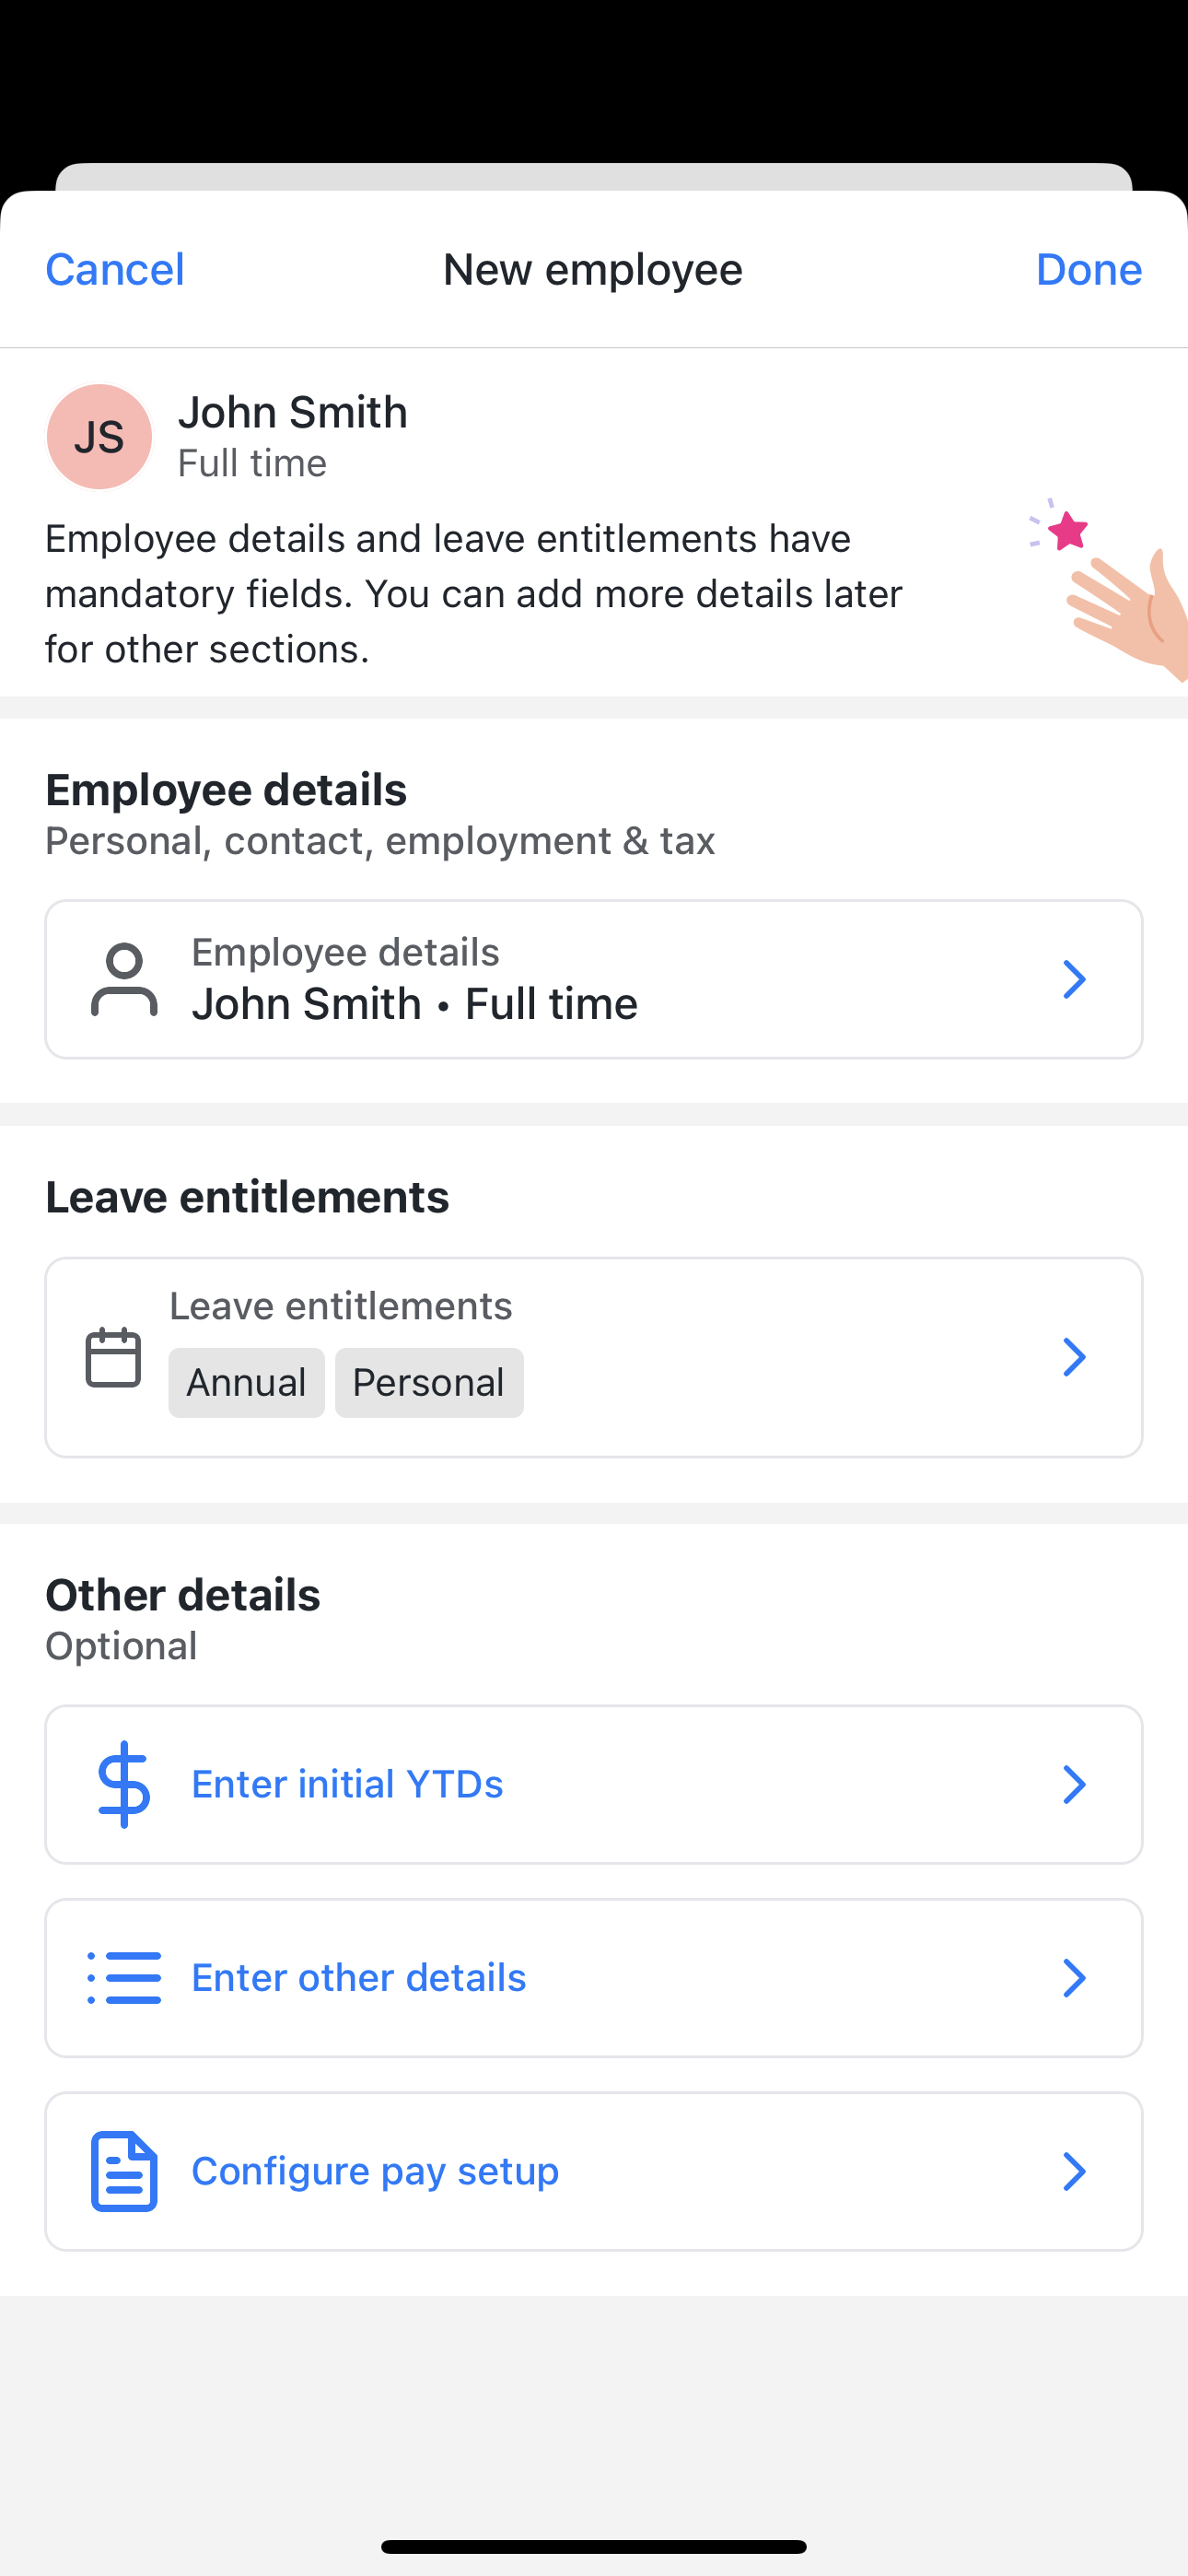
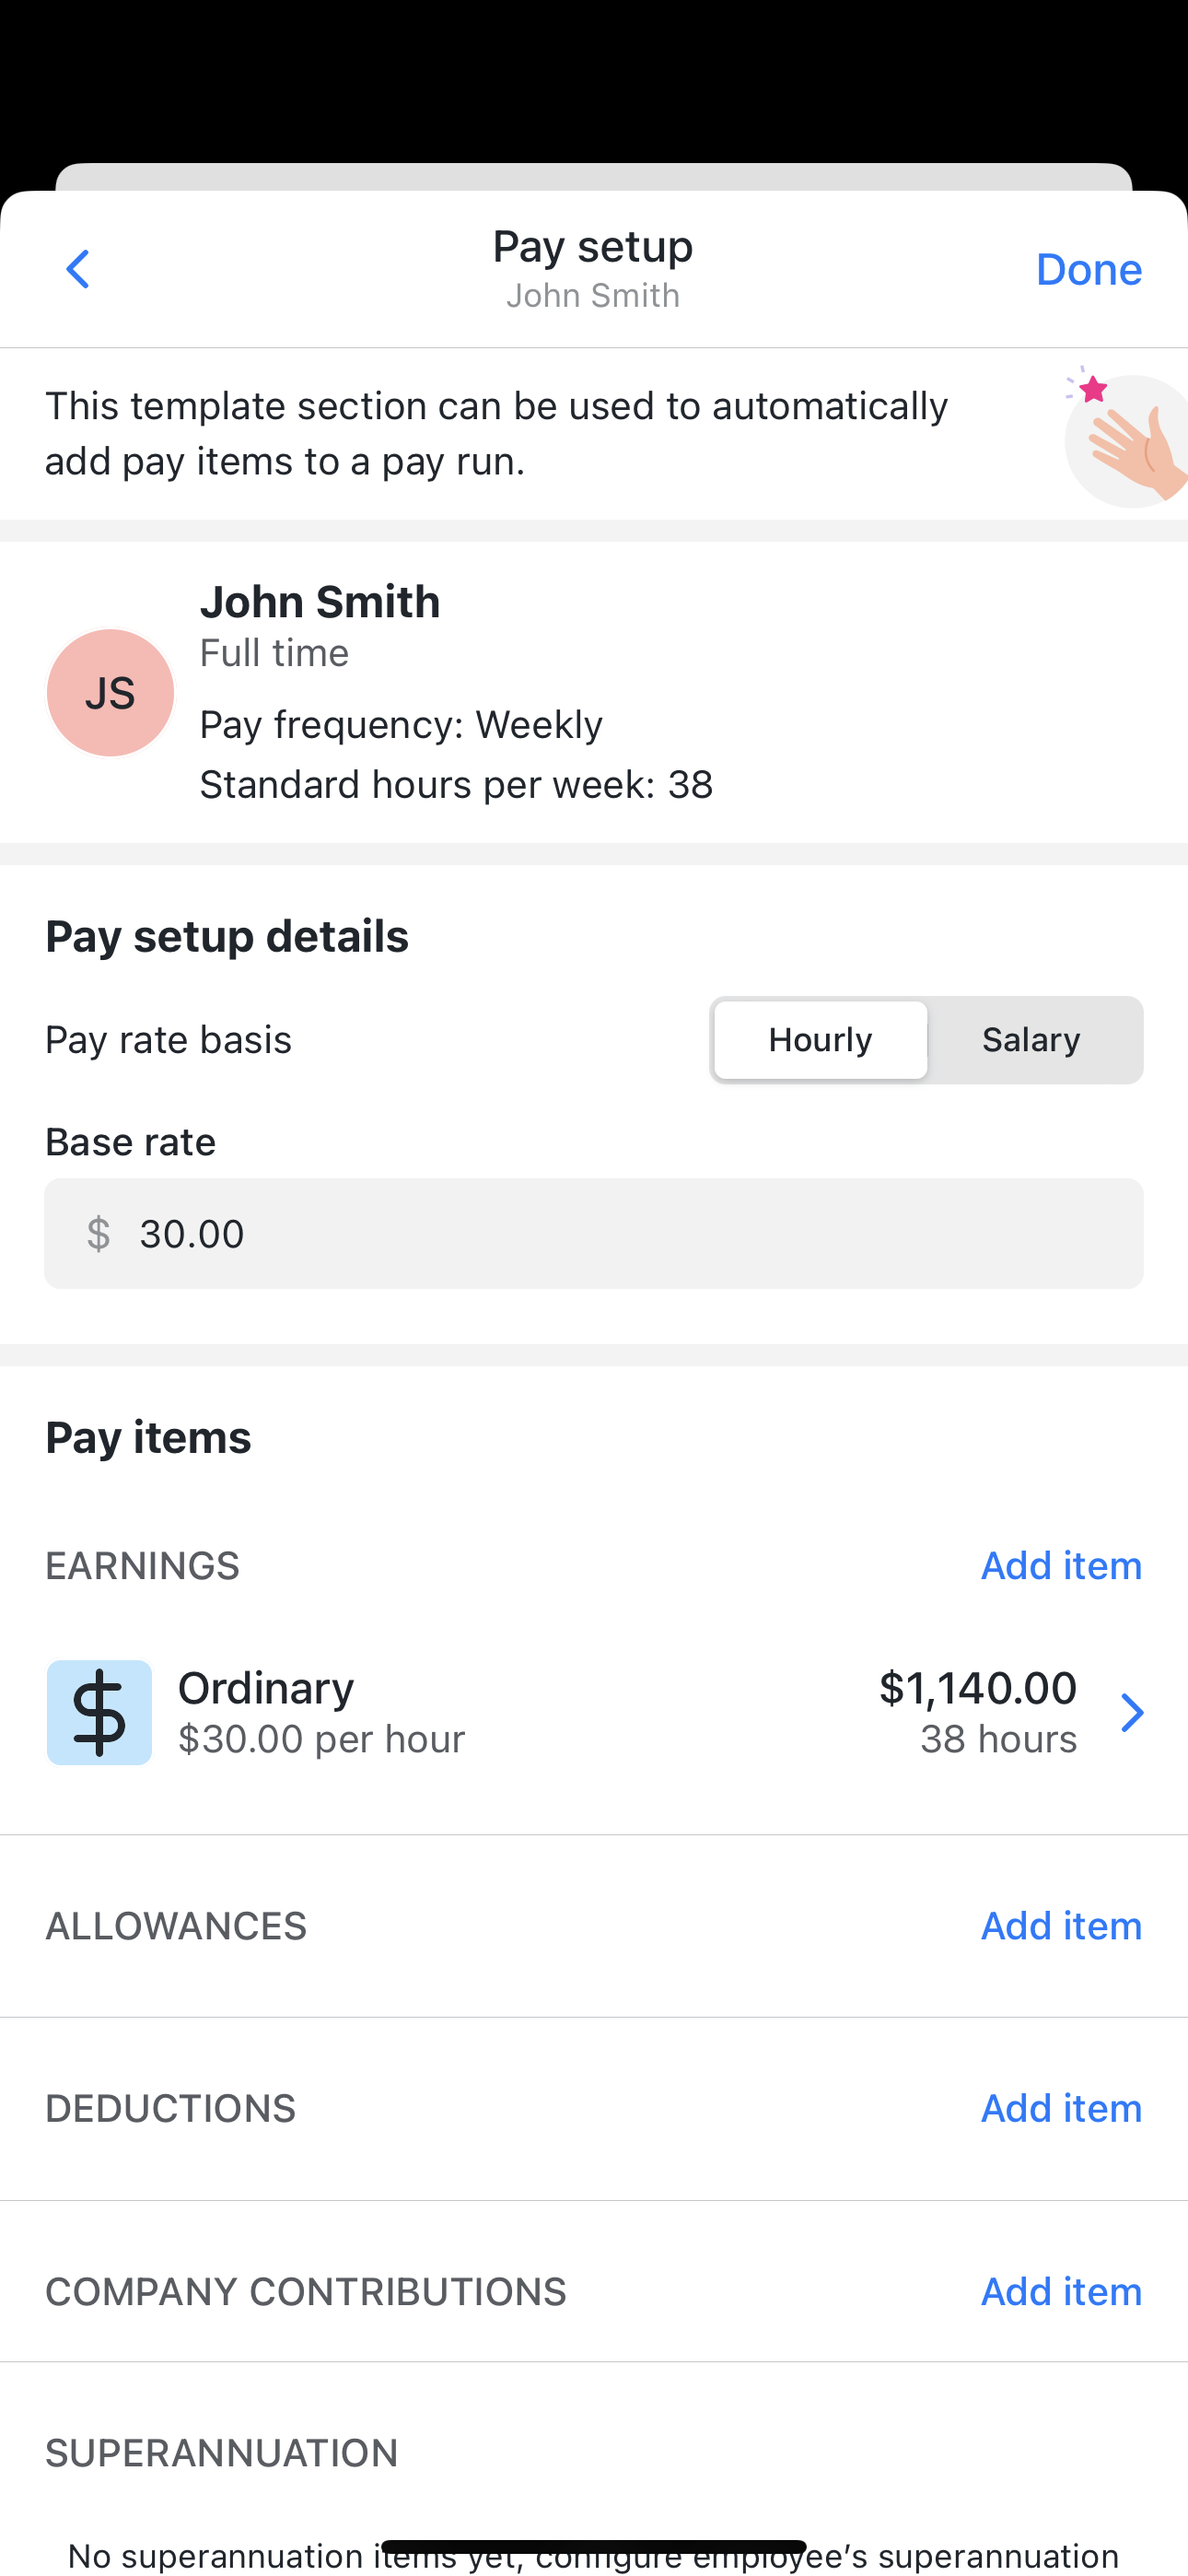
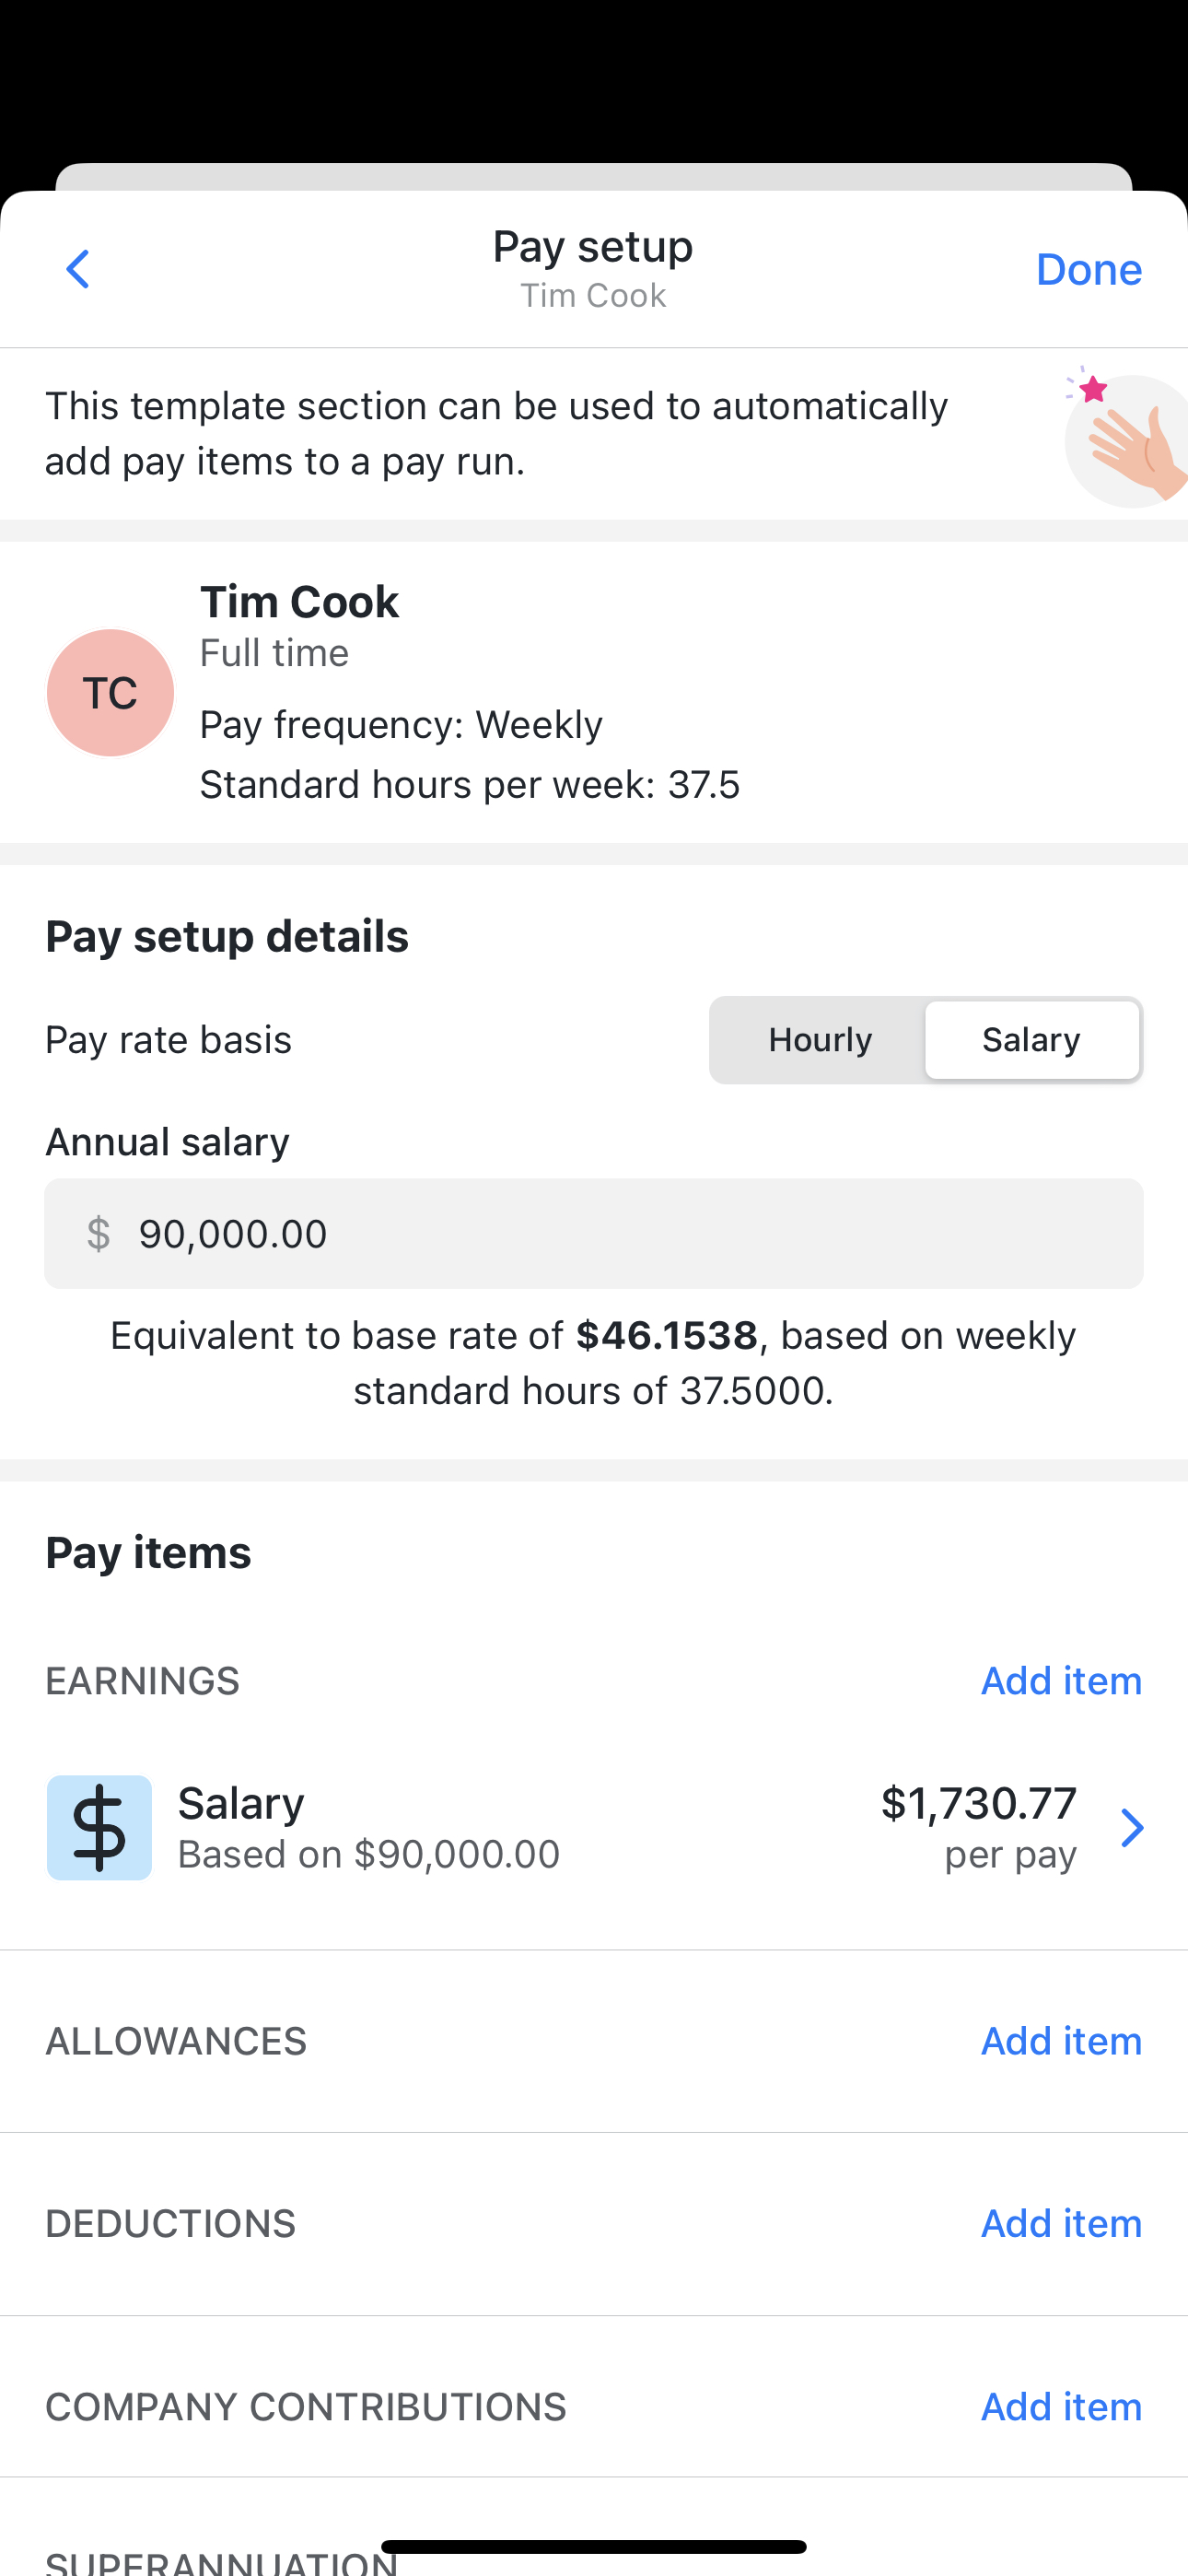
- Select if the employee is paid Hourly or a Salary
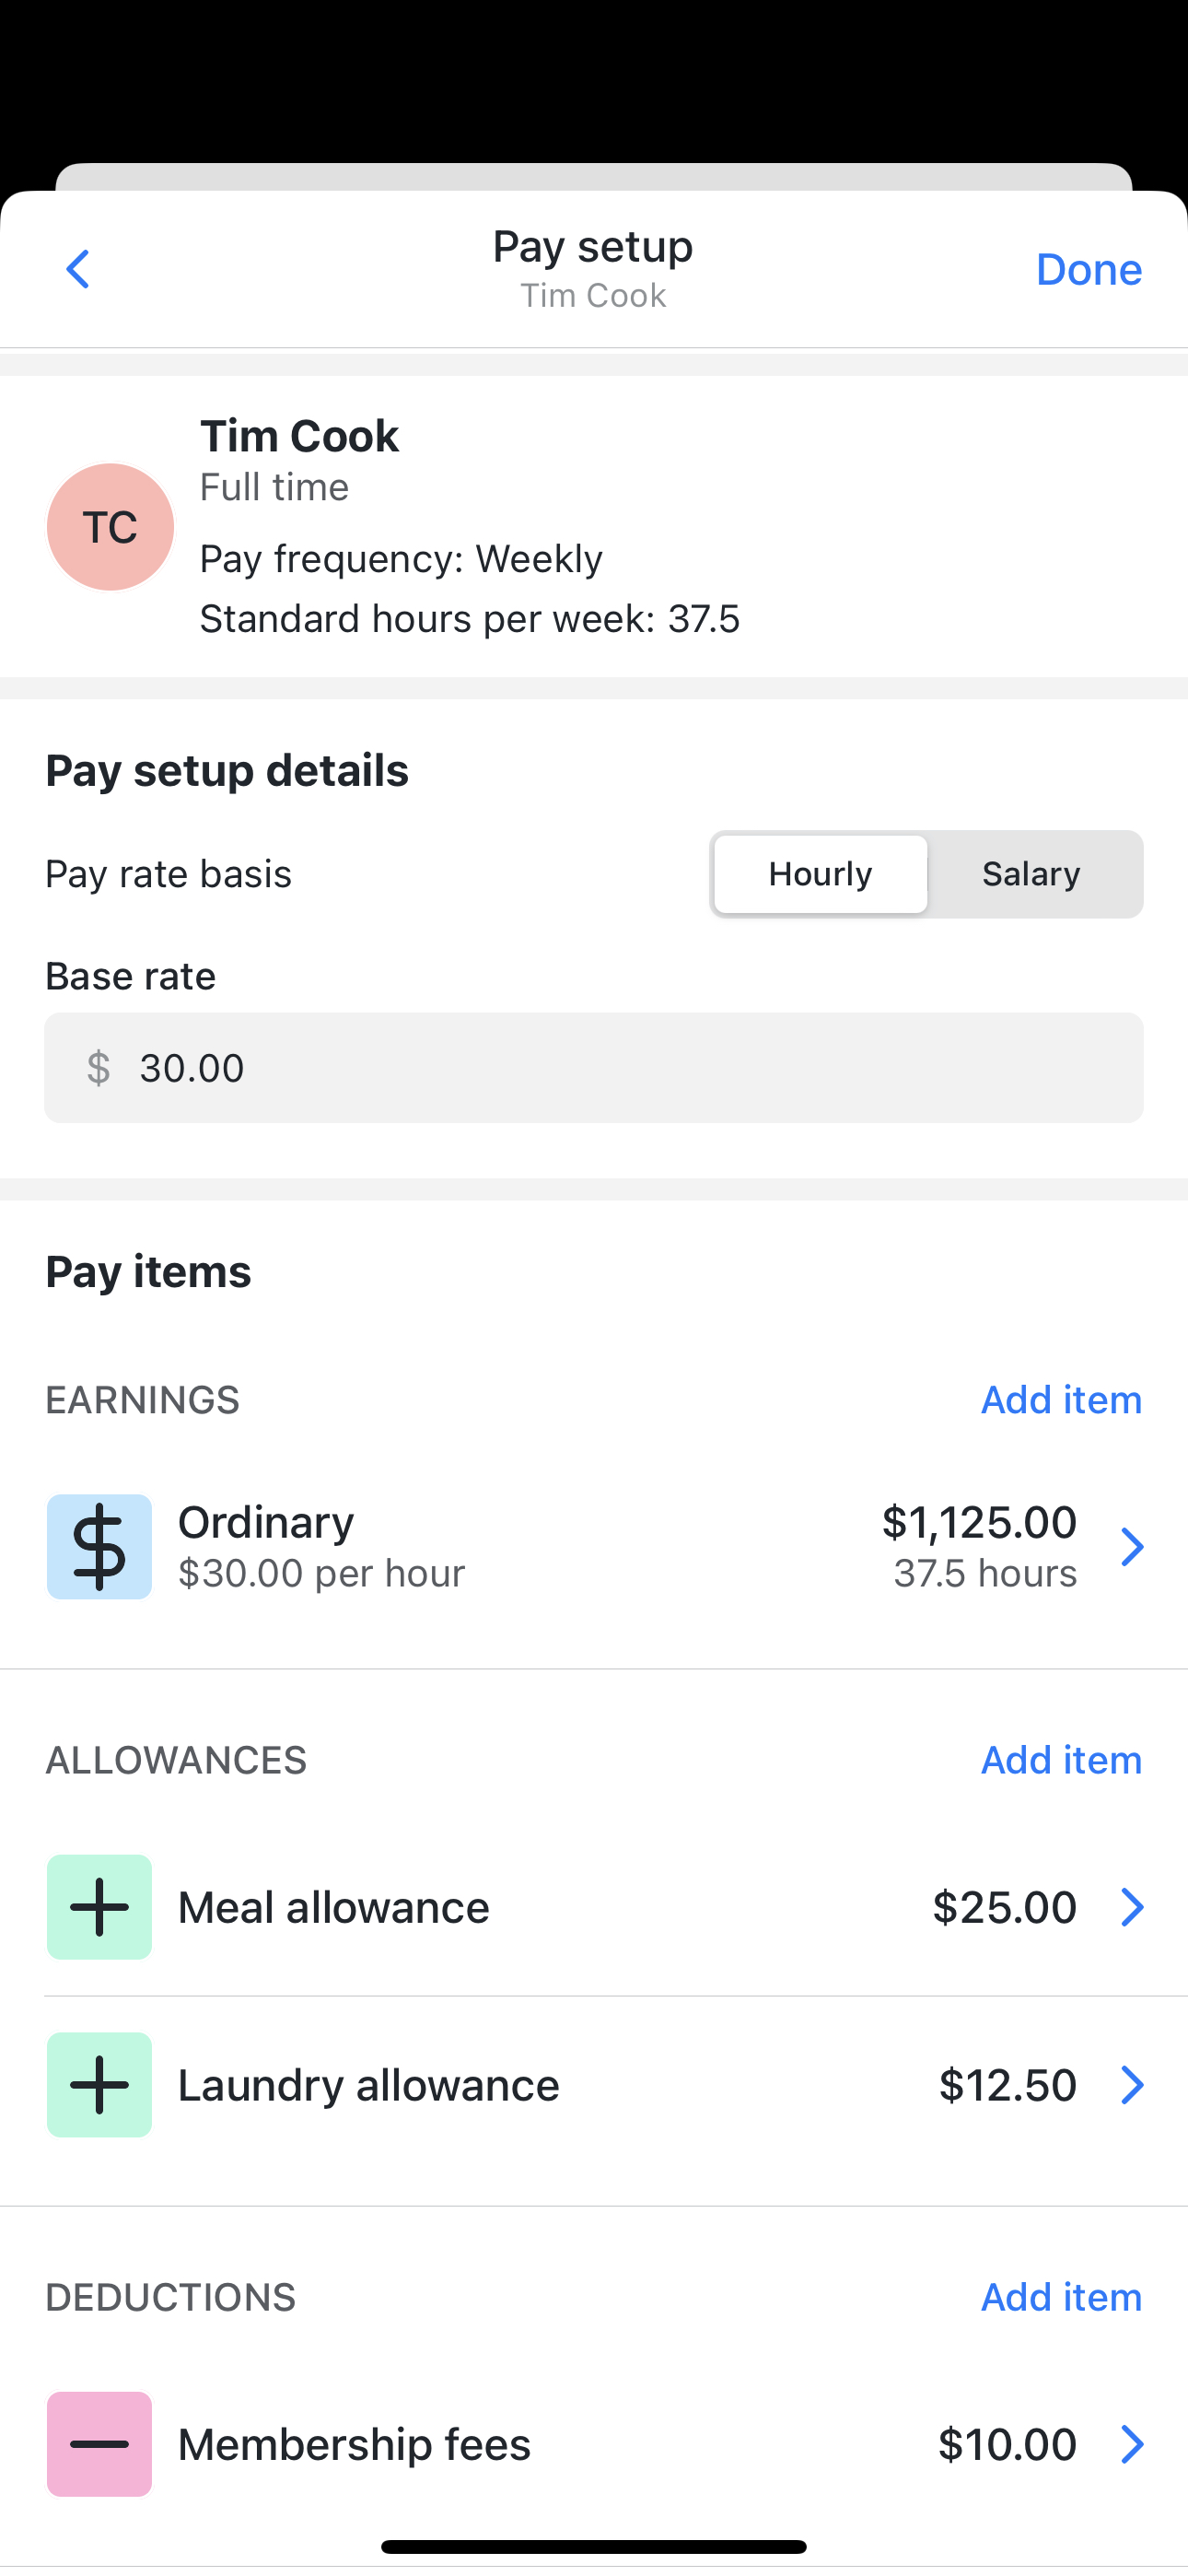
- If Hourly enter their Base rate
- This will add an OTE Earning item with Pay rate basis set to Hourly and show their Gross earnings for the item based on their pay frequency and standard hours.
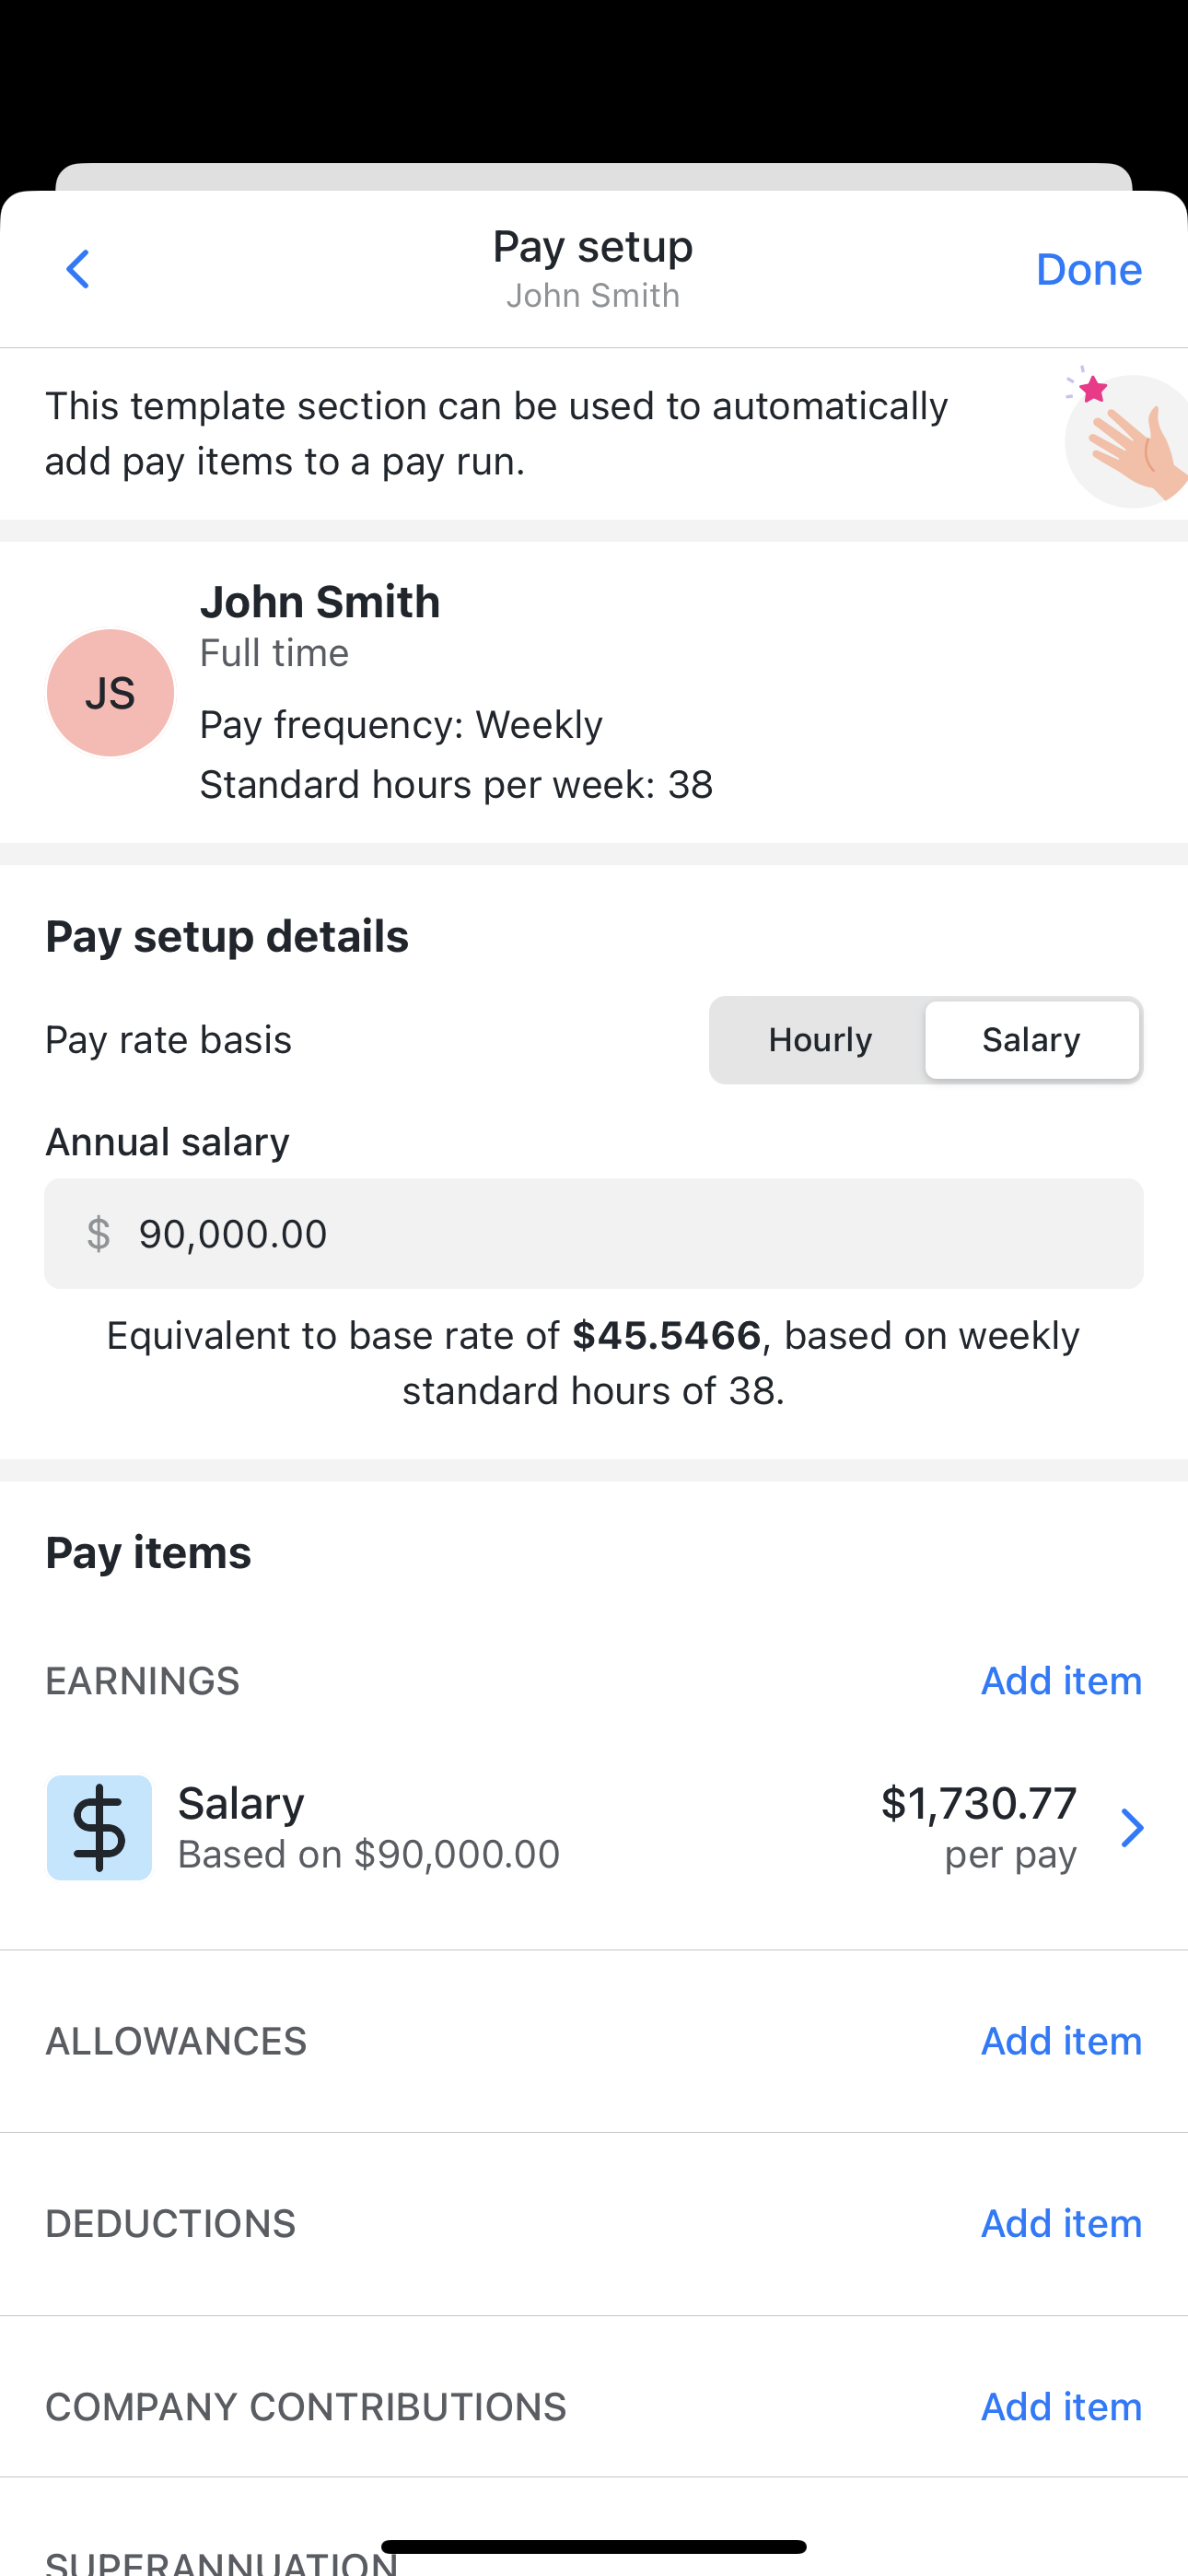
- If Salary enter their Annual salary
- This will add an OTE Earning item with Pay rate basis set to Salary and show their Gross earnings per pay for the item based on their pay frequency.
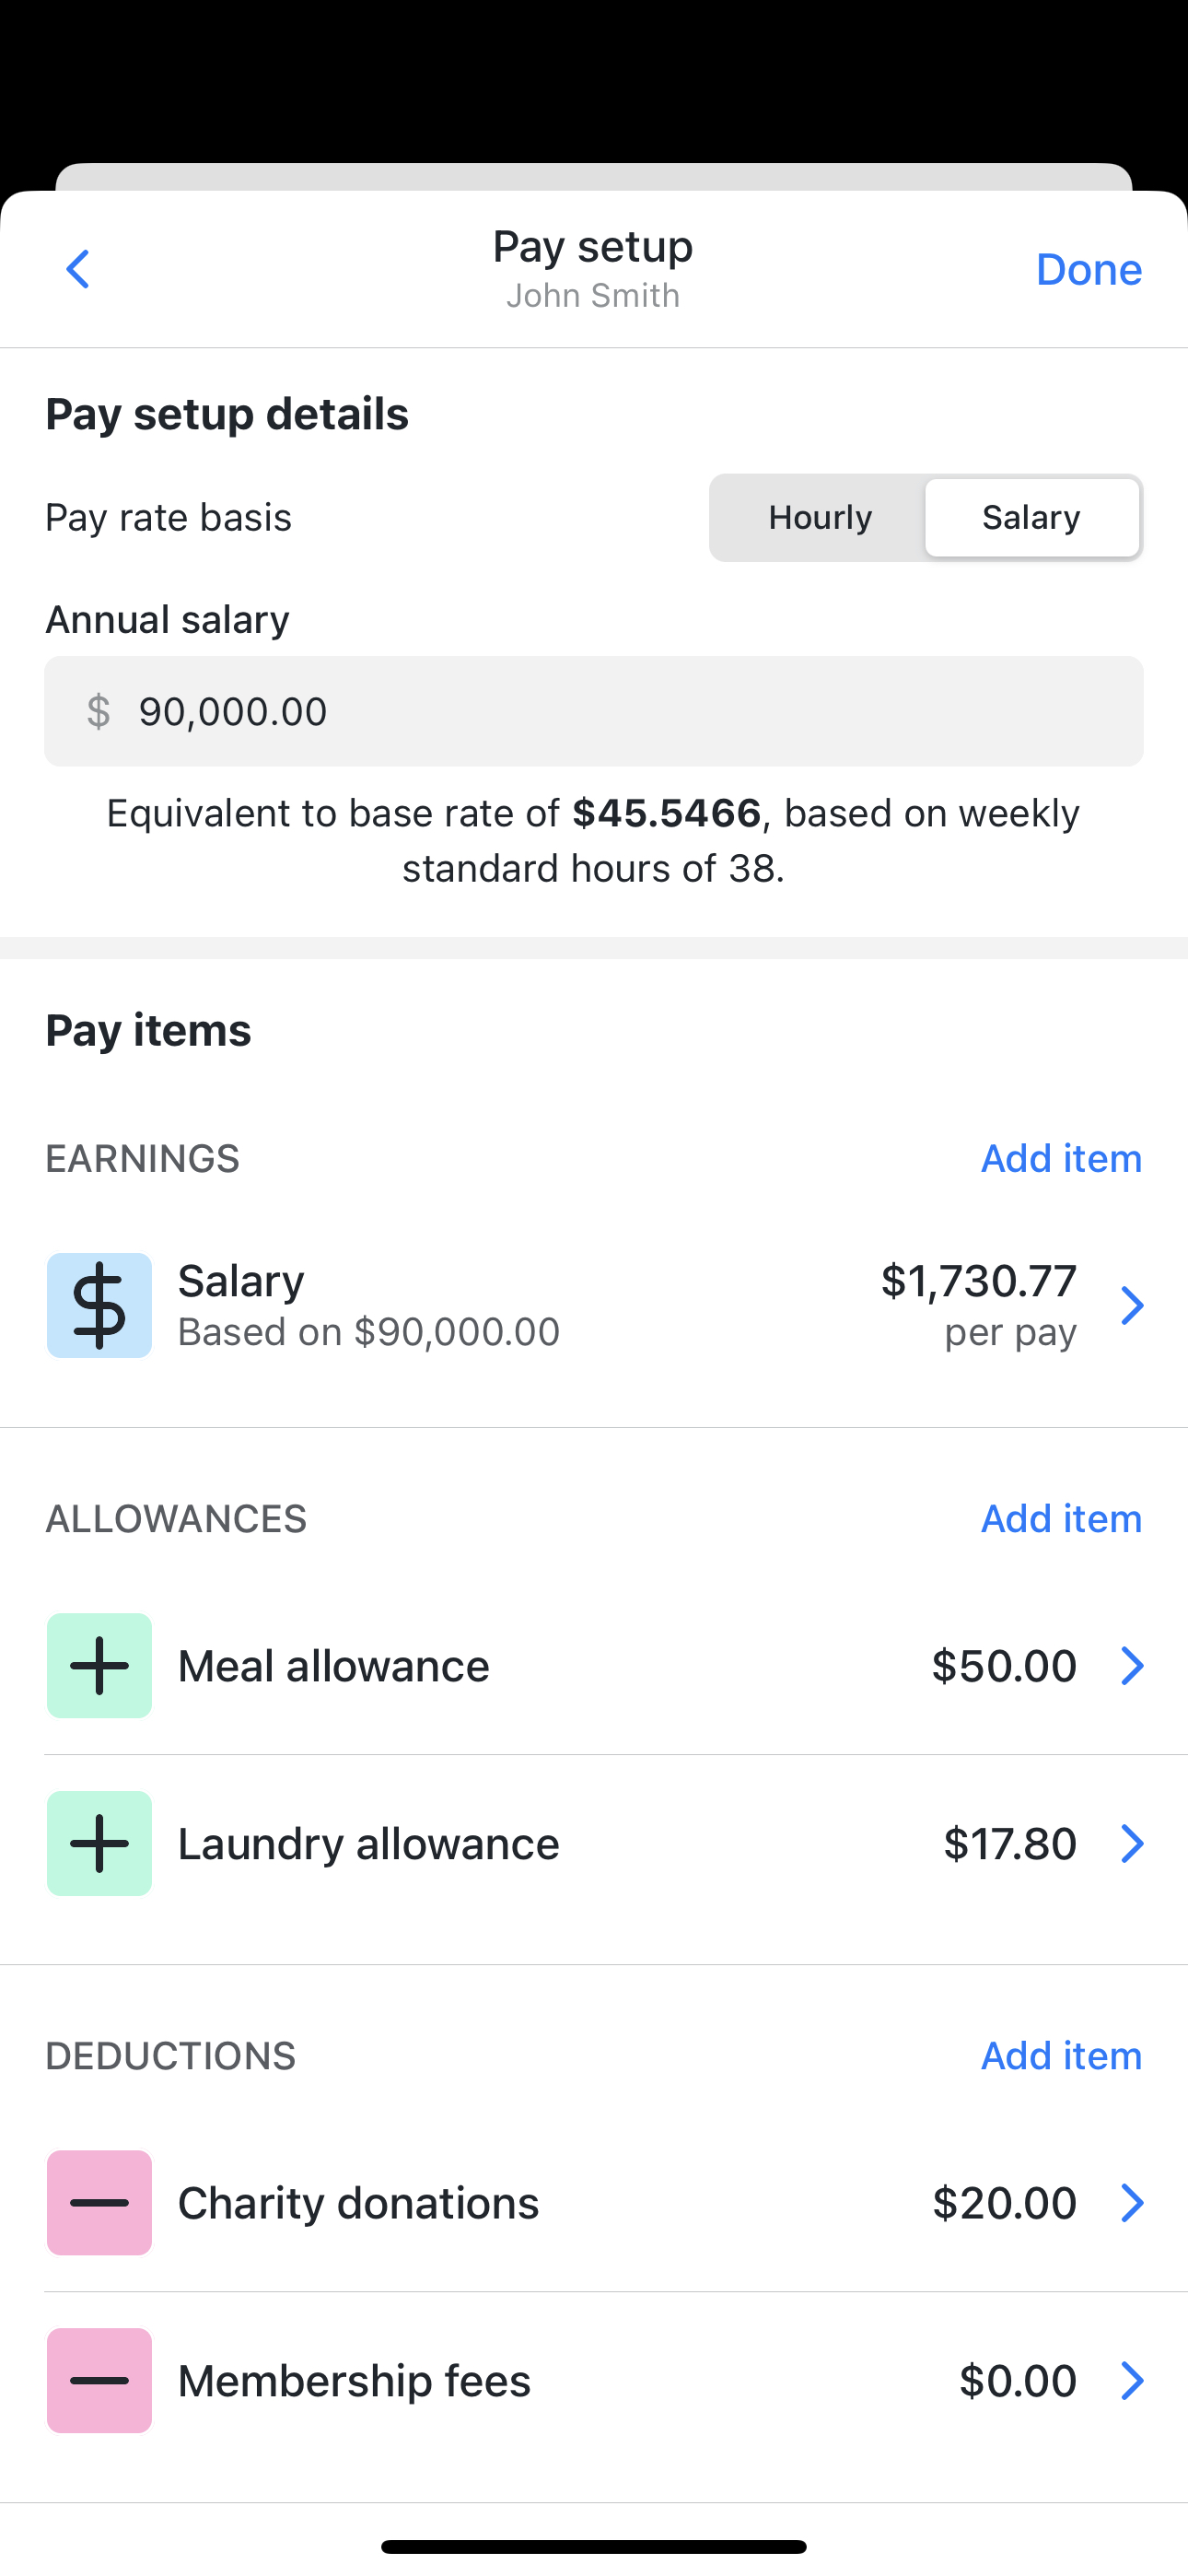
- You can add additional Pay items by tapping Add item for the required item type.
- Once you have added all required Pay items tap Done
- The Pay setup menu will show the Annual salary or the Base rate entered.
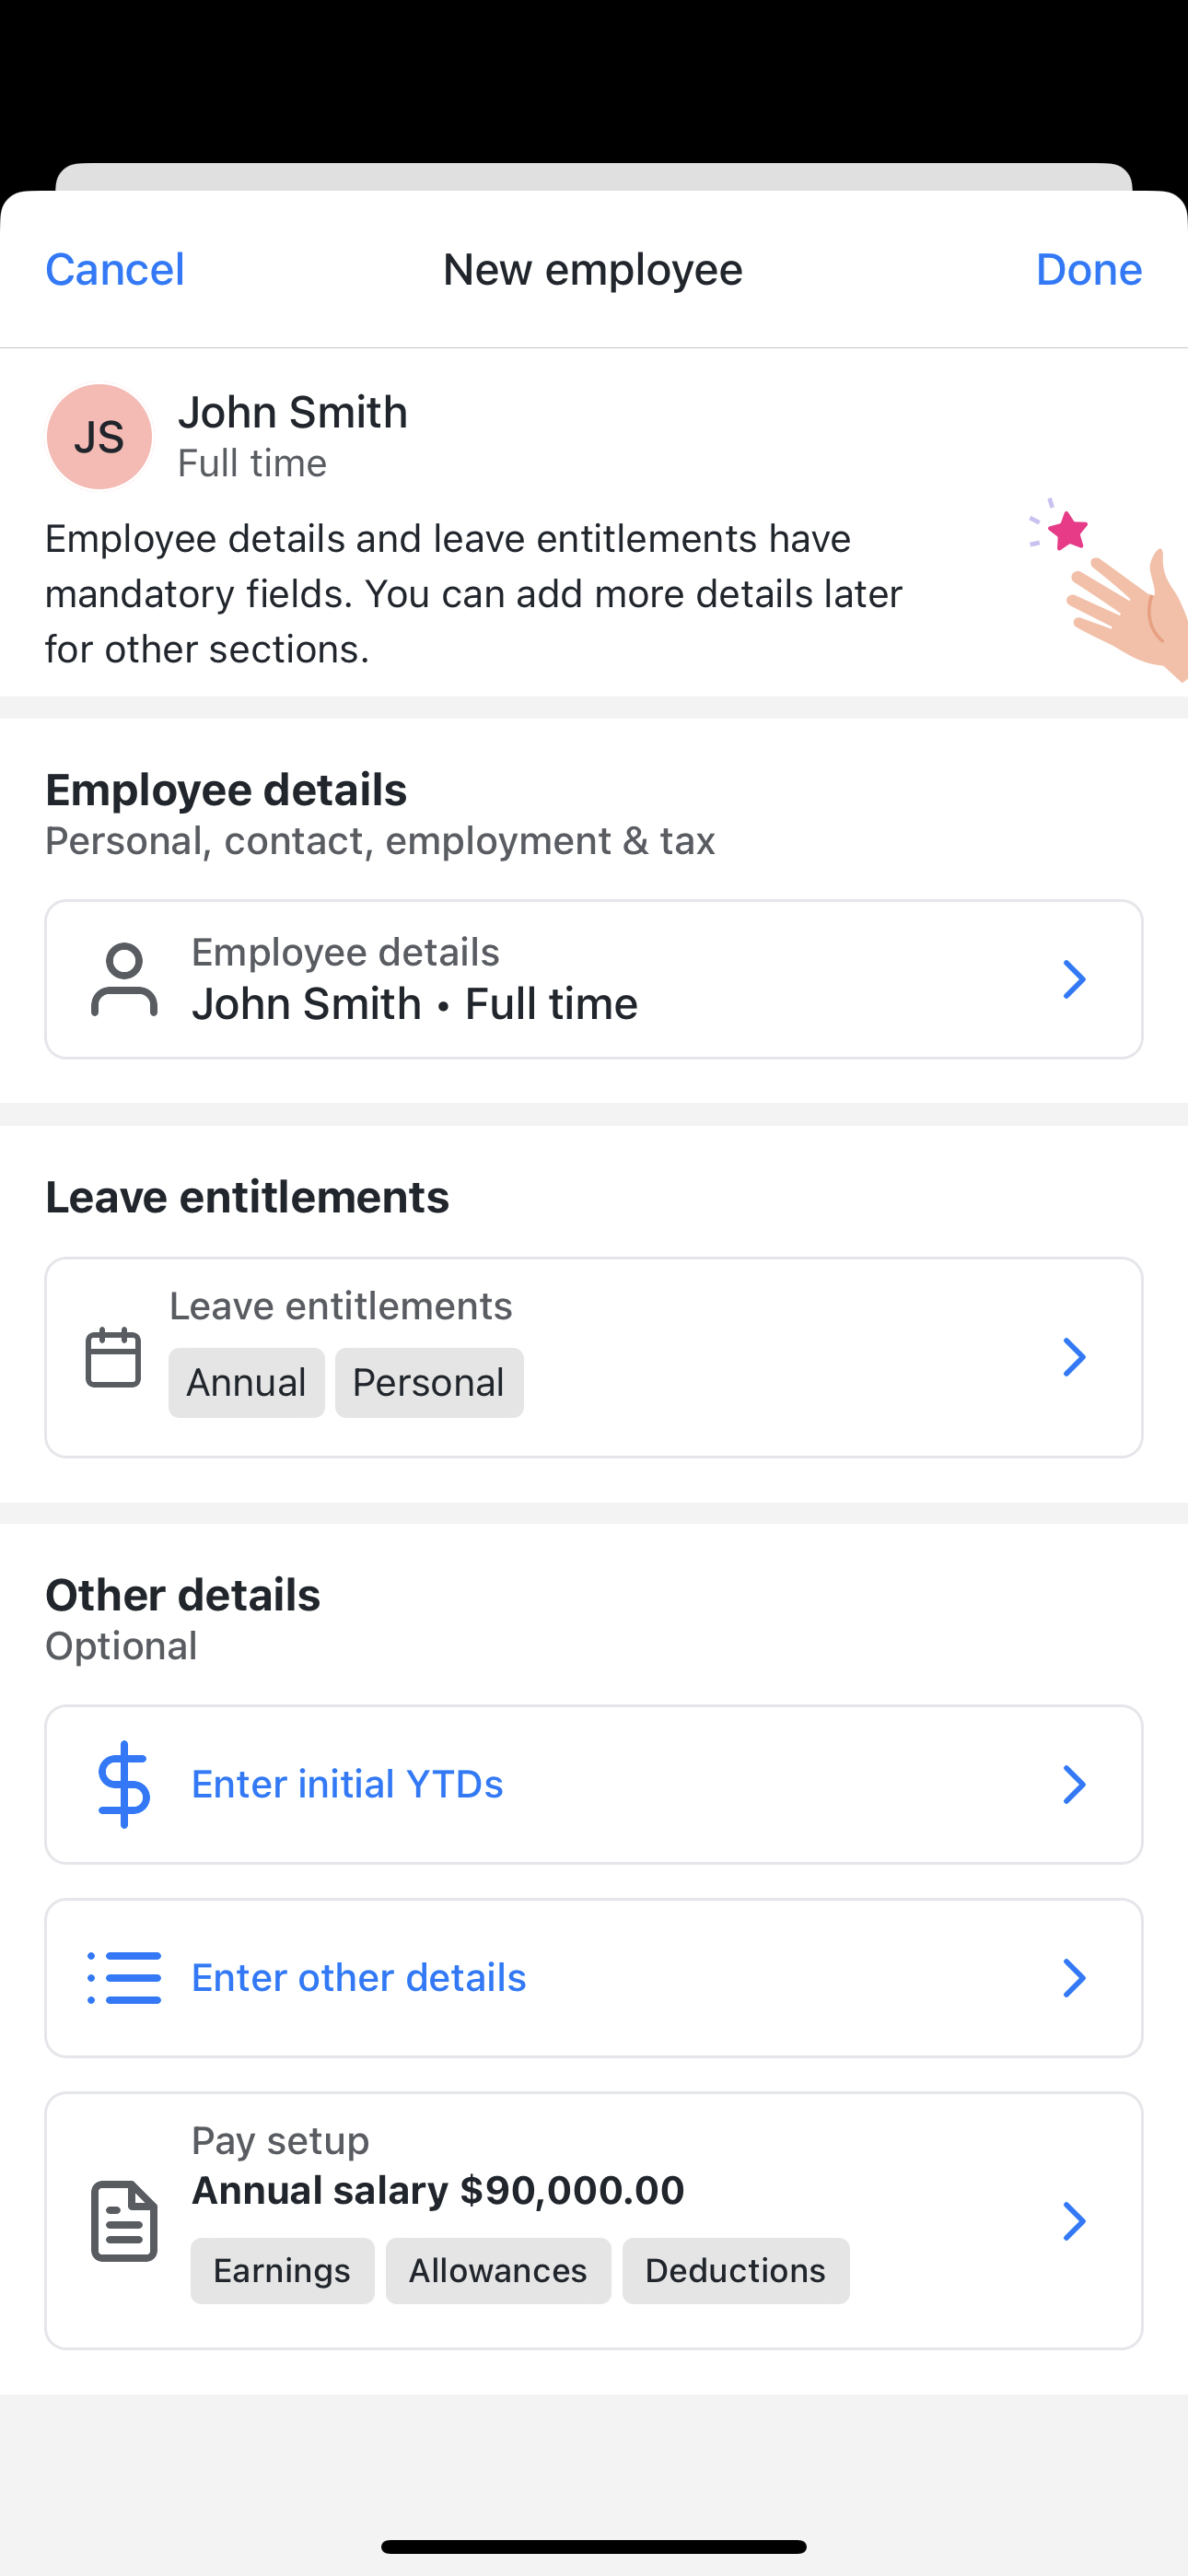
- Once you have completed adding the employee, you can view the items in the Pay setup tab of the employee's record.
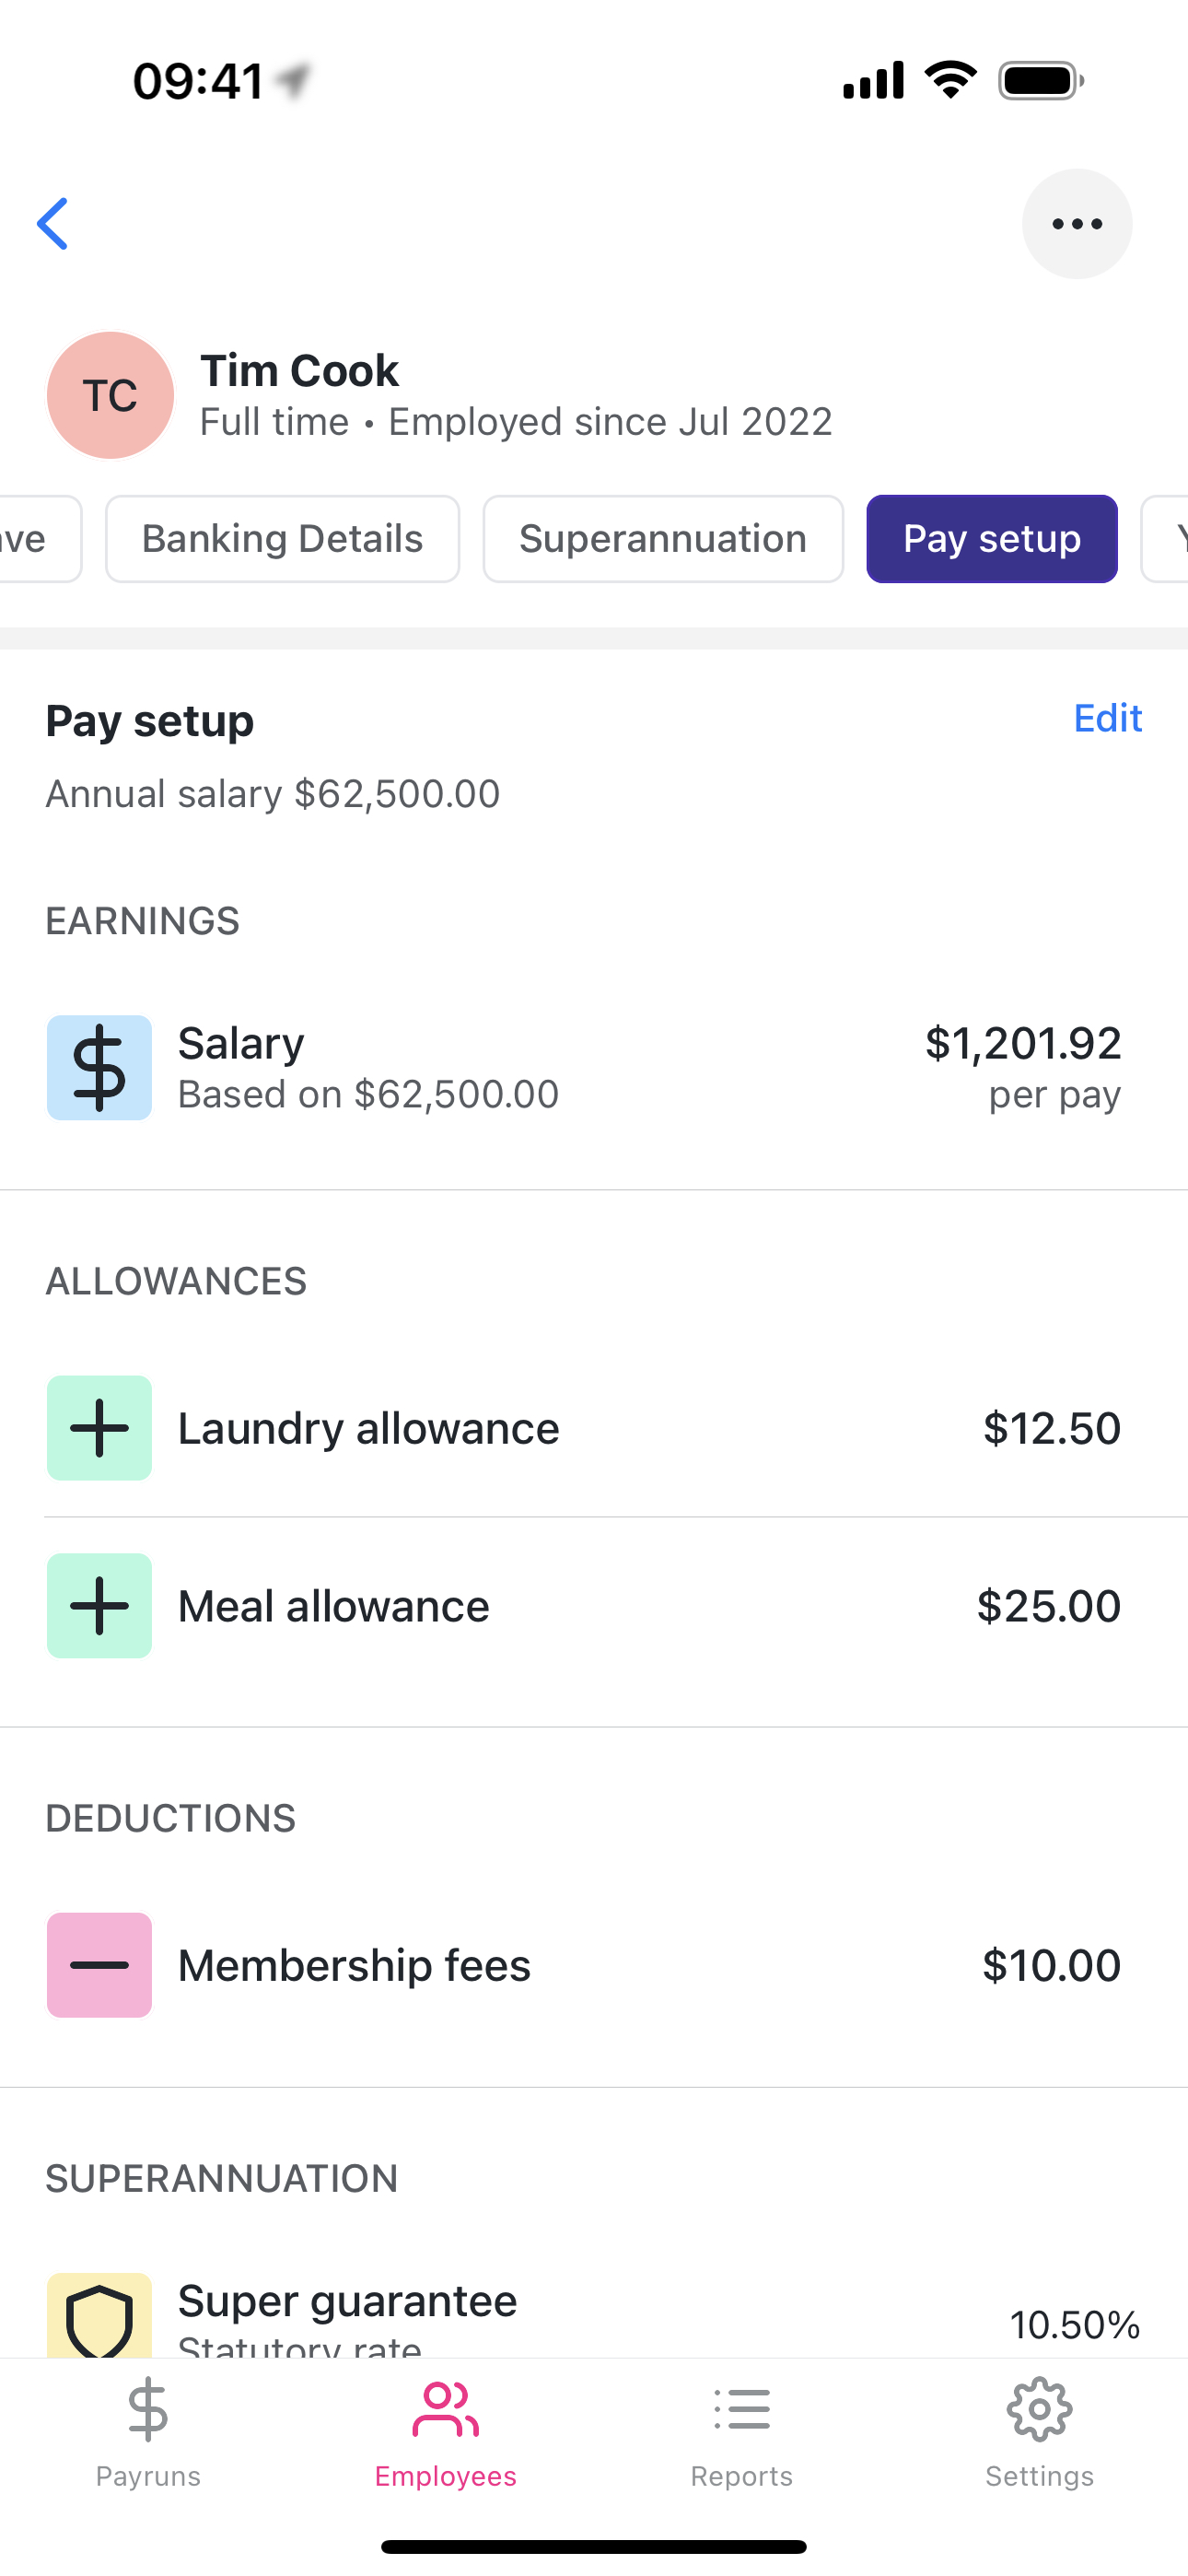
Pay setup - employee record
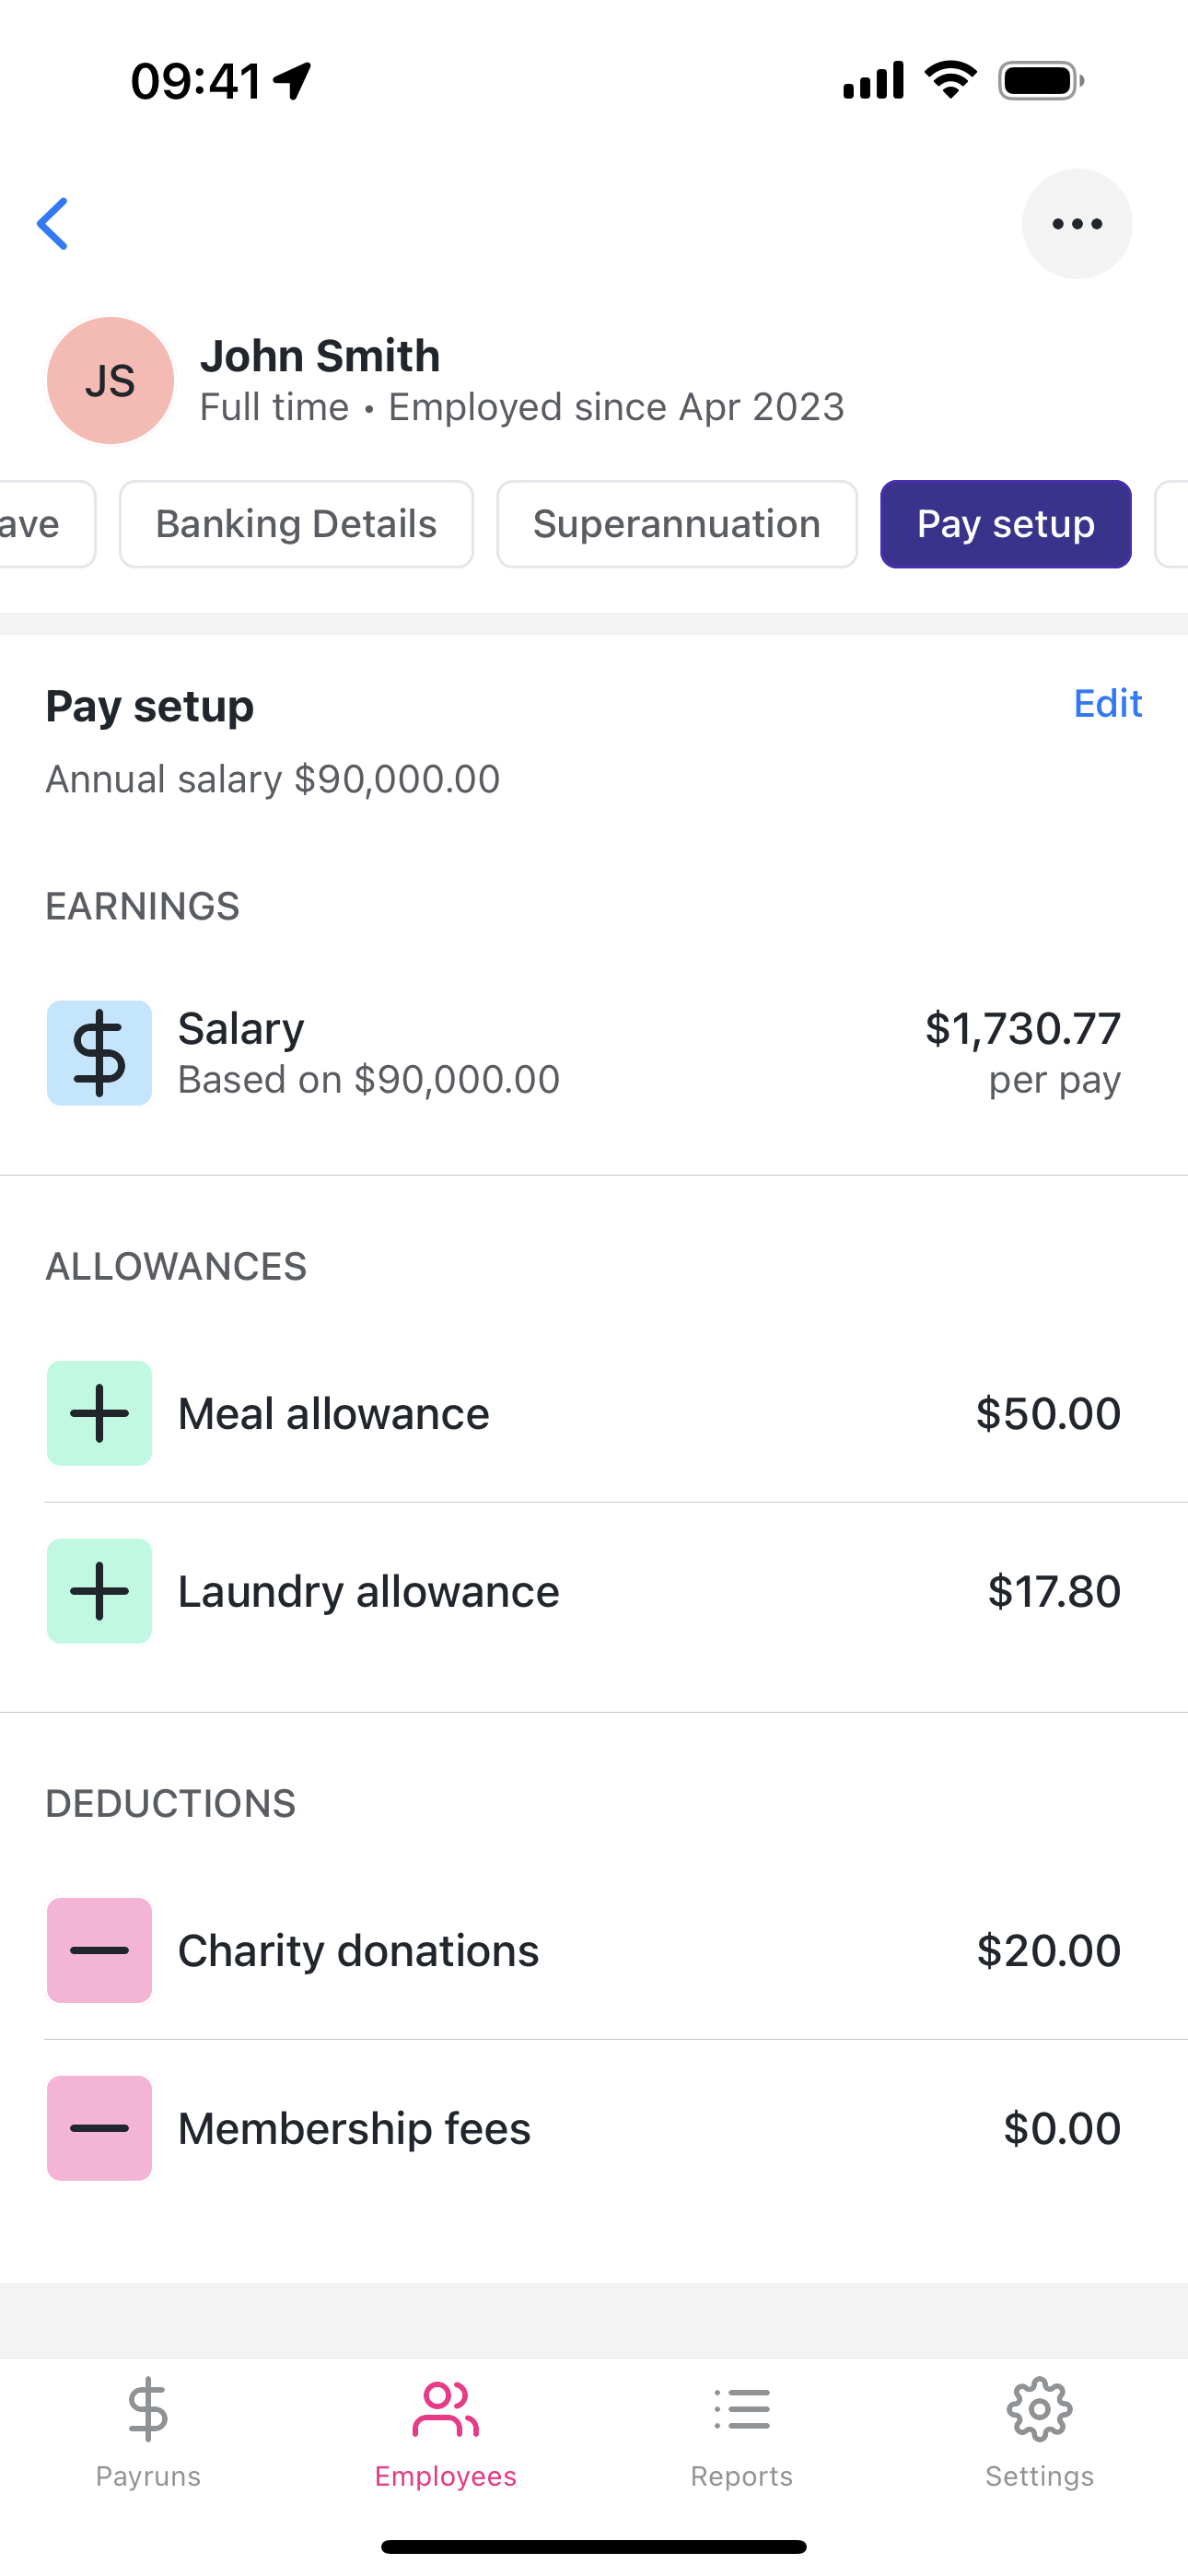
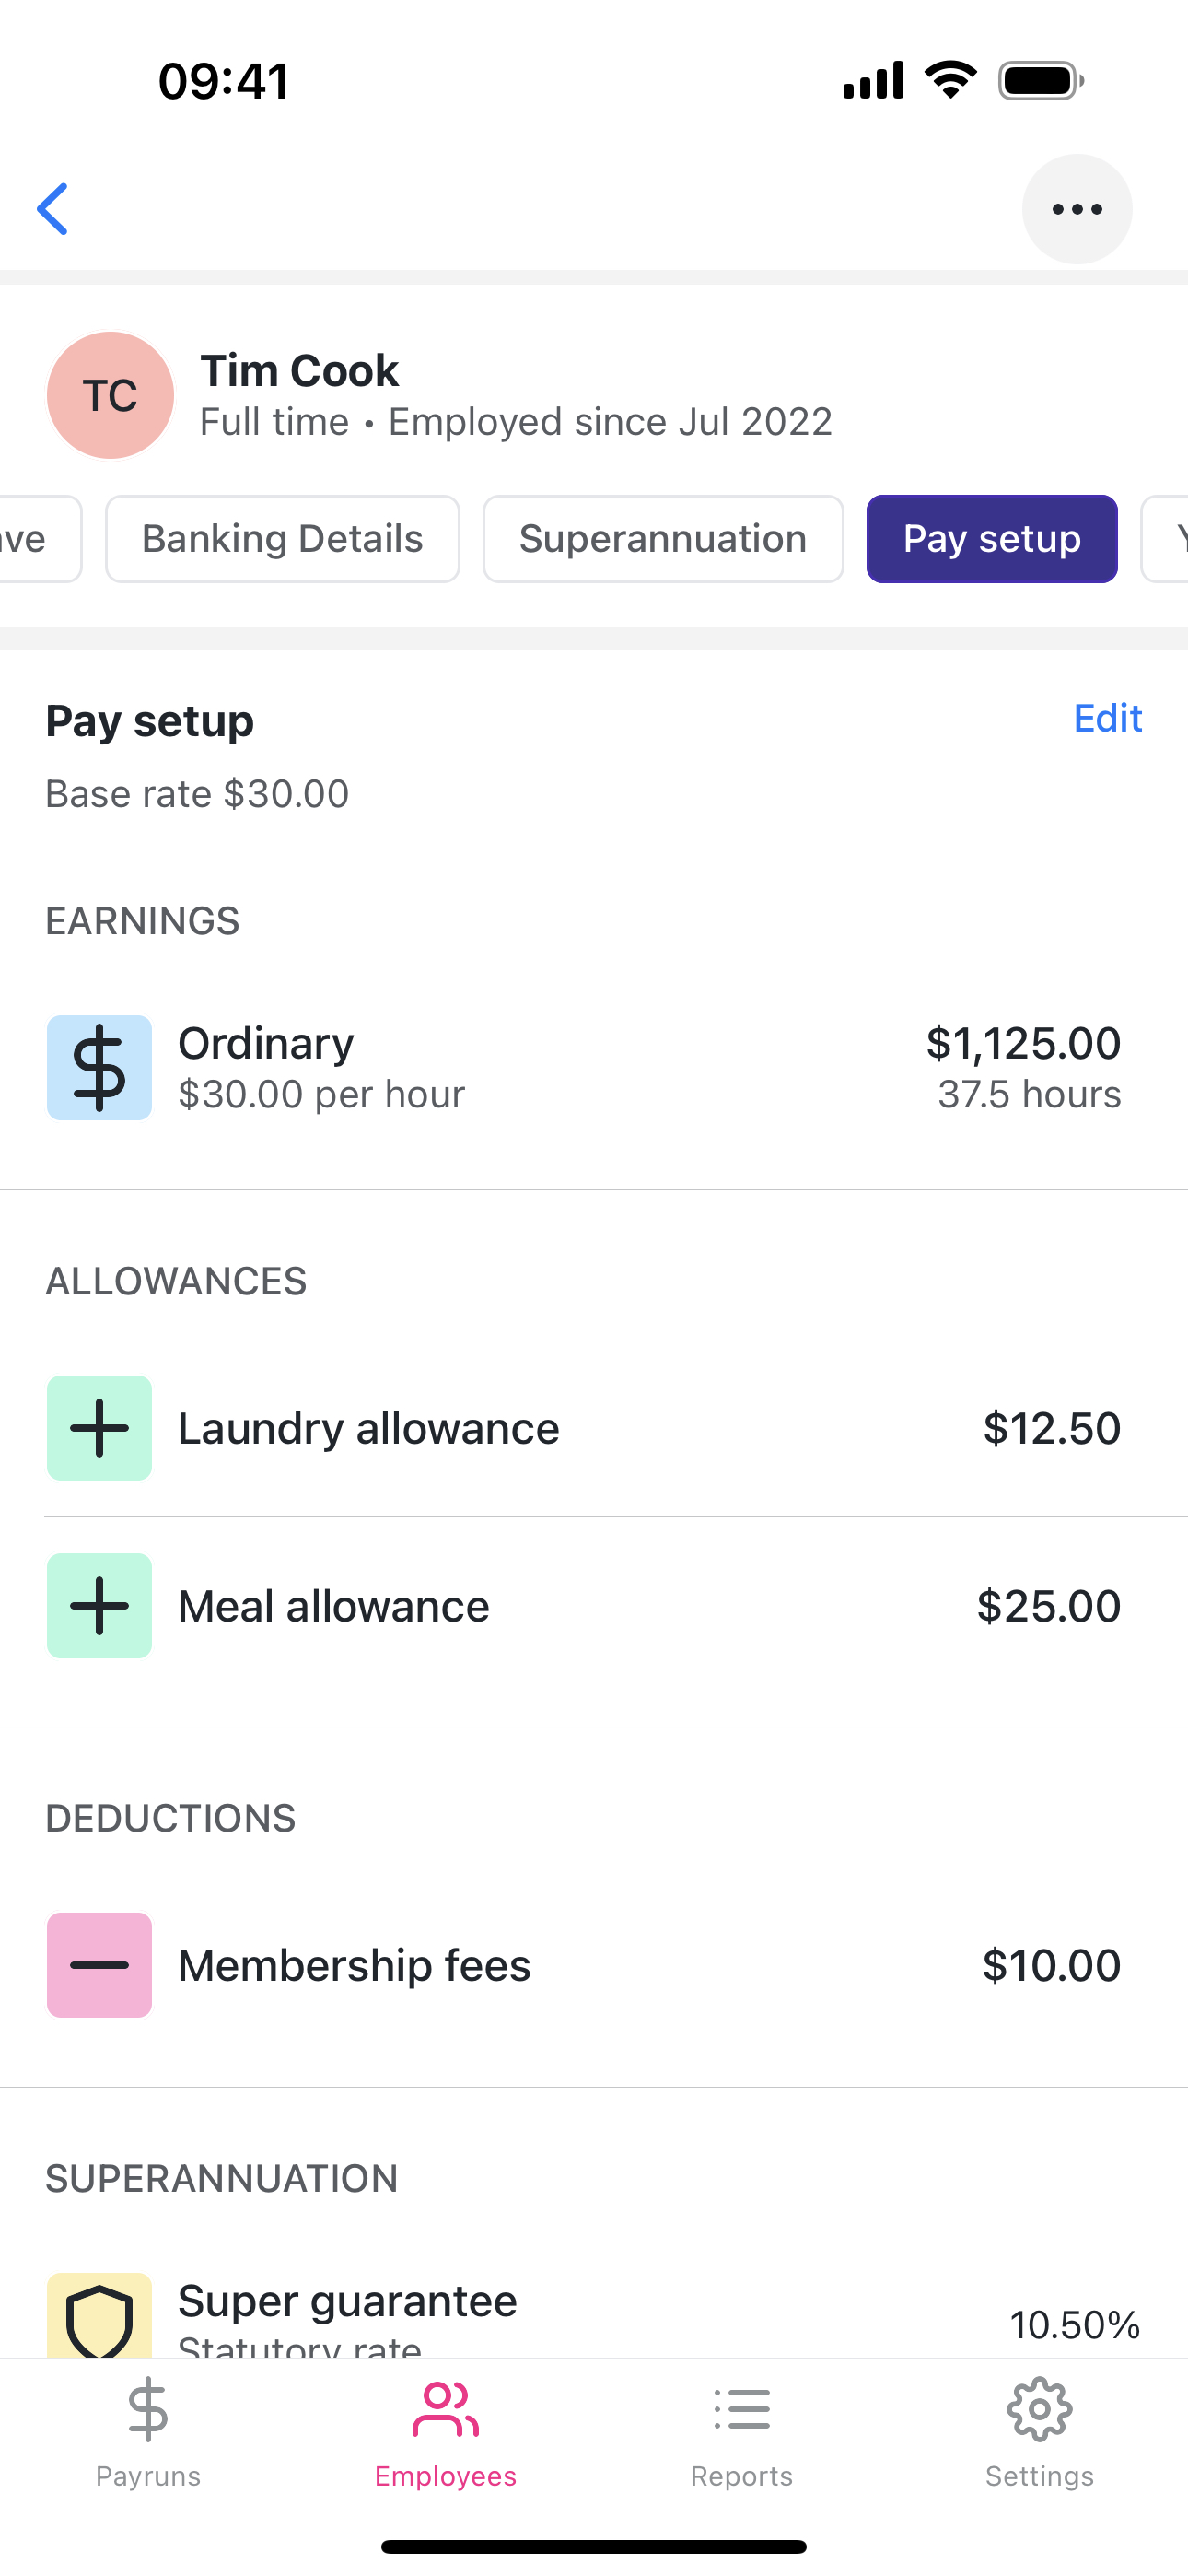
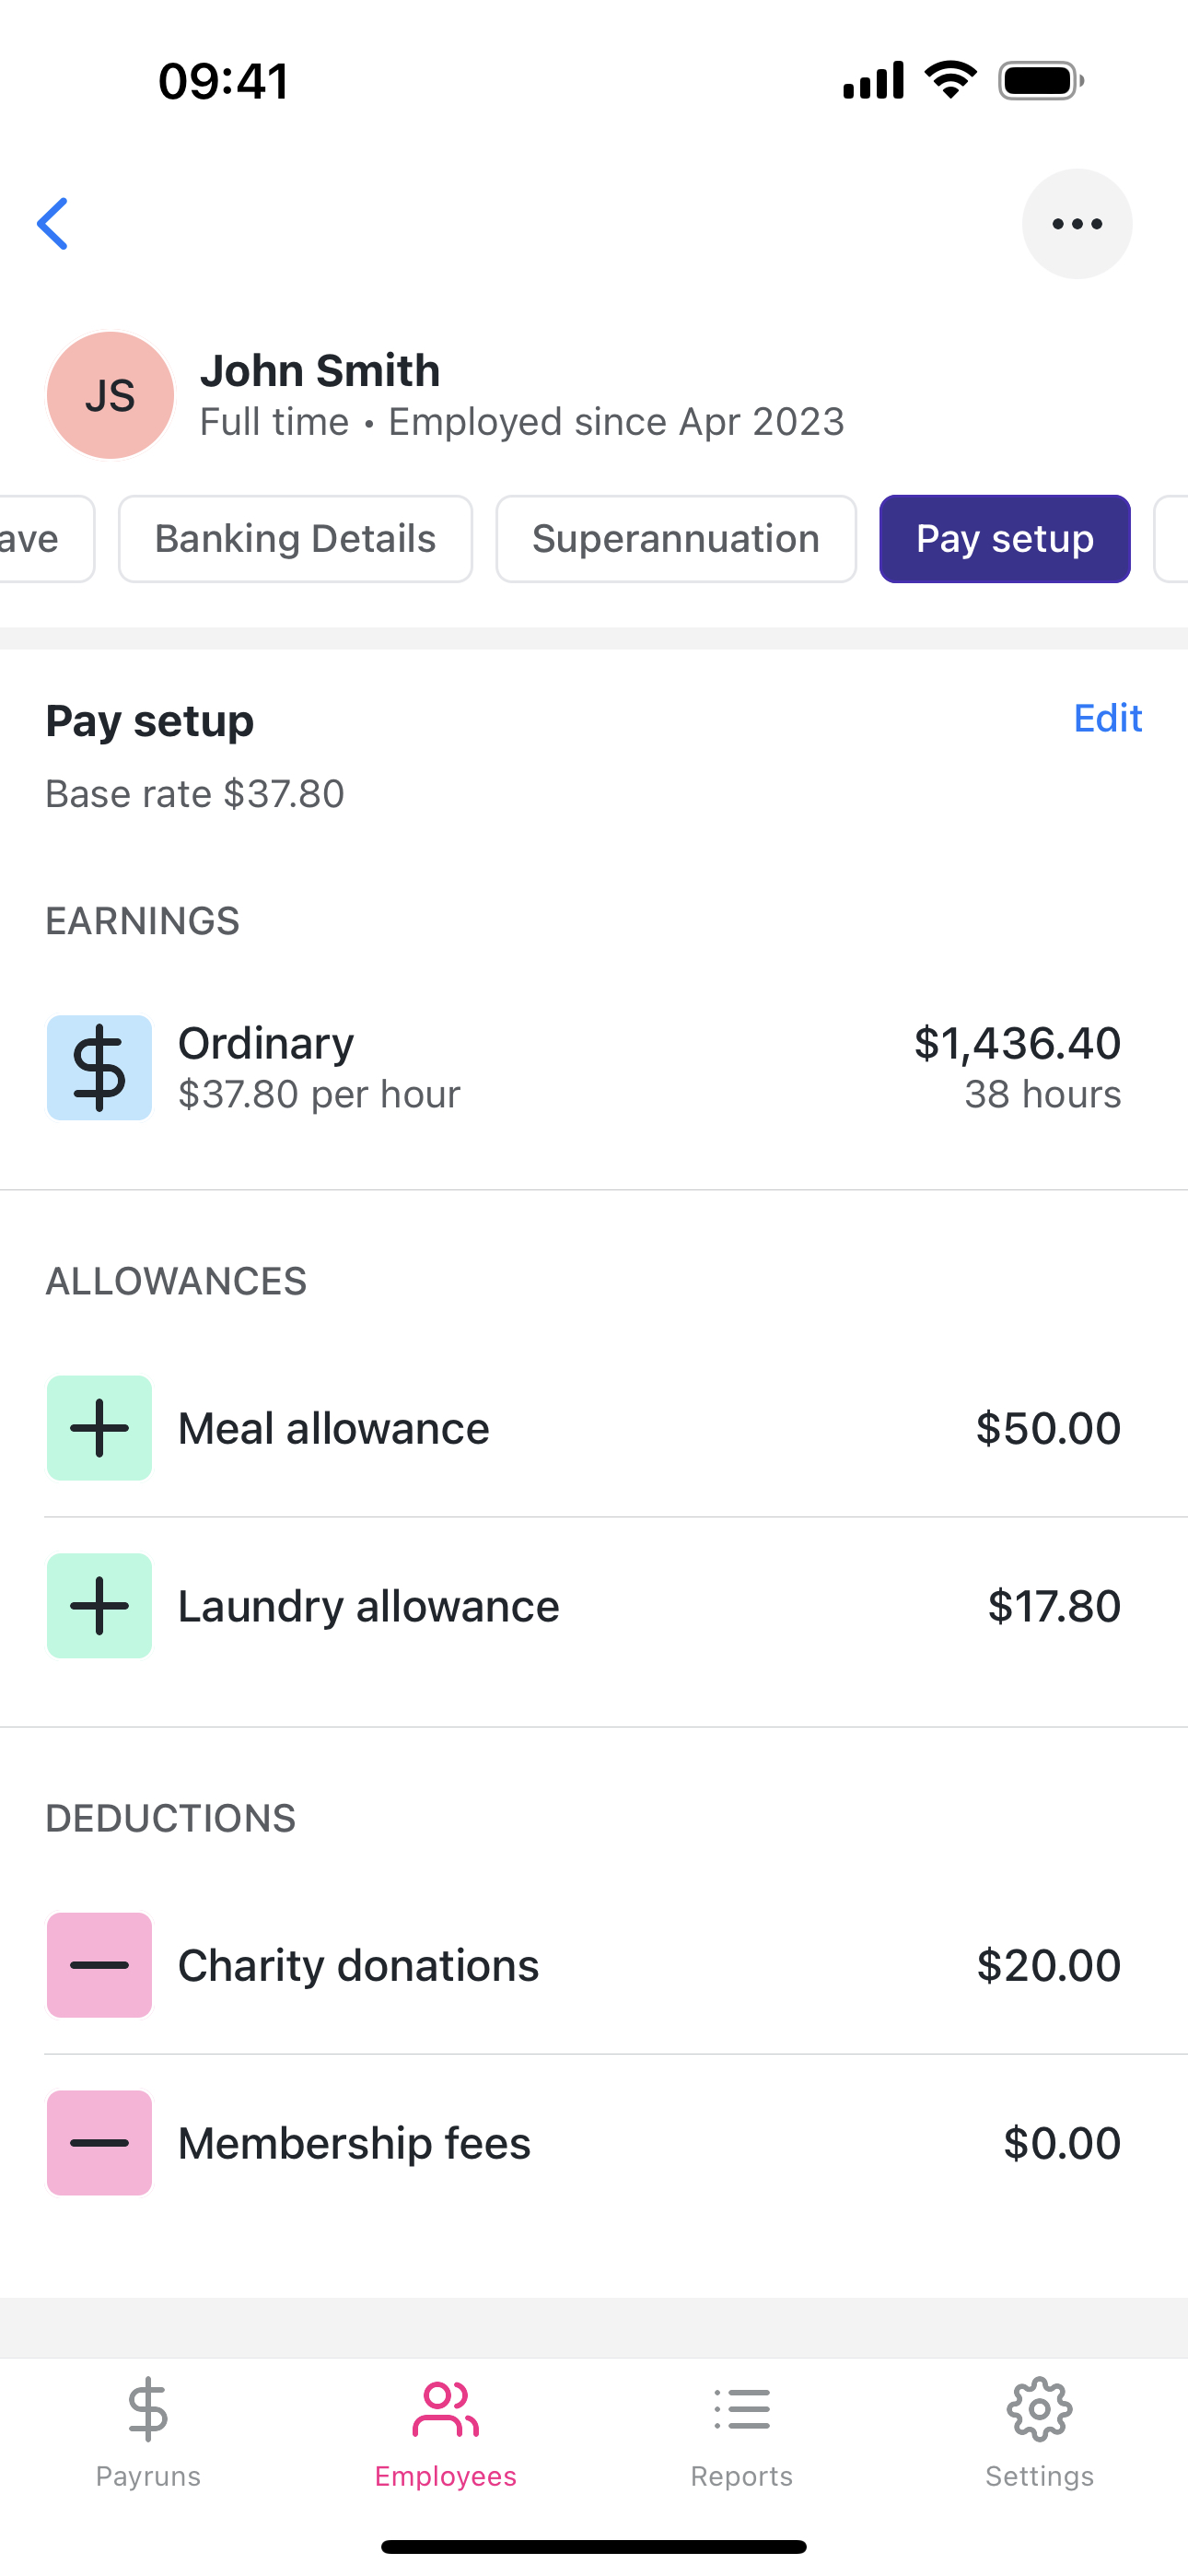
The Pay setup tab in the employee record is where you can view an employee's pay setup, modify and/or delete the previously added pay items, and add new items.
To access the Pay setup tab:
- Tap the Employee menu
- Select an employee
- Scroll the horizontal menu bar at the tope of the employee's record until you see the Pay setup tab
- Tap Pay setup
- If the employee has no configured pay setup you will be presented with the option to configure their pay setup
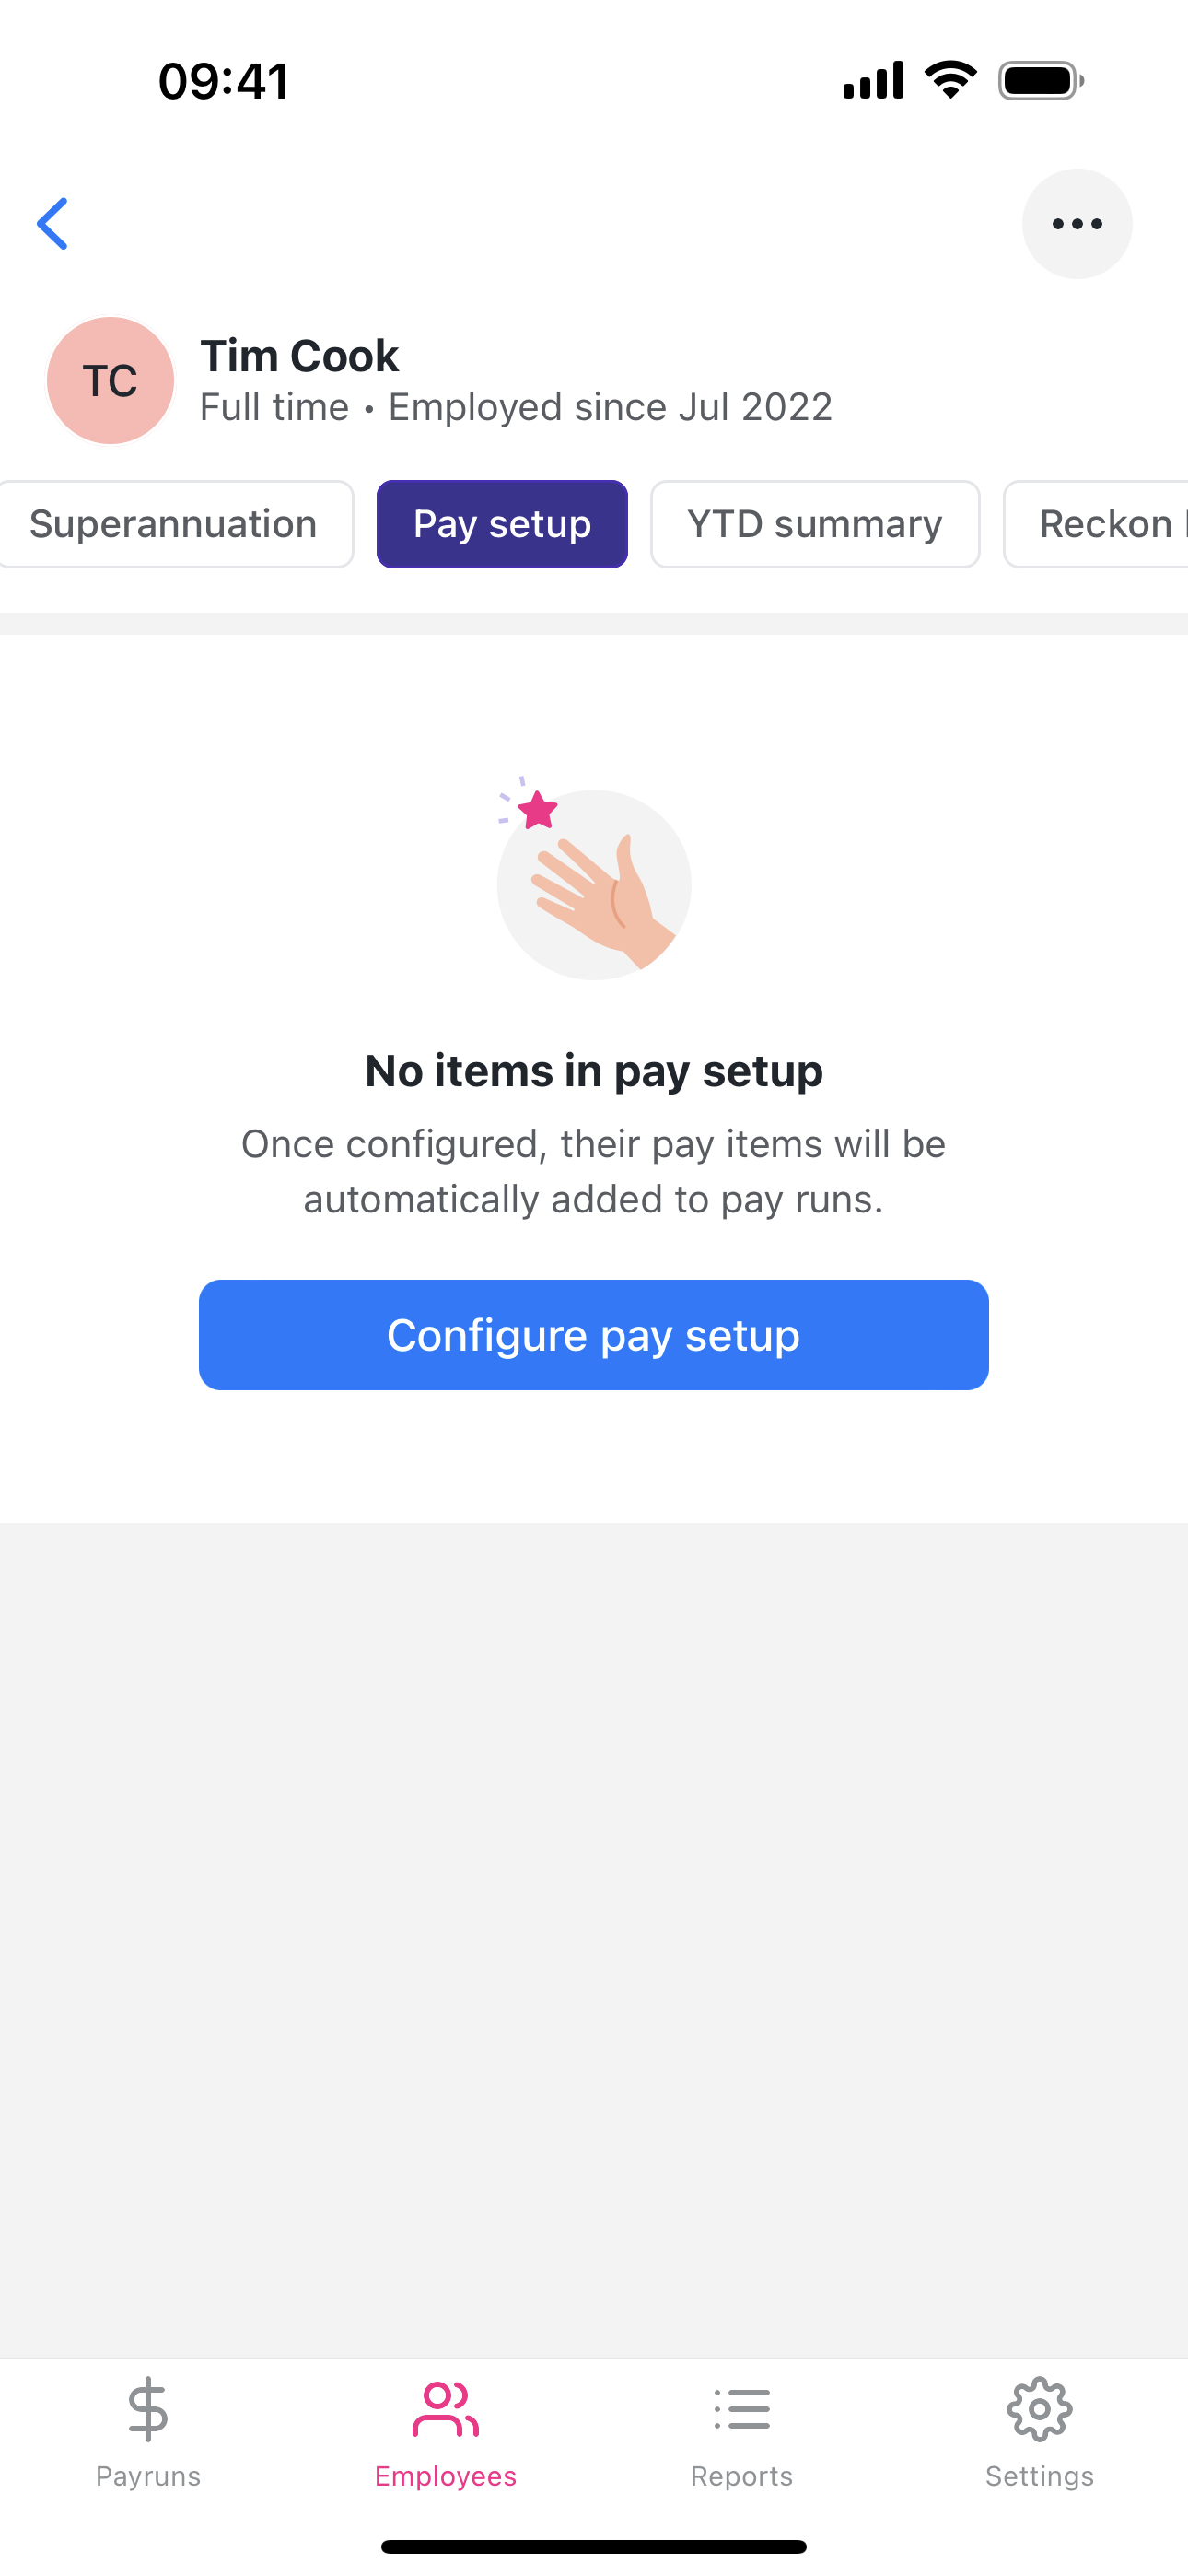
- If the employee's pay setup is configured you will have the option to edit
- If the employee has no configured pay setup you will be presented with the option to configure their pay setup
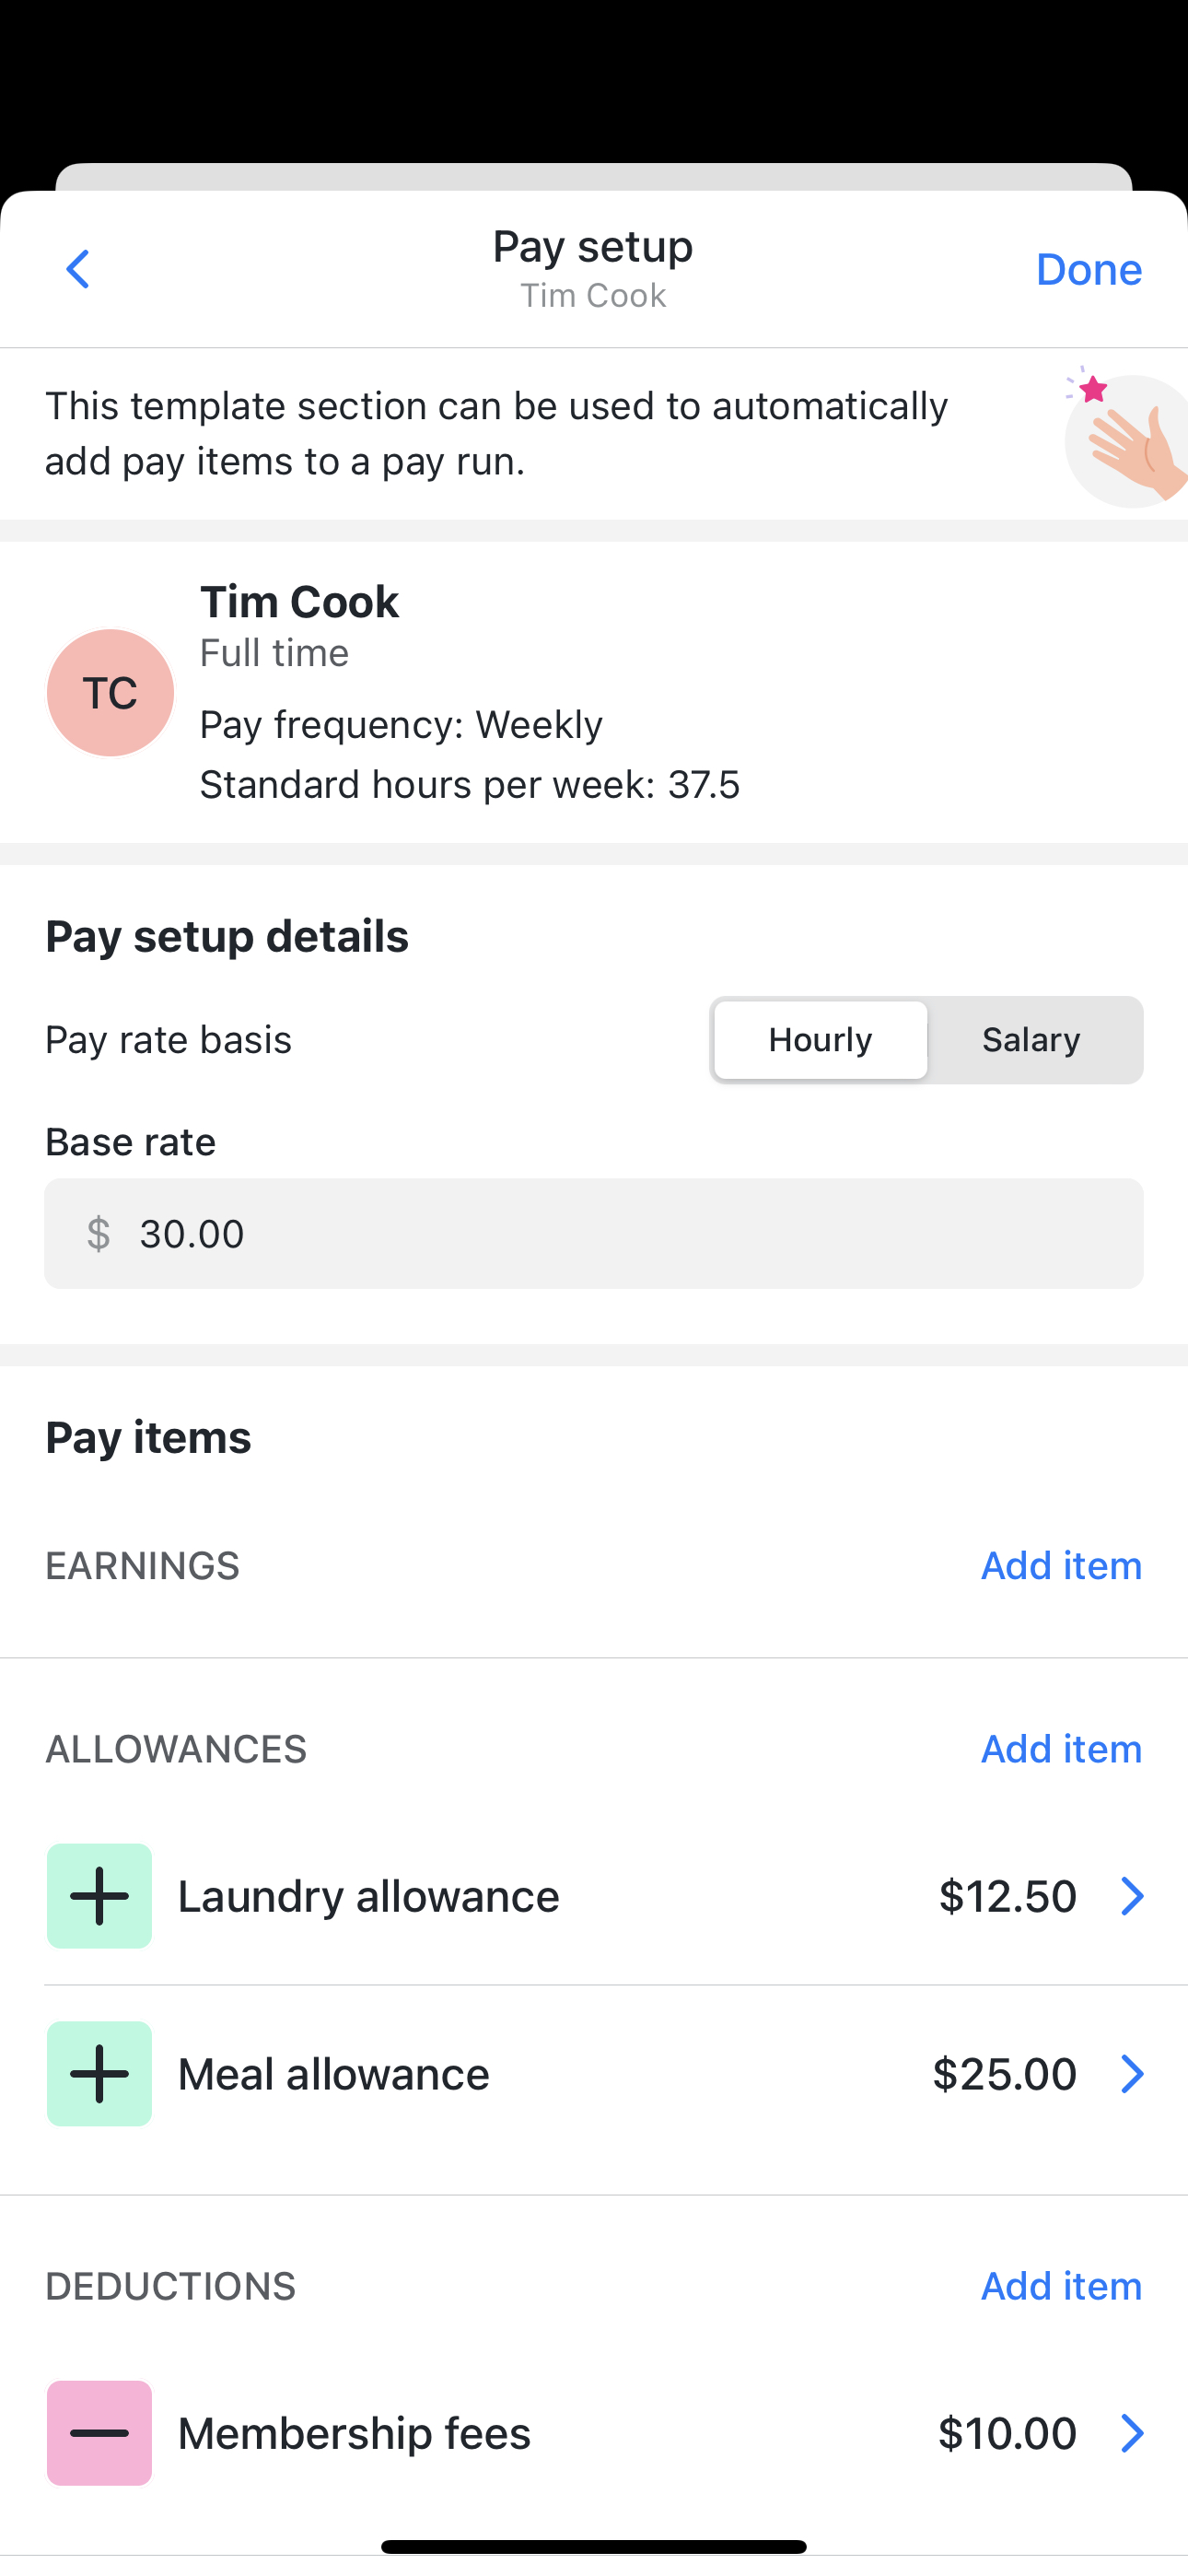
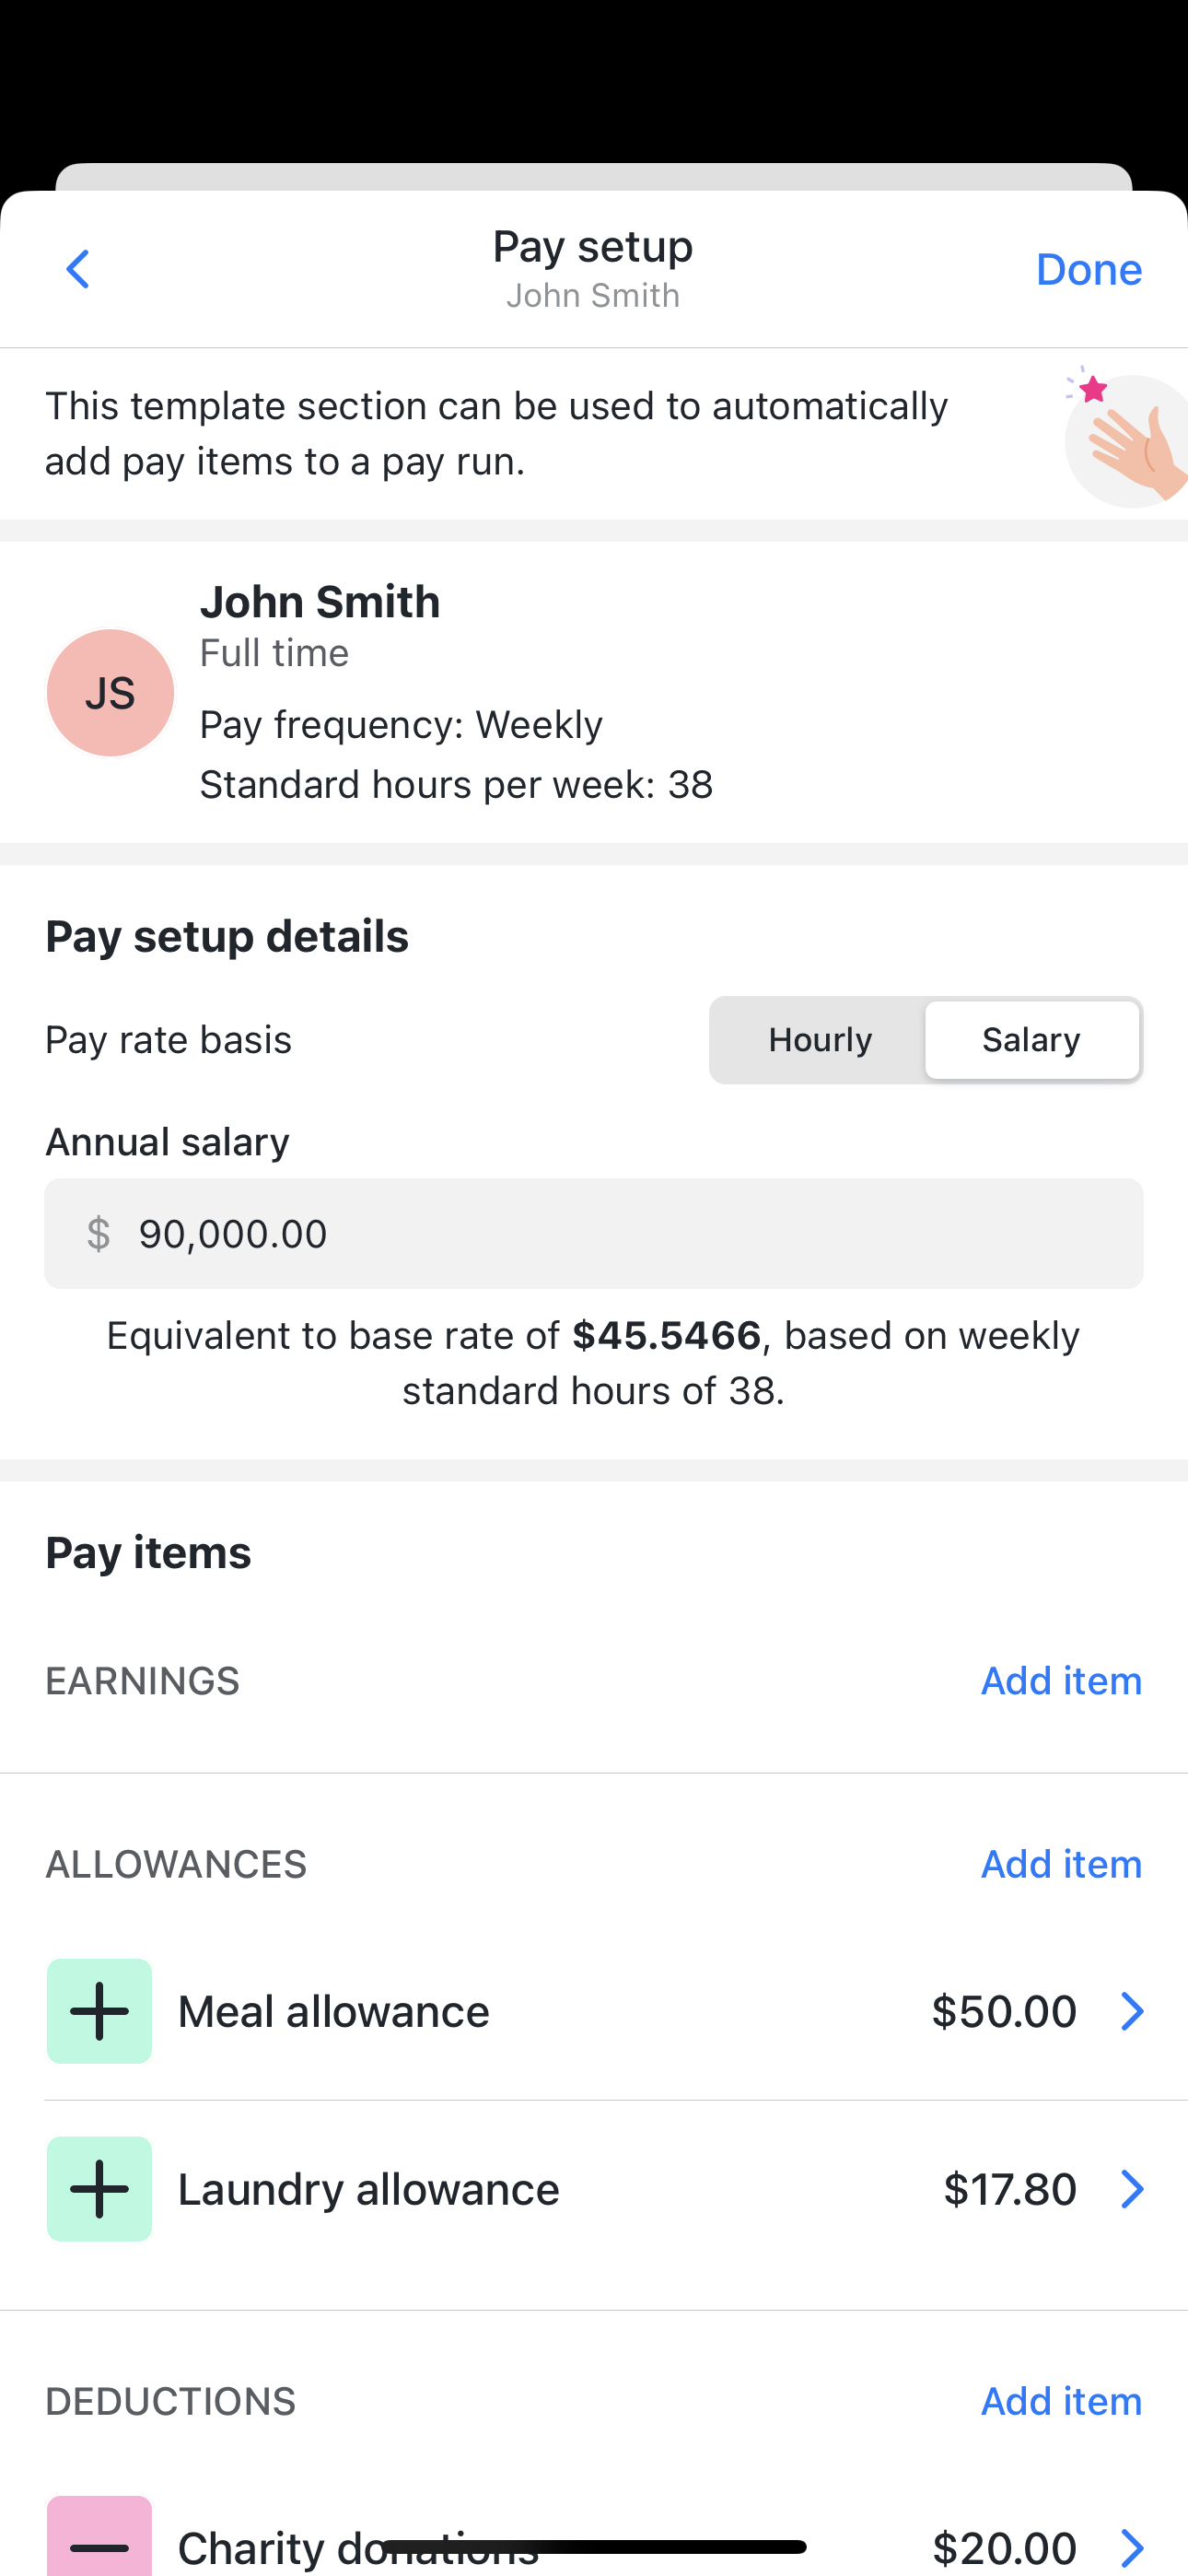
Configure pay setup
To configure an employee's Pay setup:
- Tap Configure pay setup

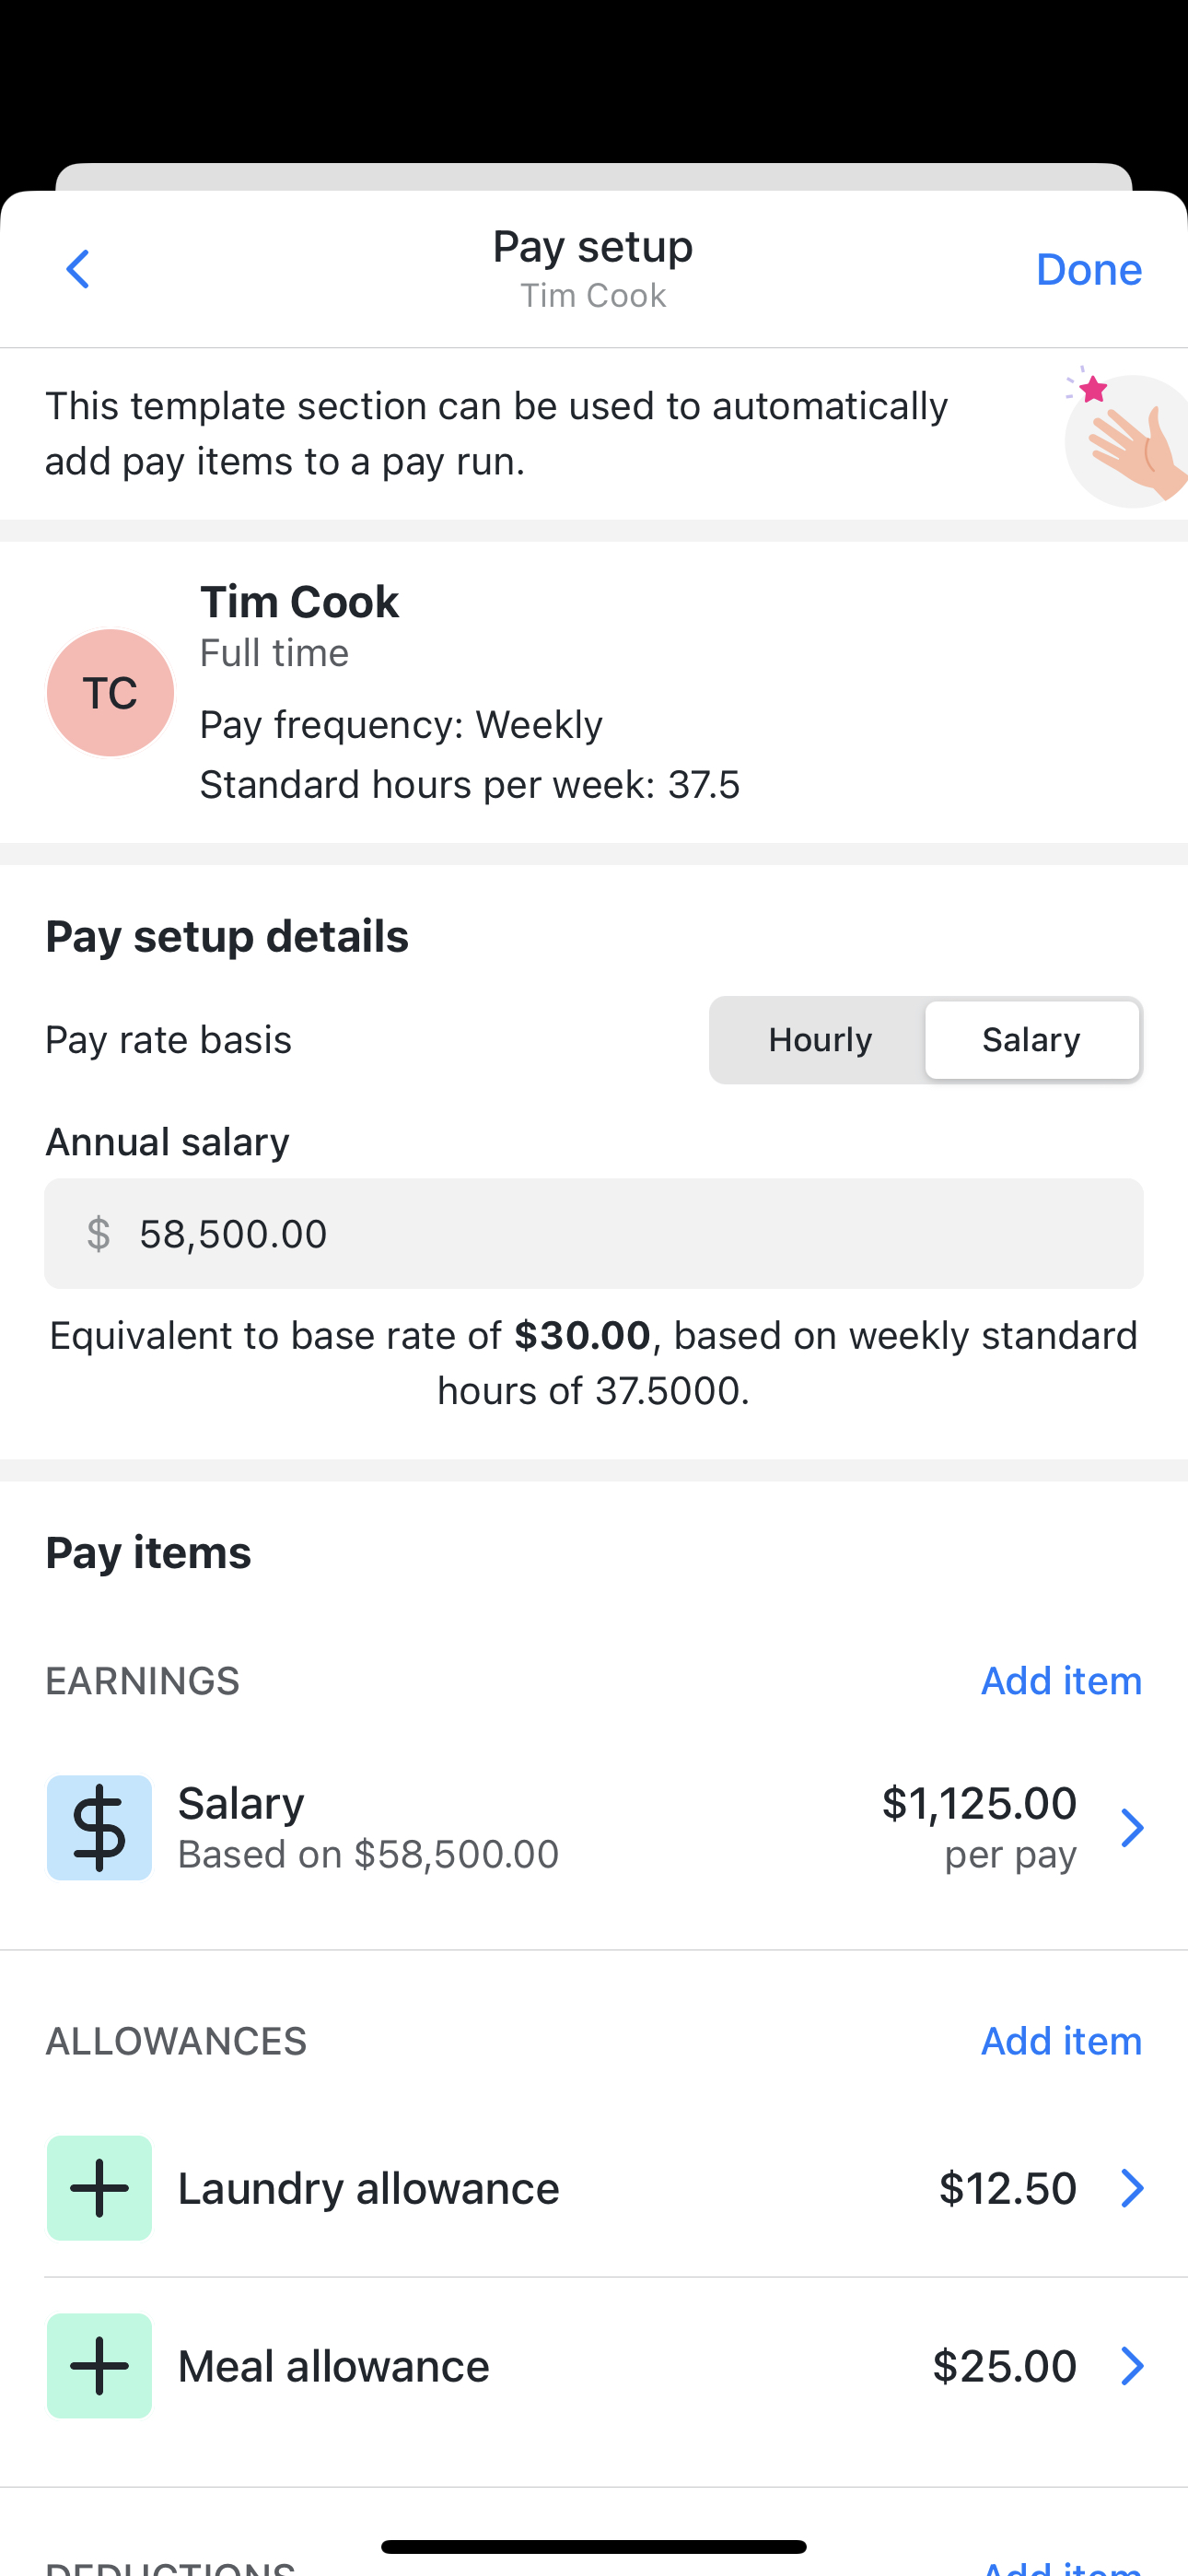
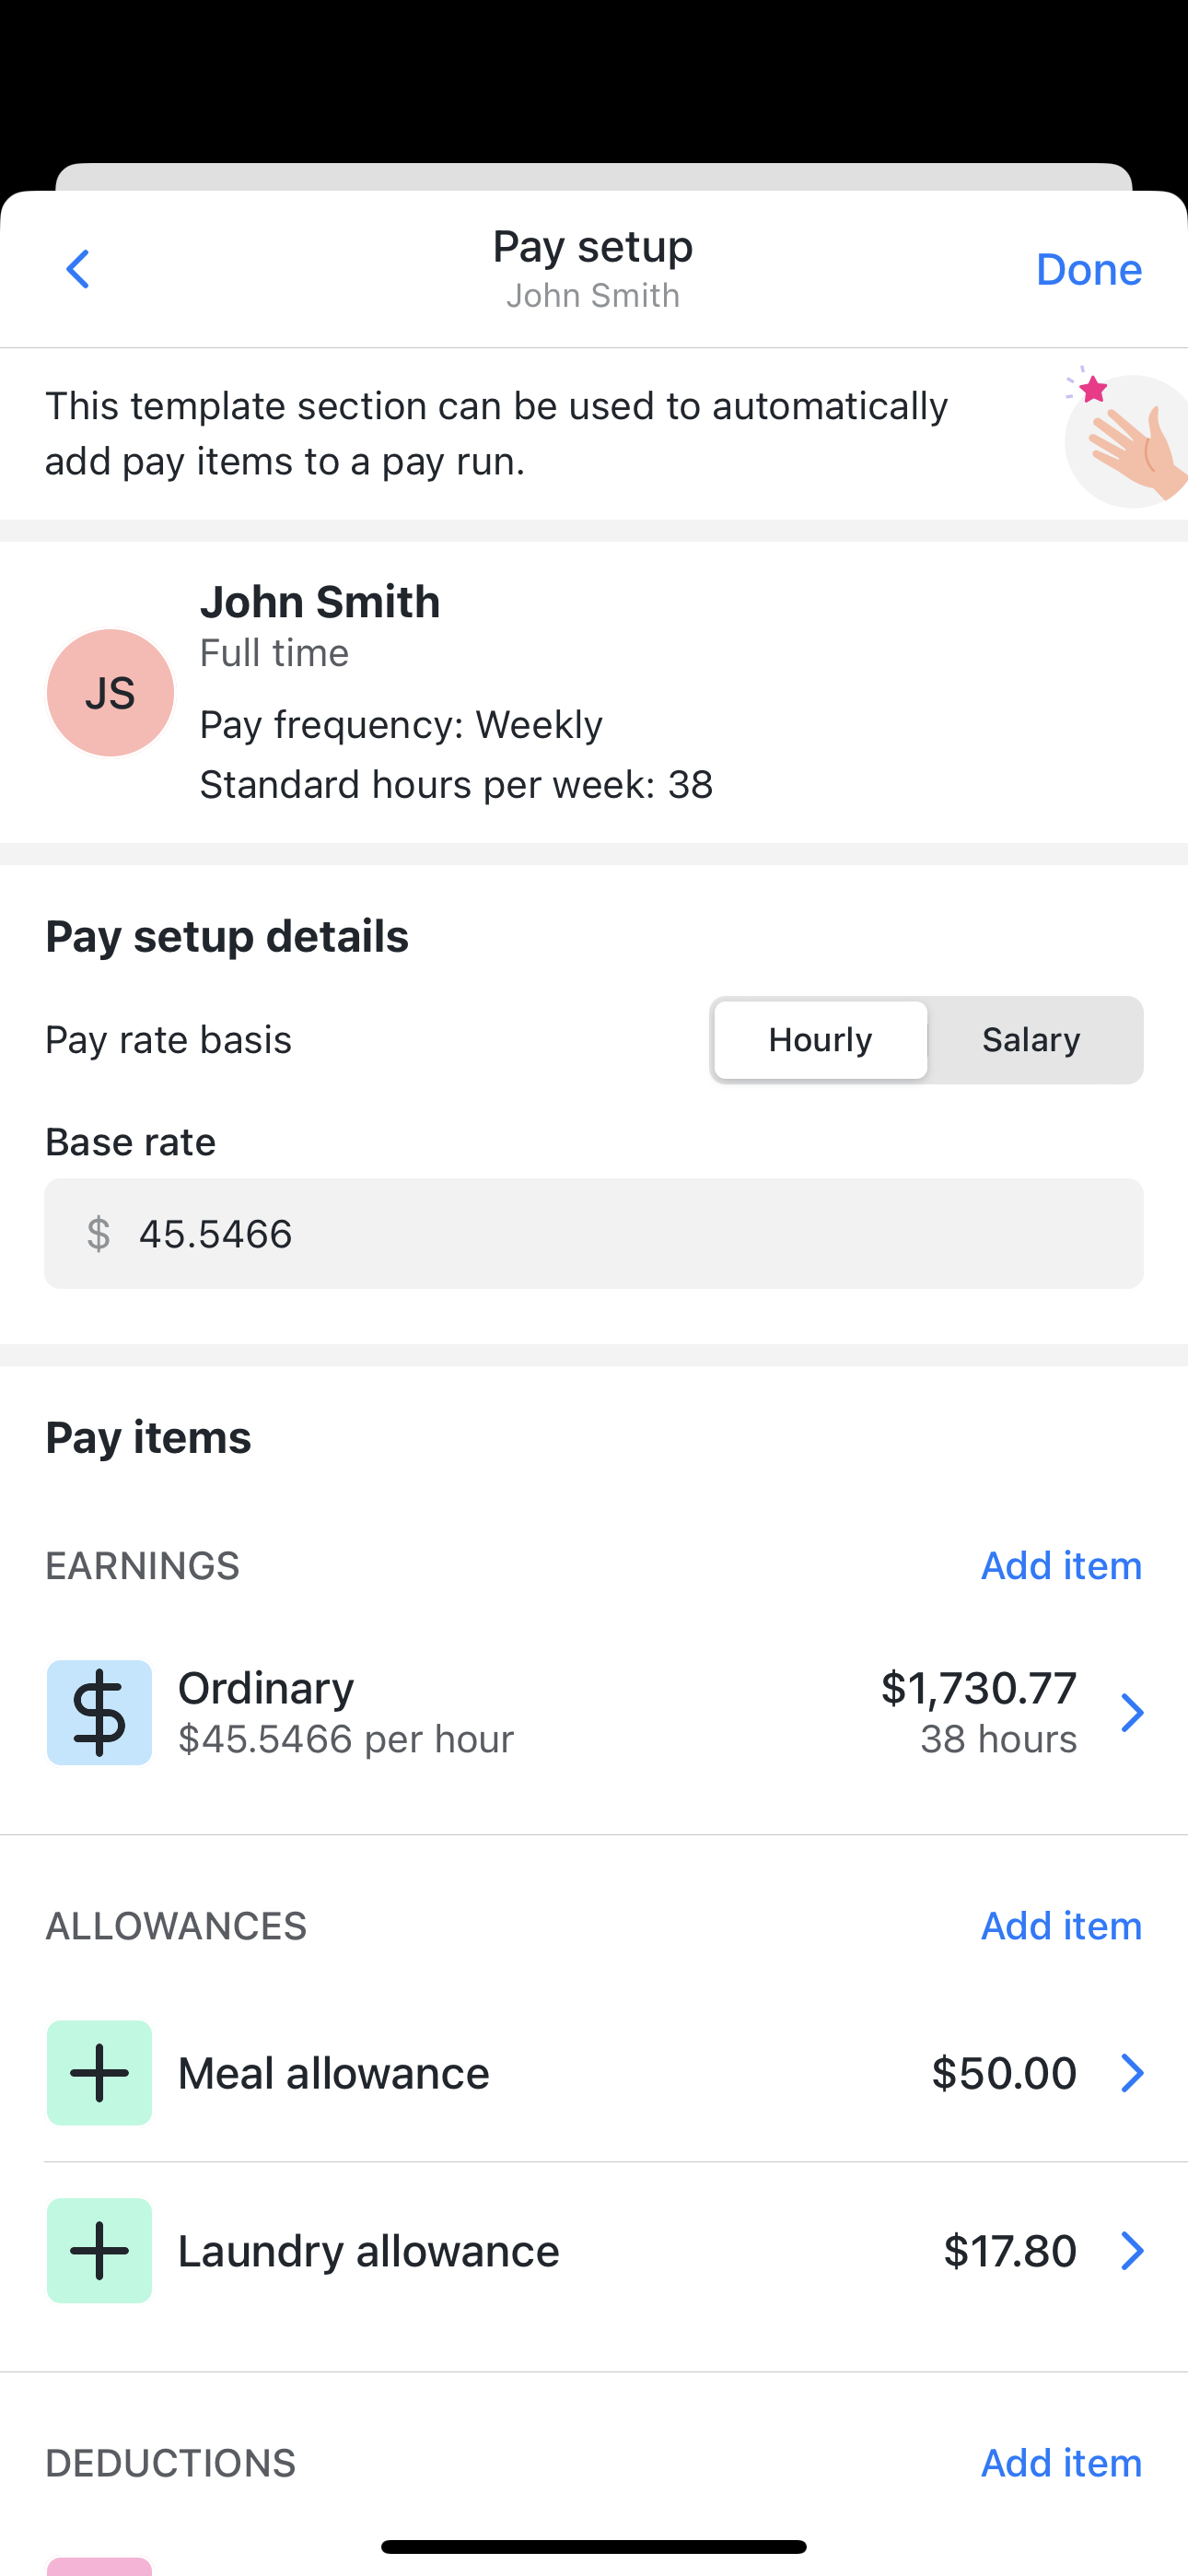
- Select if the employee is paid Hourly or by Salary
- If Hourly enter their Base rate
- This will add an OTE Earning item with Pay rate basis set to Hourly and show their Gross earnings for the item based on their pay frequency and standard hours.
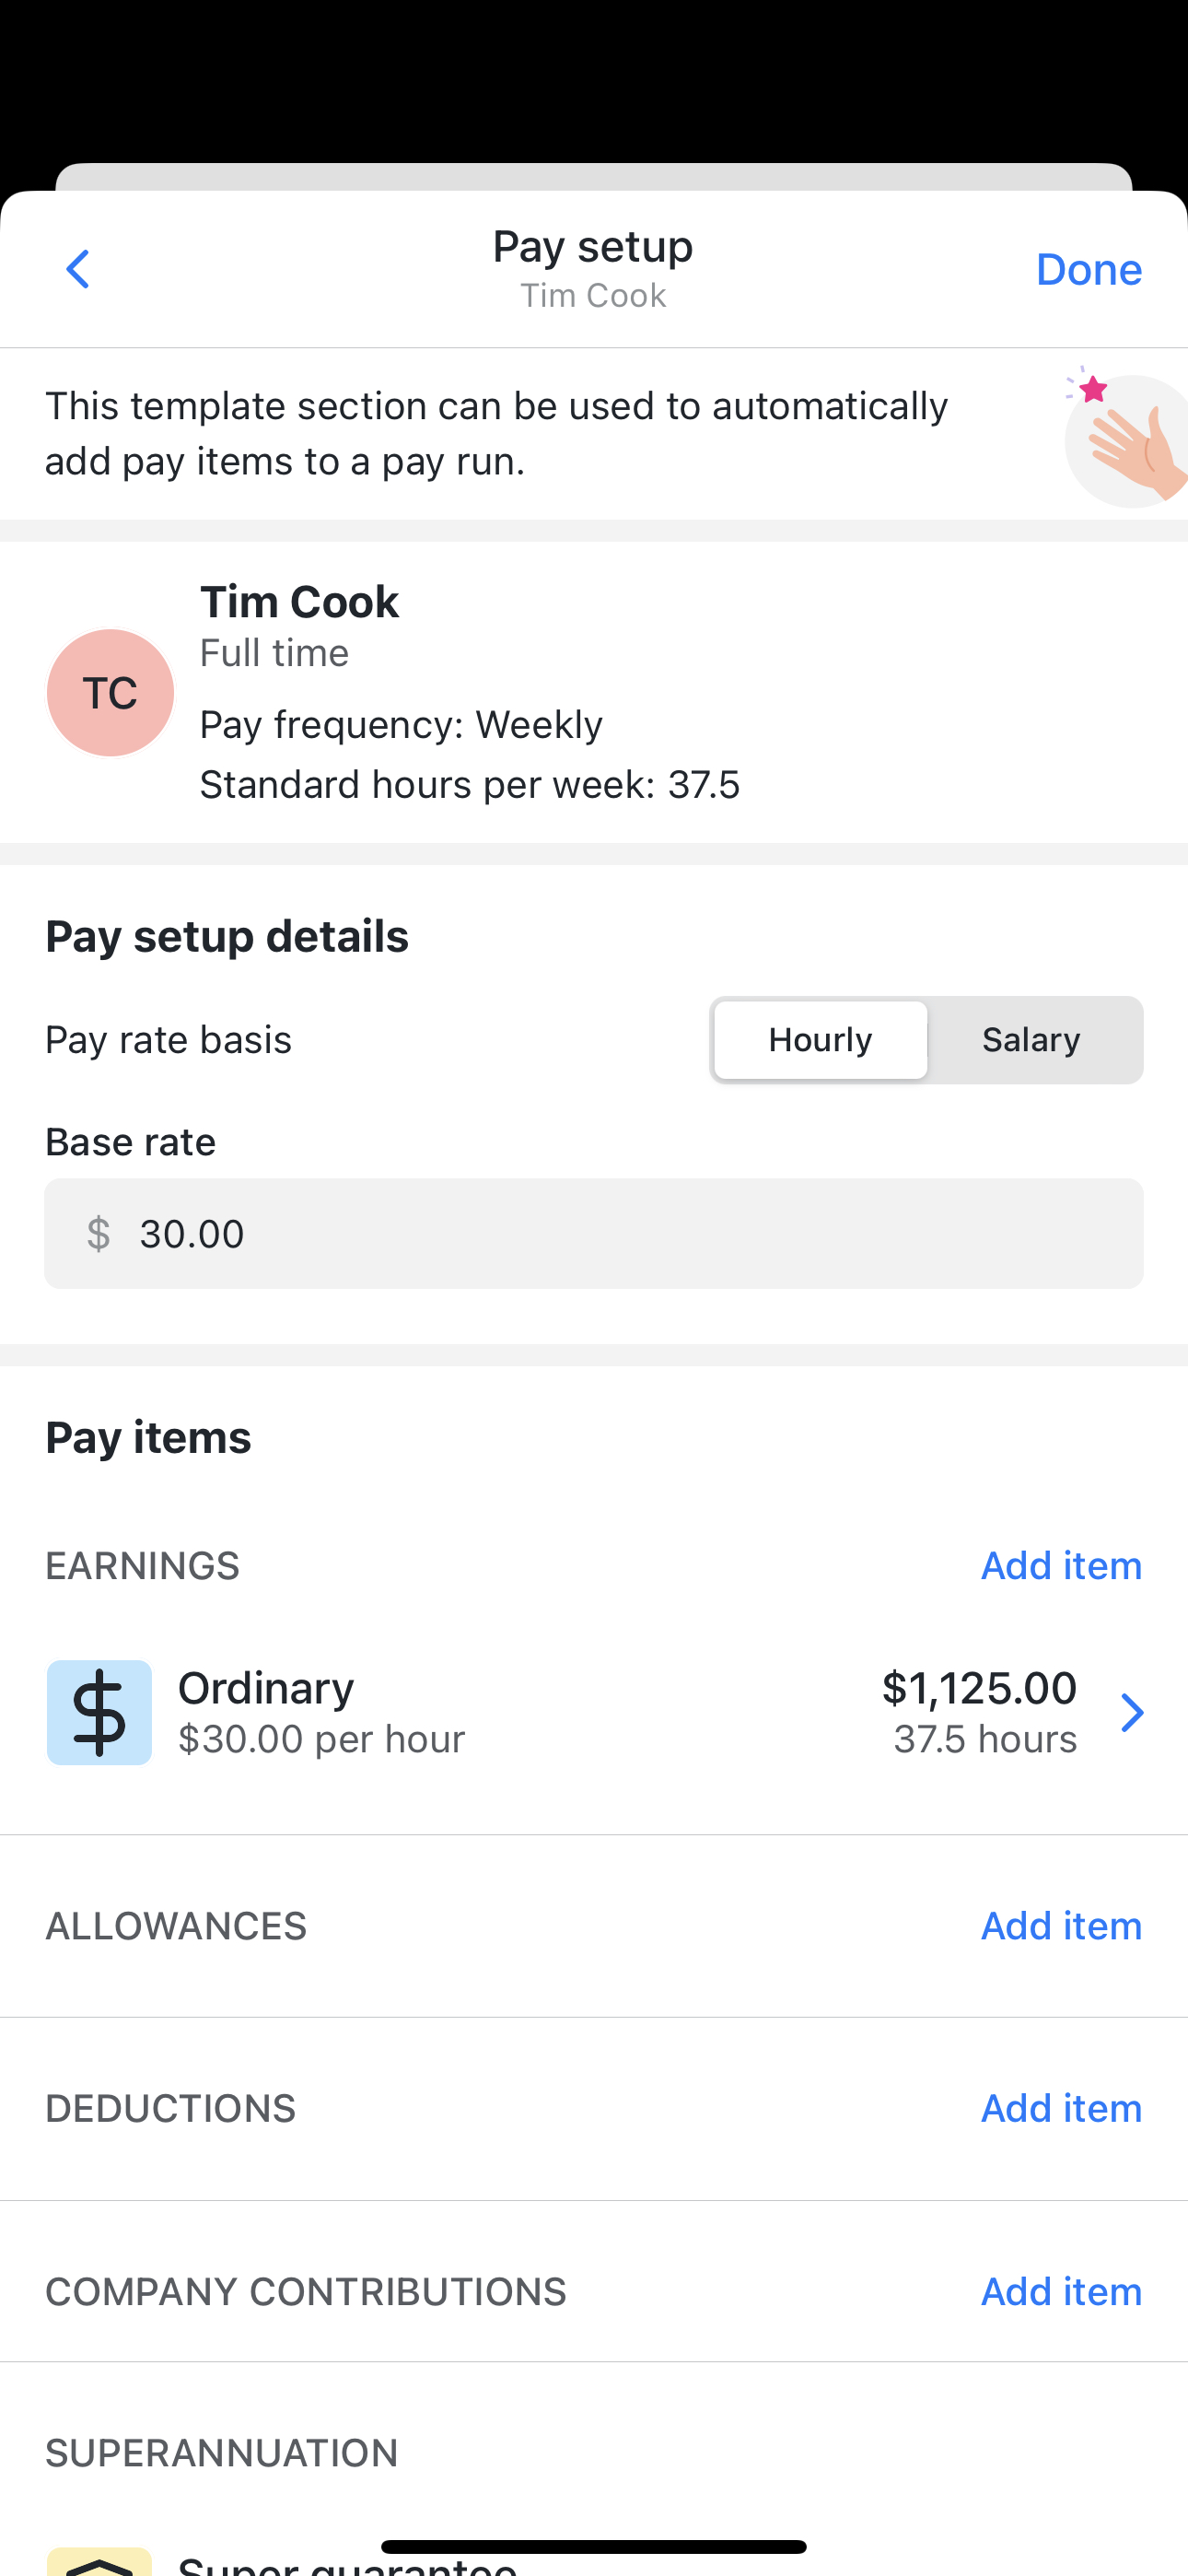
- If Salary enter their Annual salary
- This will add an OTE Earning item with Pay rate basis set to Salary and show their Gross earnings per pay for the item based on their pay frequency.
- This will add an OTE Earning item with Pay rate basis set to Salary and show their Gross earnings per pay for the item based on their pay frequency.
- You can add additional Pay items by tapping Add item for the required item type.
- Once you have added all required Pay items tap Done
Edit pay setup
When in edit mode you can modify and delete any existing pay items, and add new items.
To access edit mode:
- Navigate the to the Pay setup tab
- Tap Edit
To change an employee from Hourly to Salary:
- Select the Earnings item
- Tap Delete item
- Tap Delete
- Change Pay rate basis to Salary
- The Base rate will be converted to an Annual salary and an OTE Earning item with Pay rate basis set to Salary will be added to their Earnings
- If required enter a new Annual salary
- Tap Done
To change an employee from Salary to hourly:
- Select the Earnings item
- Tap Delete item
- Tap Delete
- Change Pay rate basis to Hourly
- The Annual salary will be converted to a Base rate and an OTE Earning item with Pay rate basis set to Hourly will be added to their Earnings
- If required enter a new Base rate
- Tap Done
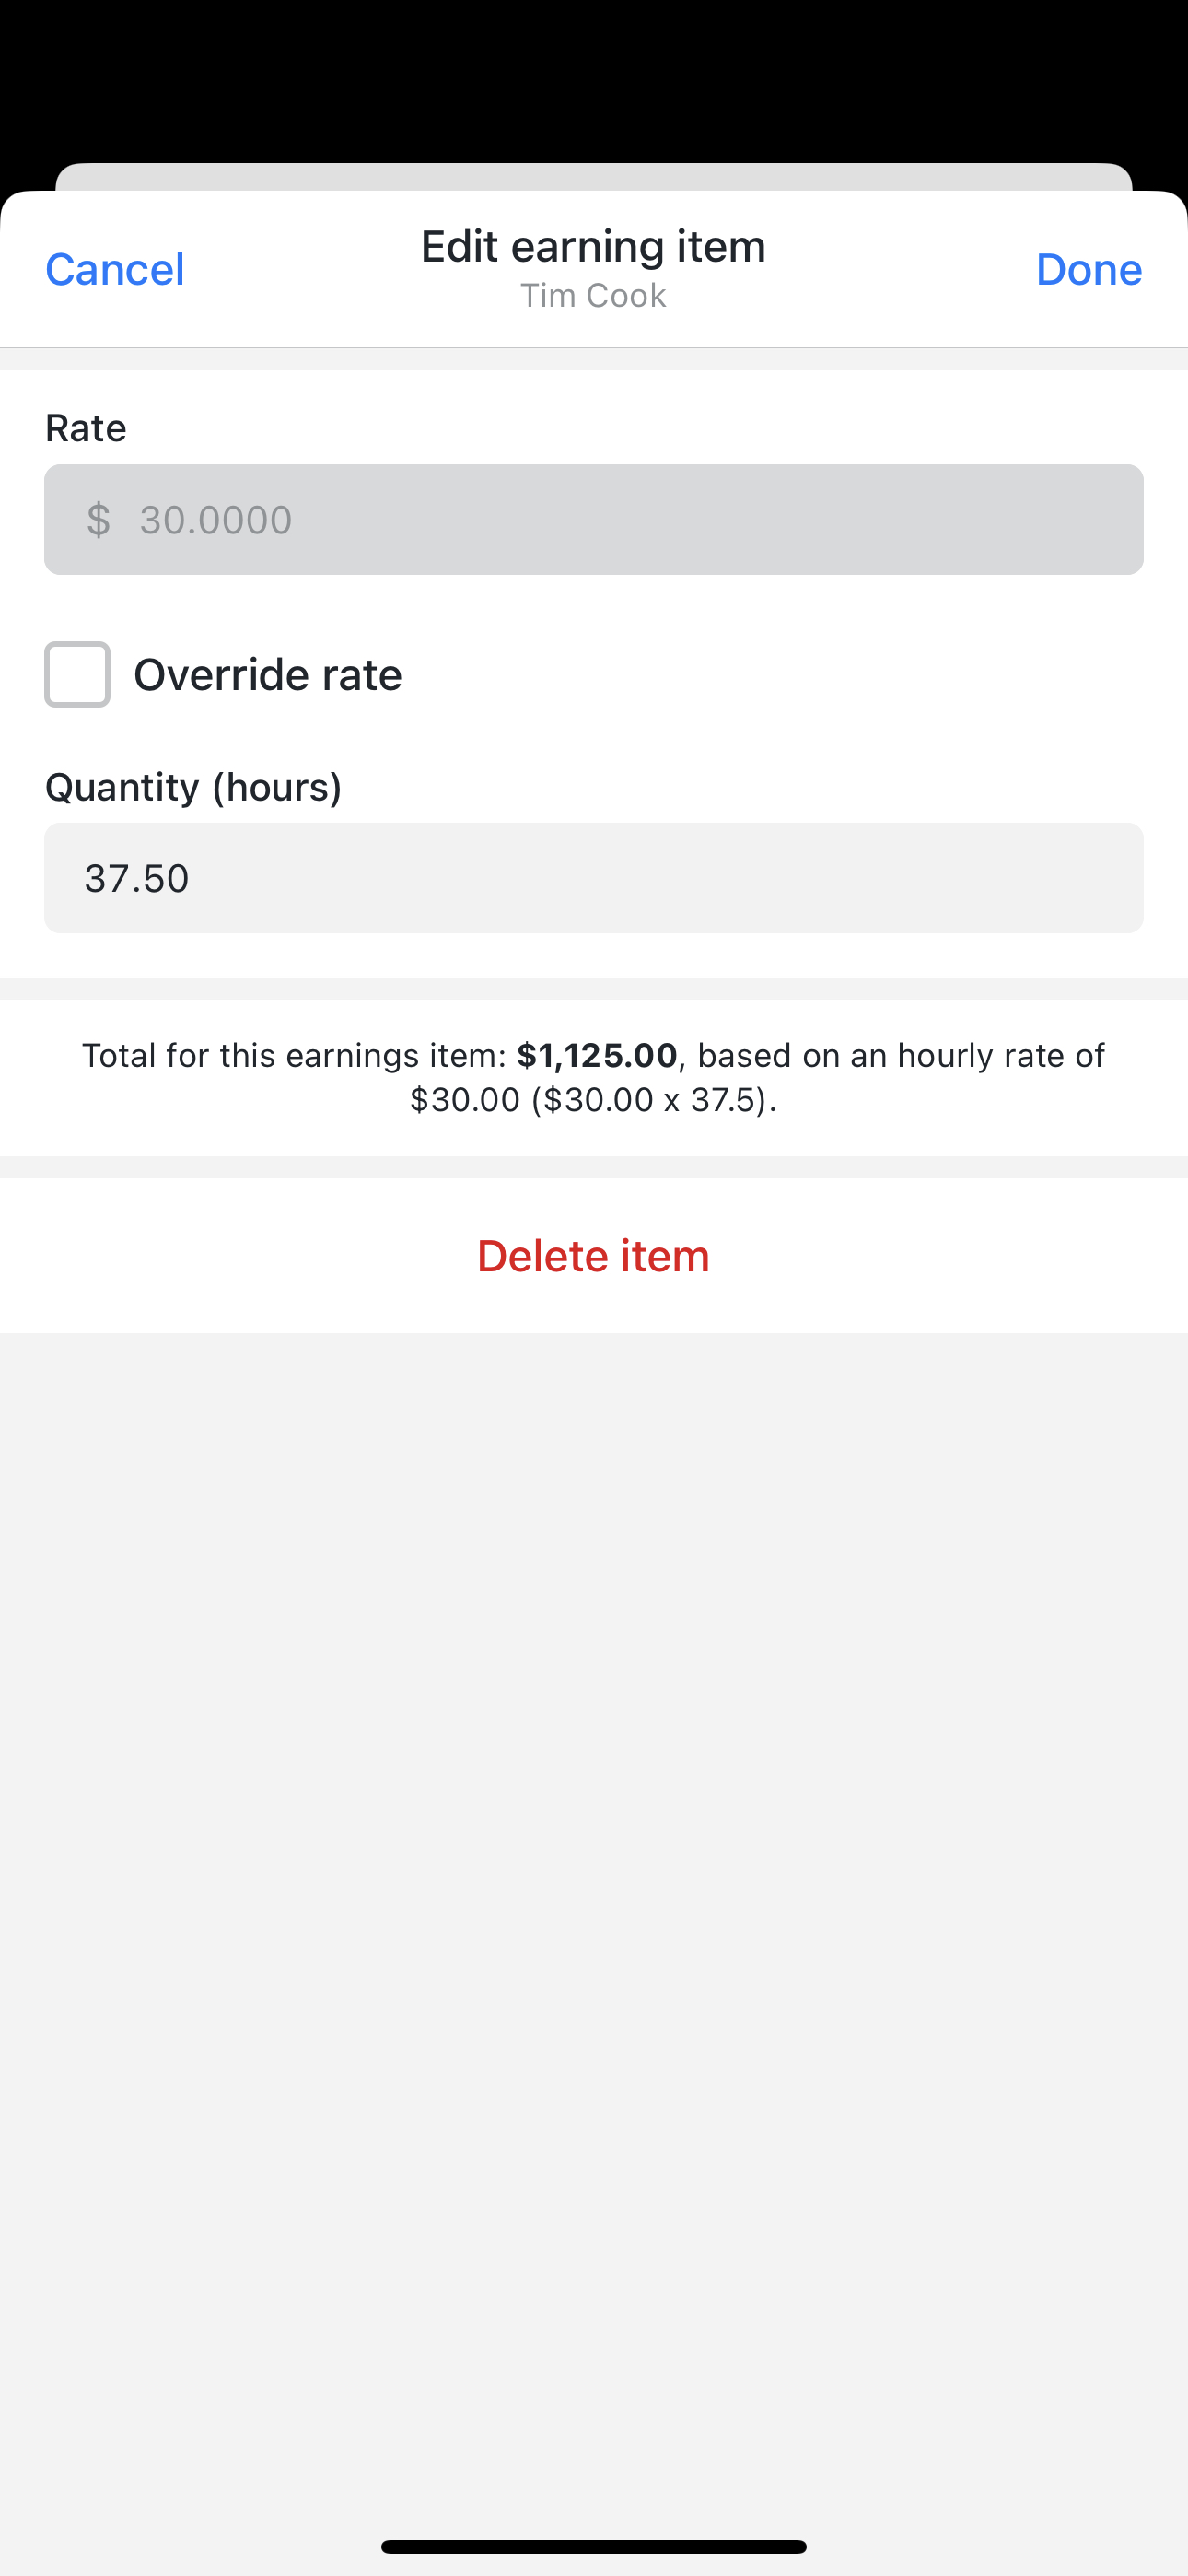
To edit an existing Pay item
- Select the Pay item
- Make the required changes
- Tap Done
To add a new Pay item
- Tap Add item for the required item type
- Configure the Pay item
- Tap Done
To delete an existing Pay item
- Select the Pay item
- Tap Delete item
- Confirm by selecting Delete
Need more help?
Ask the Reckon Community at: https://community.reckon.com/
Or Log a Support Ticket: https://www.reckon.com/au/support/