Table of Contents
How to change the Administrator for Reckon Insights: Best Practices
Scenario
Employees will eventually move on for various reasons. When this happens, work done in Reckon One Books or Reckon Insights must be transitioned smoothly to the next administrator.
Updating the email address in Reckon Portal will disable the associated Reckon Insights account. To ensure a smooth transition, follow the steps below.
Best practice
- Use a shared company admin account for Reckon Portal, Reckon One, and Reckon Insights.
- Always use the Shared Folders to store and share Reckon Insights content, even if you're the only user.
Workaround
If Reckon Insights users currently access the service with individual accounts instead of a shared company account, follow these steps to transition to the next administrator:
Terminology
- User A: Current administrator
- User B: Next administrator
Before you begin: Ensure that User A is still the primary email address in Reckon Portal before proceeding.
Step 1: Sign up User B in Reckon Portal
Each user needs their own Reckon Portal account.
- User B goes to Reckon Portal and clicks Register for free.
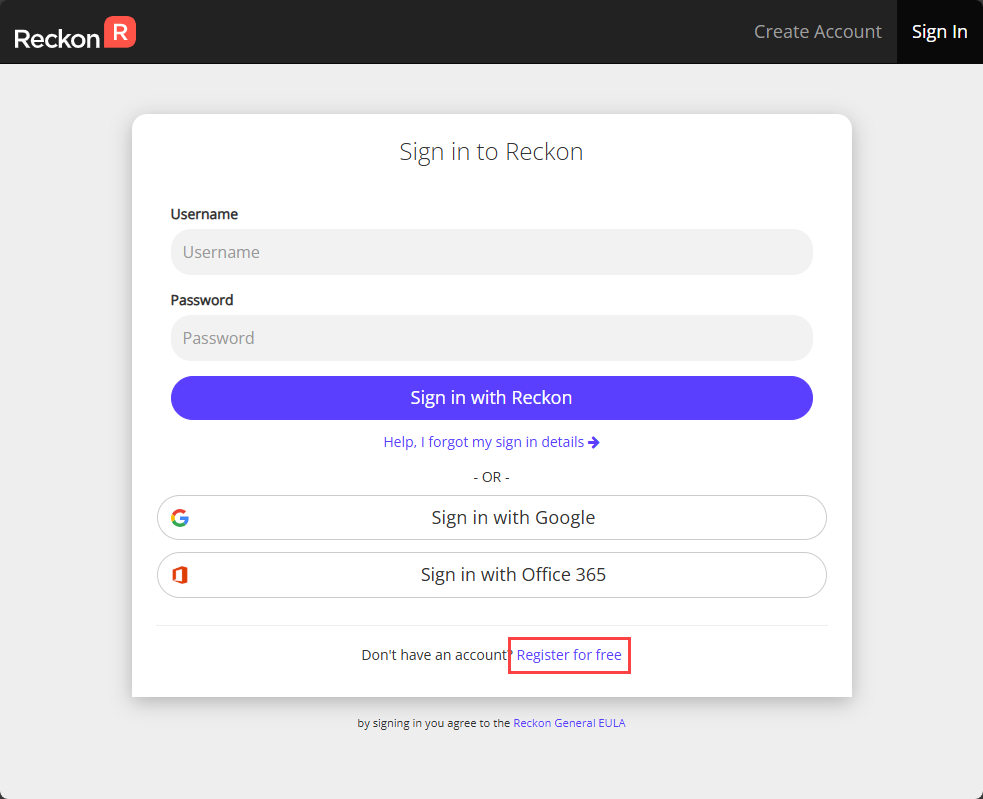
- After signing up and verifying their email, User B logs in to confirm access.
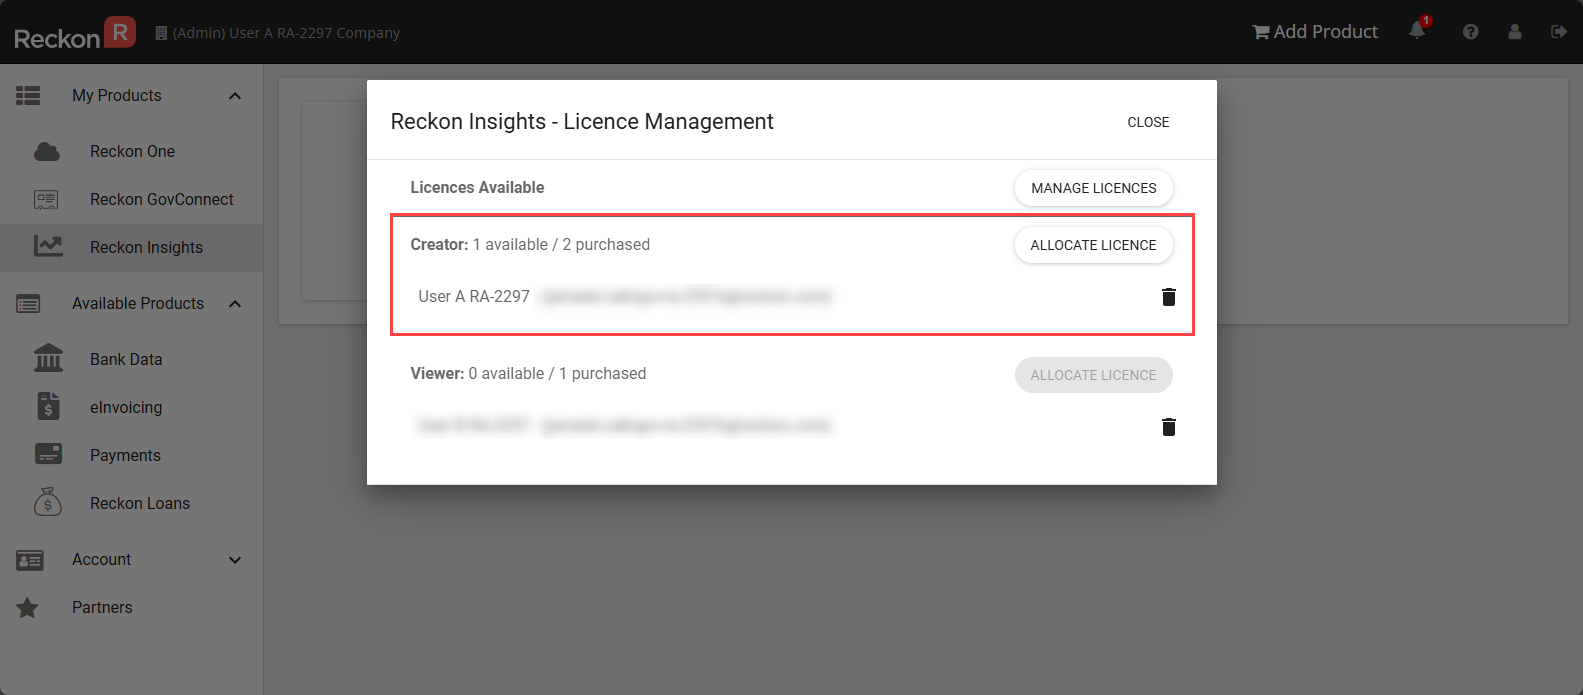
Step 2: Set the Creator License to User B
This will trigger an invitation to create a Reckon Insights account.
- User A logs in to Reckon Portal.
- Navigate to Reckon Insights > Licenses.
- Click the Delete icon to remove the license allocation for User A.
- Click Allocate License and assign the Creator License to User B.
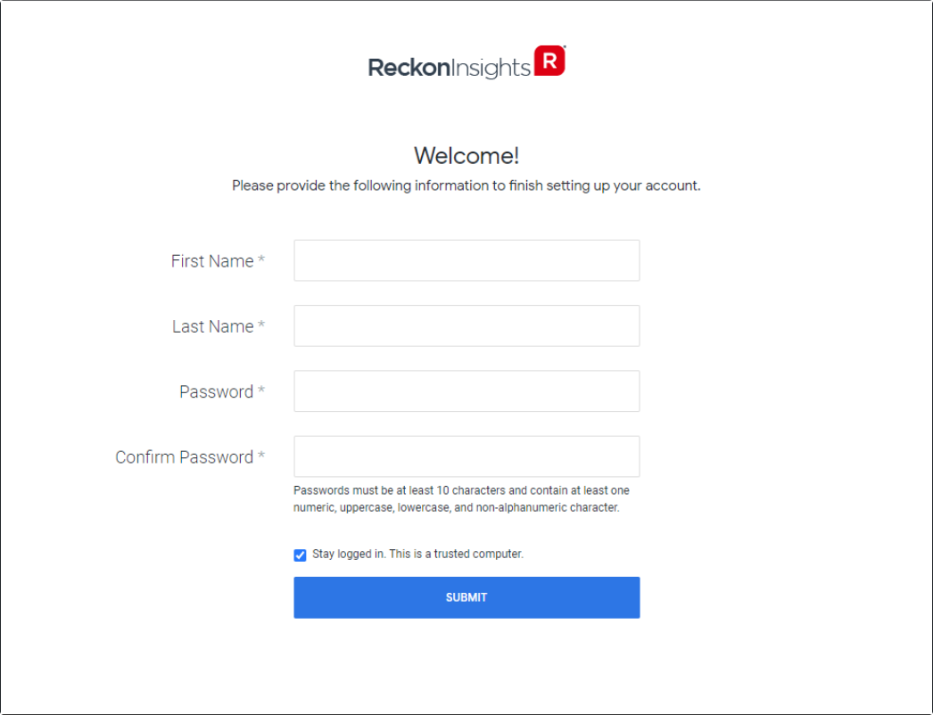
Step 3: Activate Reckon Insights for User B
This ensures that the Reckon Insights account is accessible for User B.
- User B receives a welcome email after the license is assigned.
- User B opens the email and clicks Activate Your Account.
- They will be prompted to set up their Name and Password for Reckon Insights.
The passwords for Reckon Portal and Reckon Insights are not the same, but they can be set similarly.
Step 4: Add User B to the Reckon Insights Data feeds
This ensures that User B will have access to the data feed in Reckon Insights.
- User A logs in to Reckon Portal.
- Navigate to Reckon Insights > Manage > Manage Feeds.
- Click on the Feed name for the Reckon One Book.
- Go to the Users tab and click Add user.
- Assign the appropriate access level for User B and click Done.
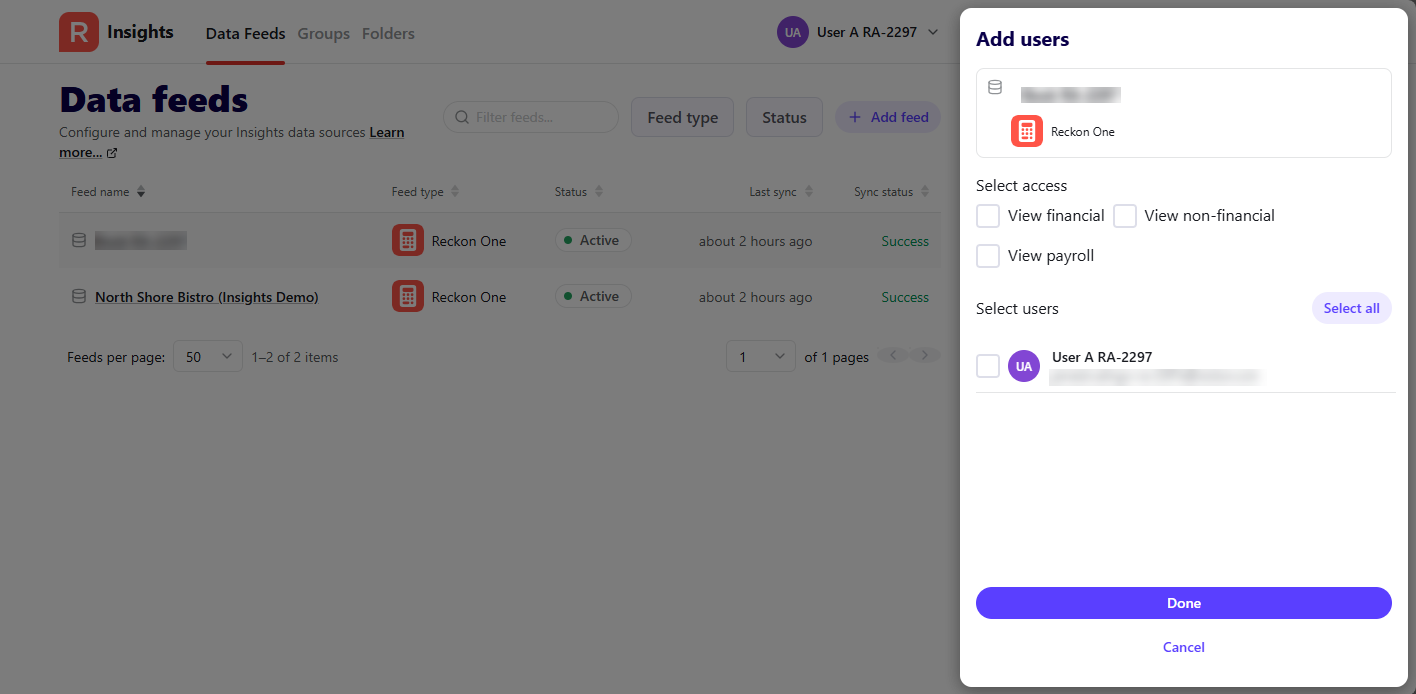
User B now has access to shared content previously created by User A in Reckon Insights.
(Optional) Step 5: Update the Primary Reckon Portal email address
This step requires using a different email (User C) to update User B’s Reckon Portal email. This ensures User A can later update their own email if needed.
This will grant the user access to the Reckon One Book and manage the data feeds in Reckon Insights.
- User B logs in to Reckon Portal.
- Click on the Profile icon (top-right corner).
- Click Edit under Login and Email.
- Enter the new email address (User C) and complete the reCAPTCHA.
- Click Save, then check User C’s inbox to verify the change.
- Log in using the updated credentials to confirm the change.
- User A repeats 2 to 5 to update the email with User B.