Creating an invoice - Reckon Invoices App
New invoice
- To create a new invoice, tap on the + icon on the foot navigator bar.
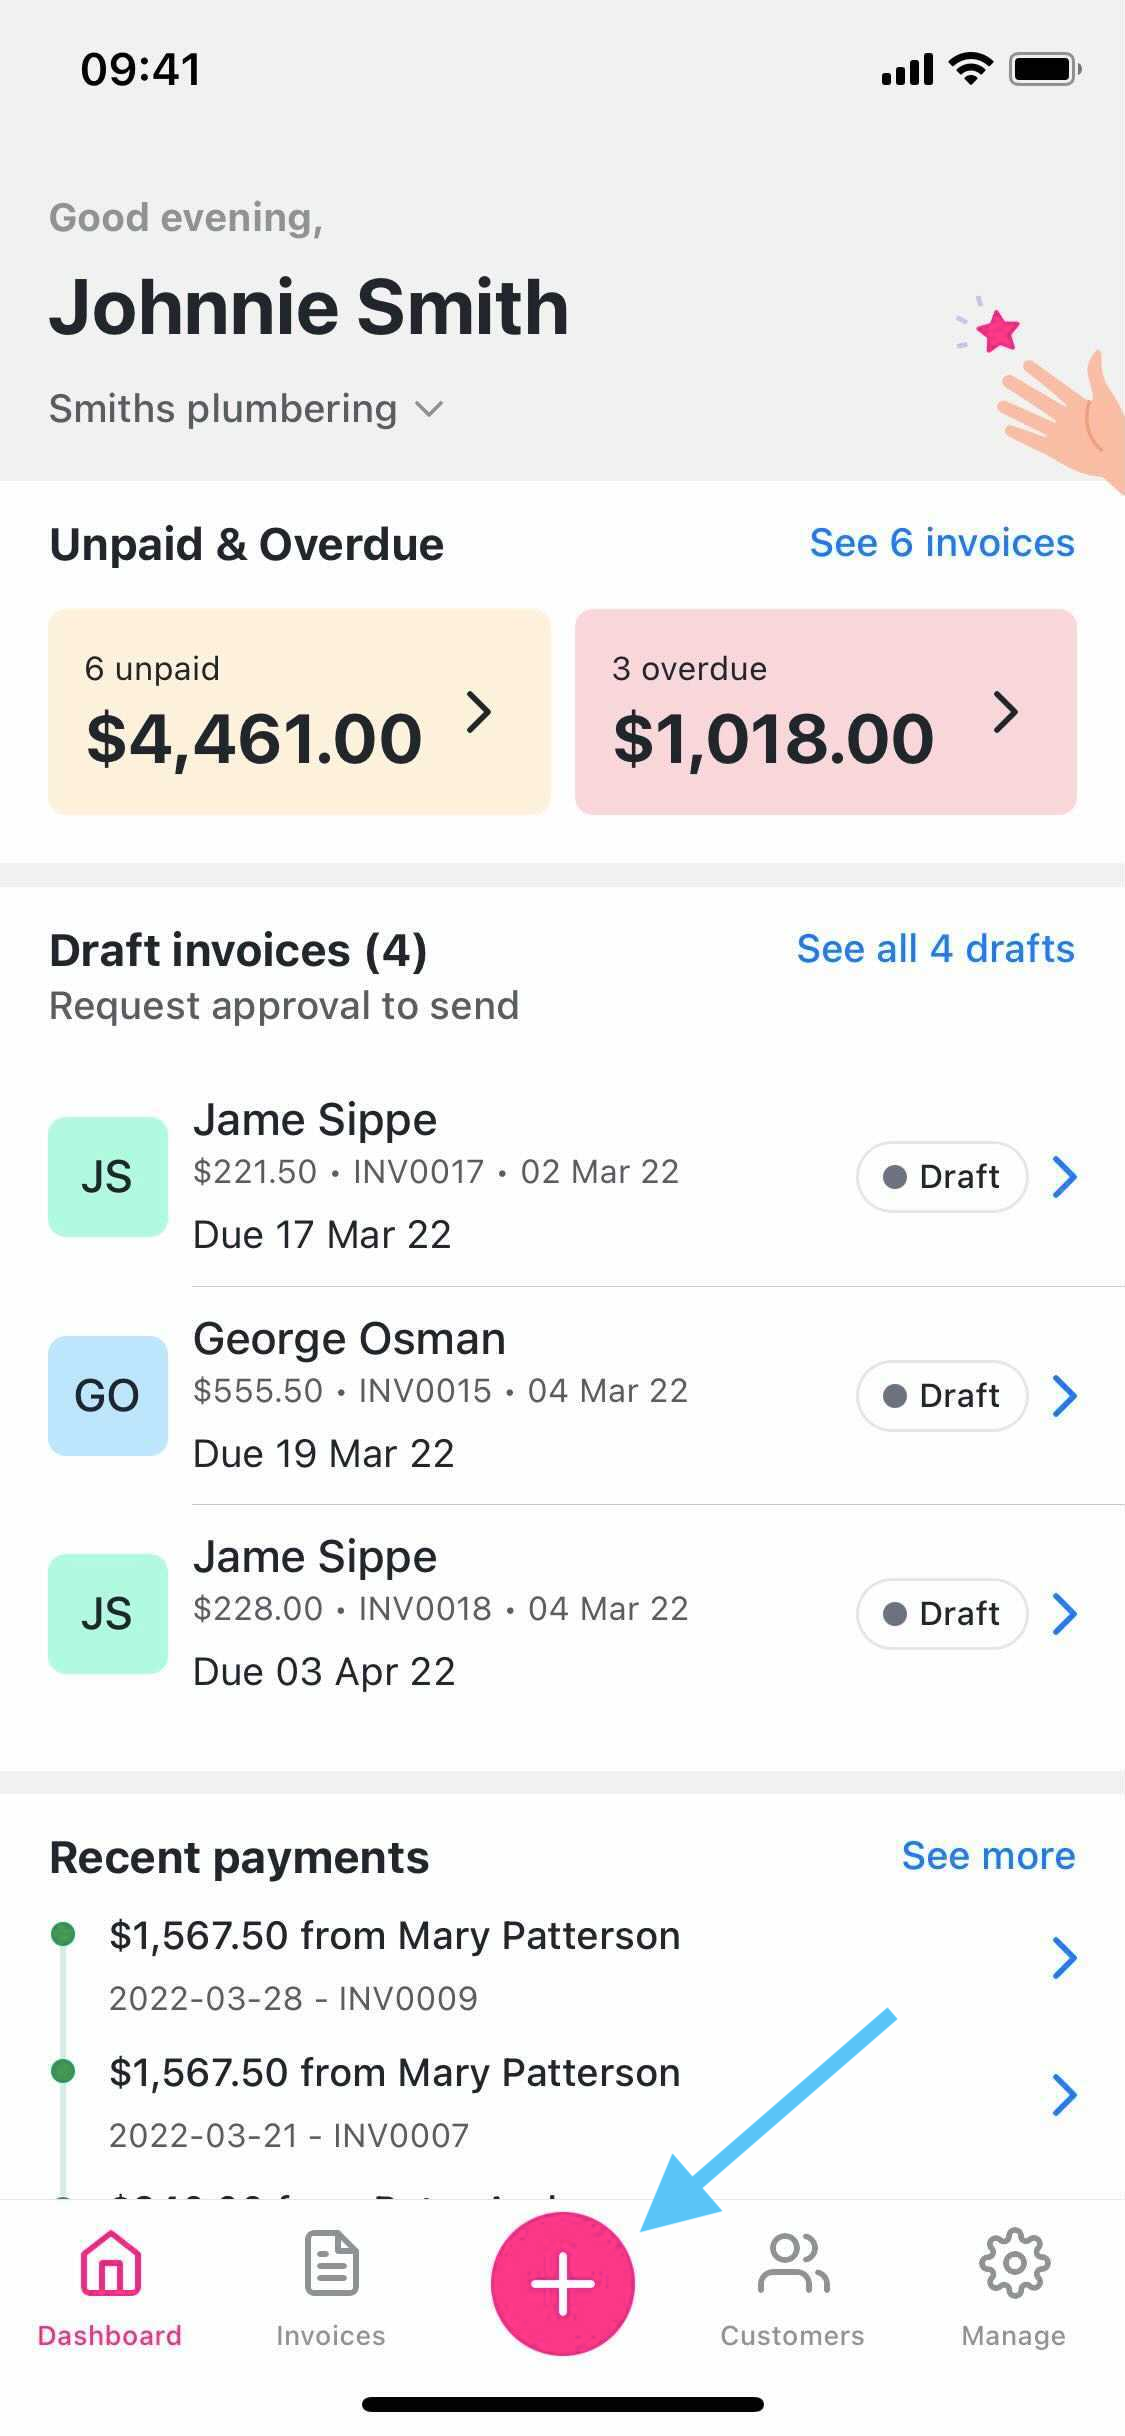
- Tap New invoice on the menu.
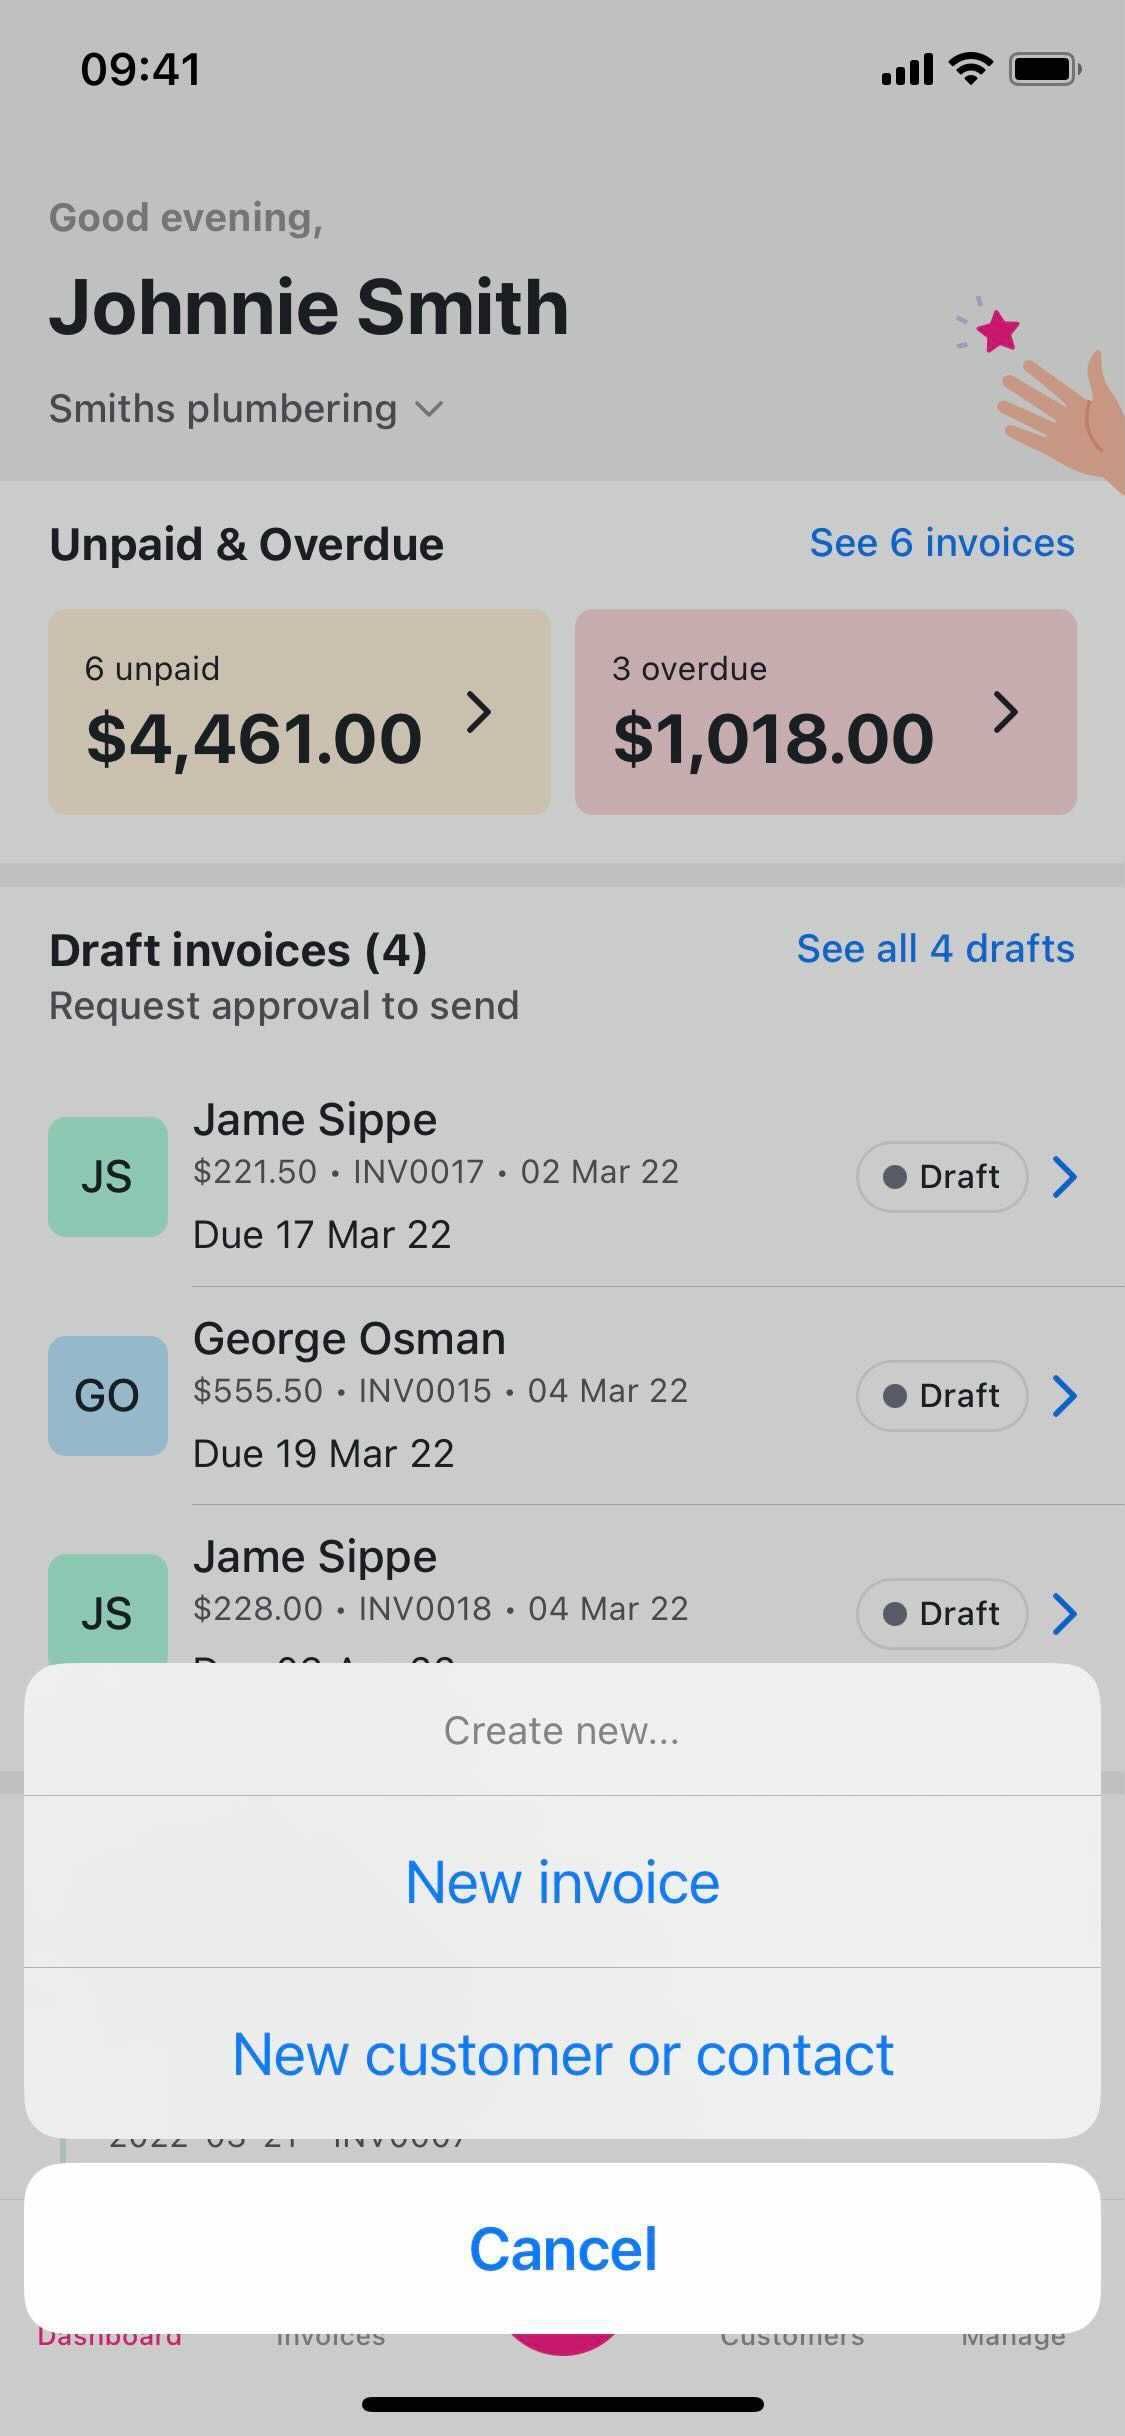
- A new invoice screen will appear. Tap Cancel if you don't want to create the invoice and close the new invoice screen.
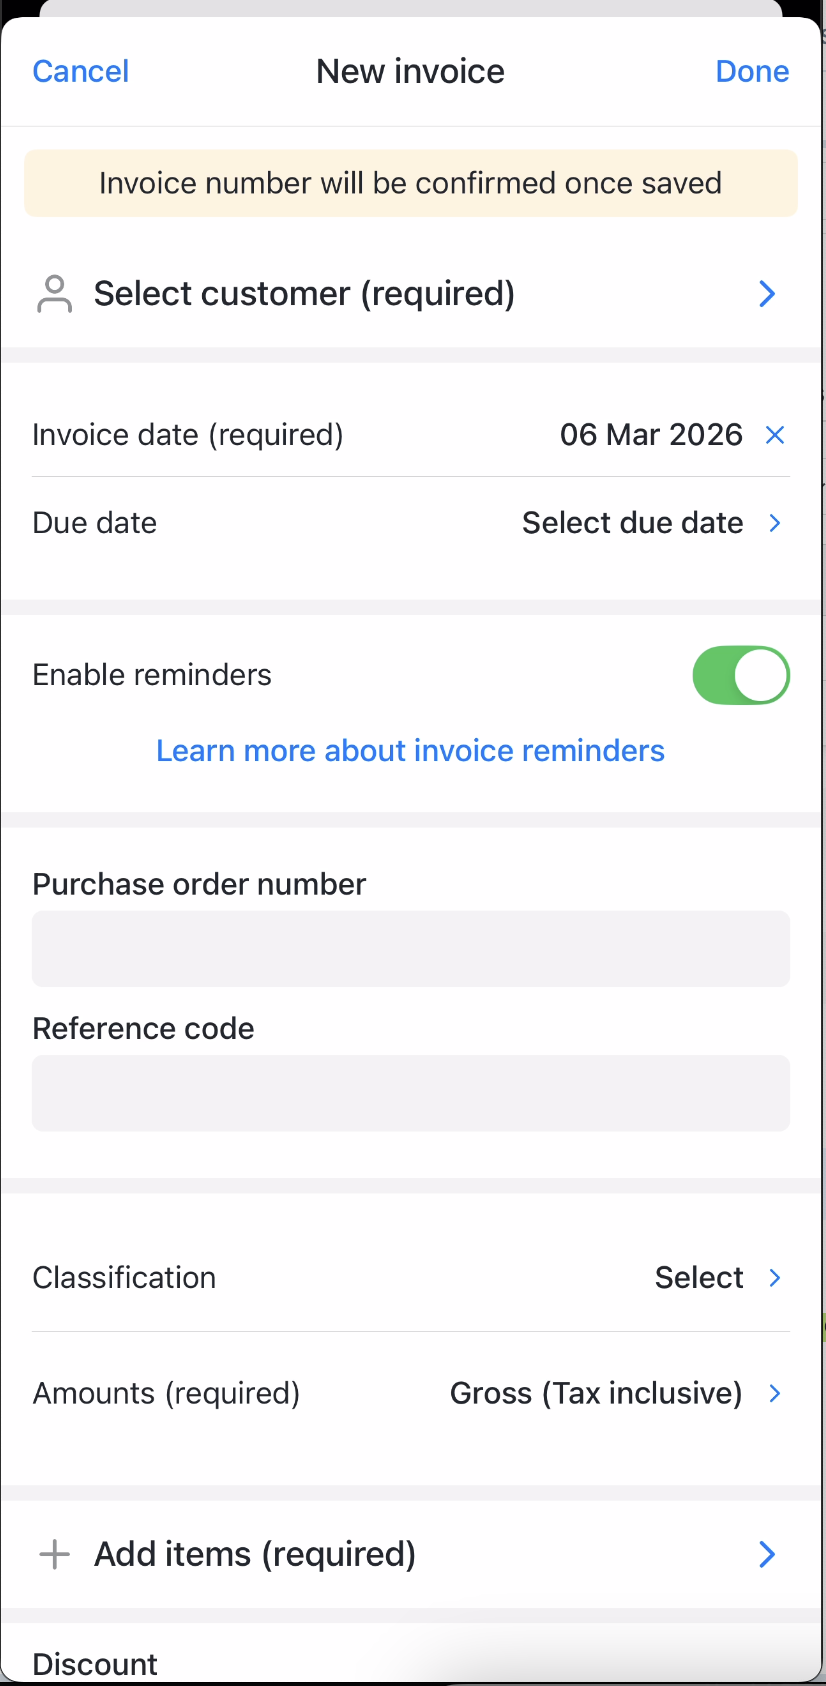
- (Optional) If Invoice reminders is enabled in Reckon One, you will see an Enable reminders toggle. Switch the toggle on to automatically send your customer a invoice reminder based on the setup on your Reckon One book.
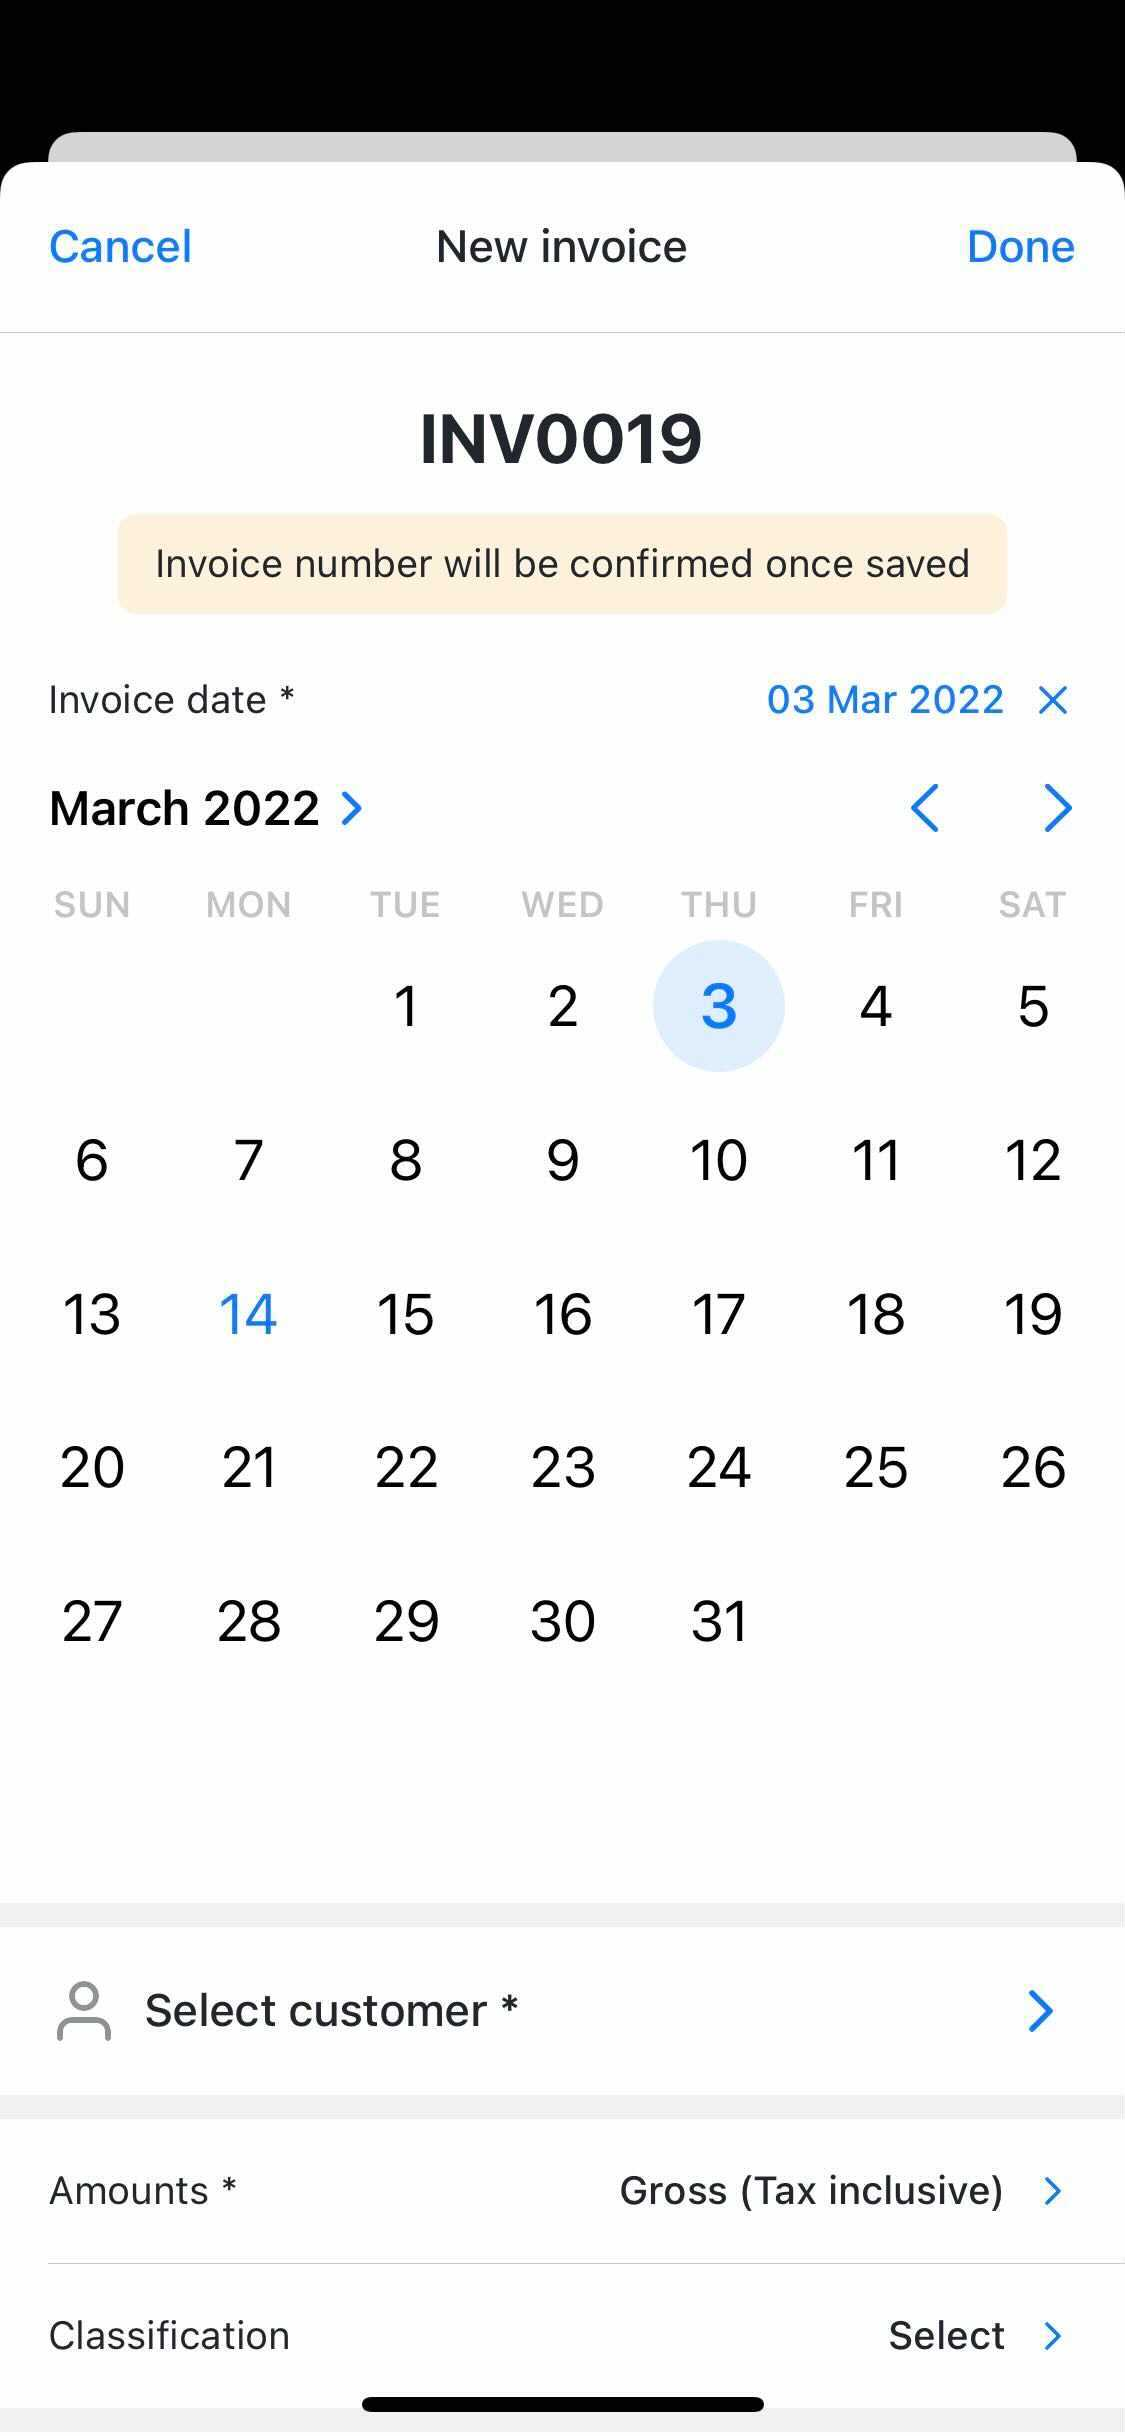
- The invoice date will be default to Today's date. To change the invoice date, tap on the date to invoke the calendar. Select invoice date then tap Done.You cannot create an invoice dated before your book start date. Refer to Reckon One books settings on the web.
- Tap Select customer to bring up the customer list. All active customers will be available on the list. Tap on the radio option button next to the customer name then tap Done.
If the customer hasn't been created yet, tap on + New customer to create a new customer.Type the customer name in the Filter text field instead of scrolling through the list. This is handy if you have a lot of customers in your book.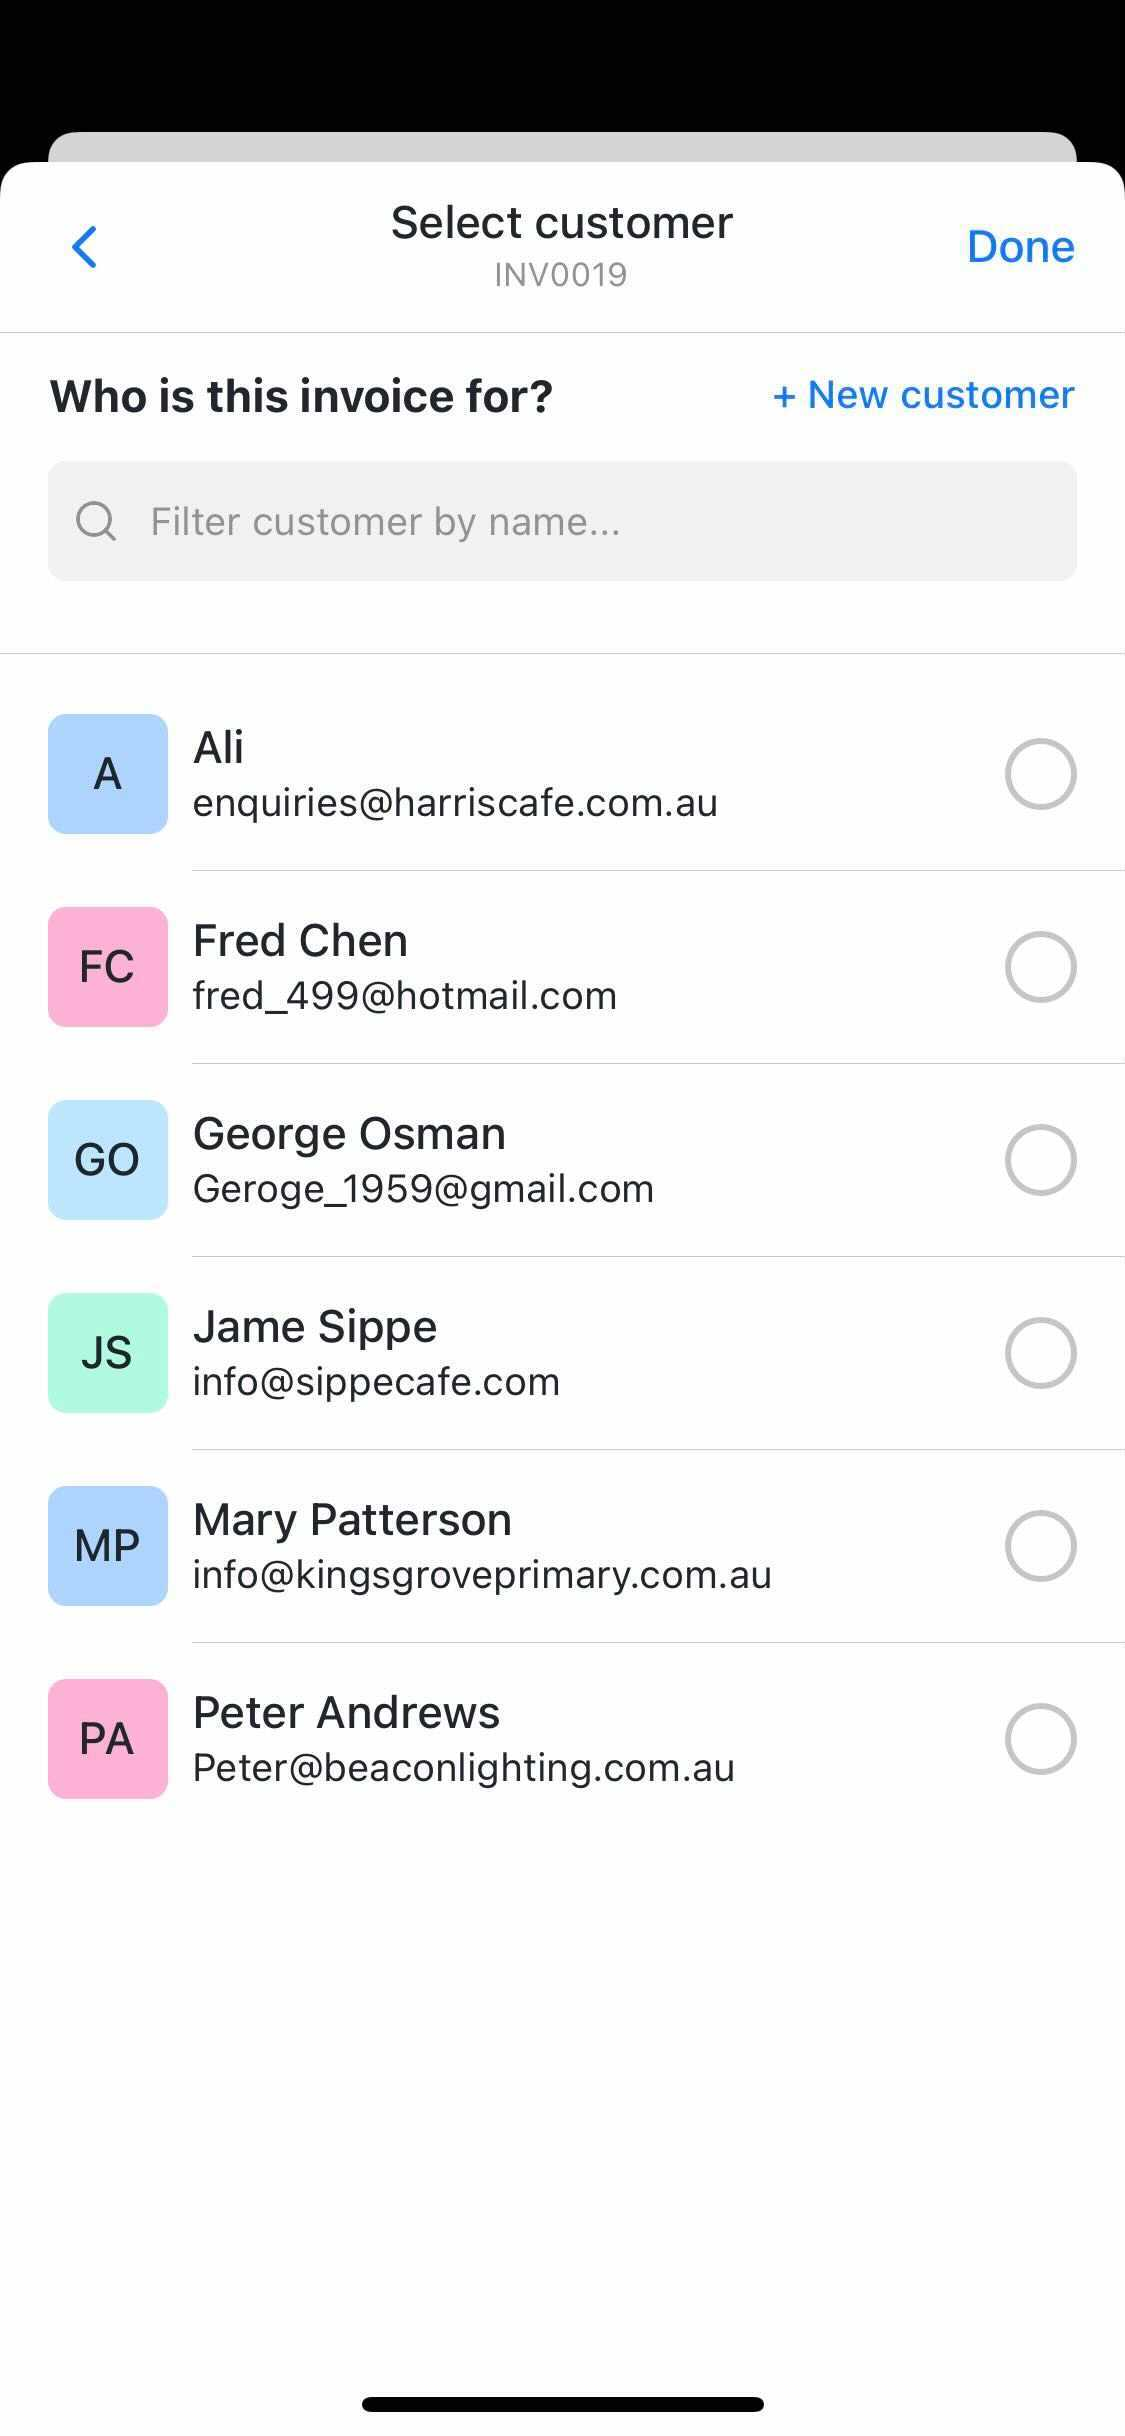
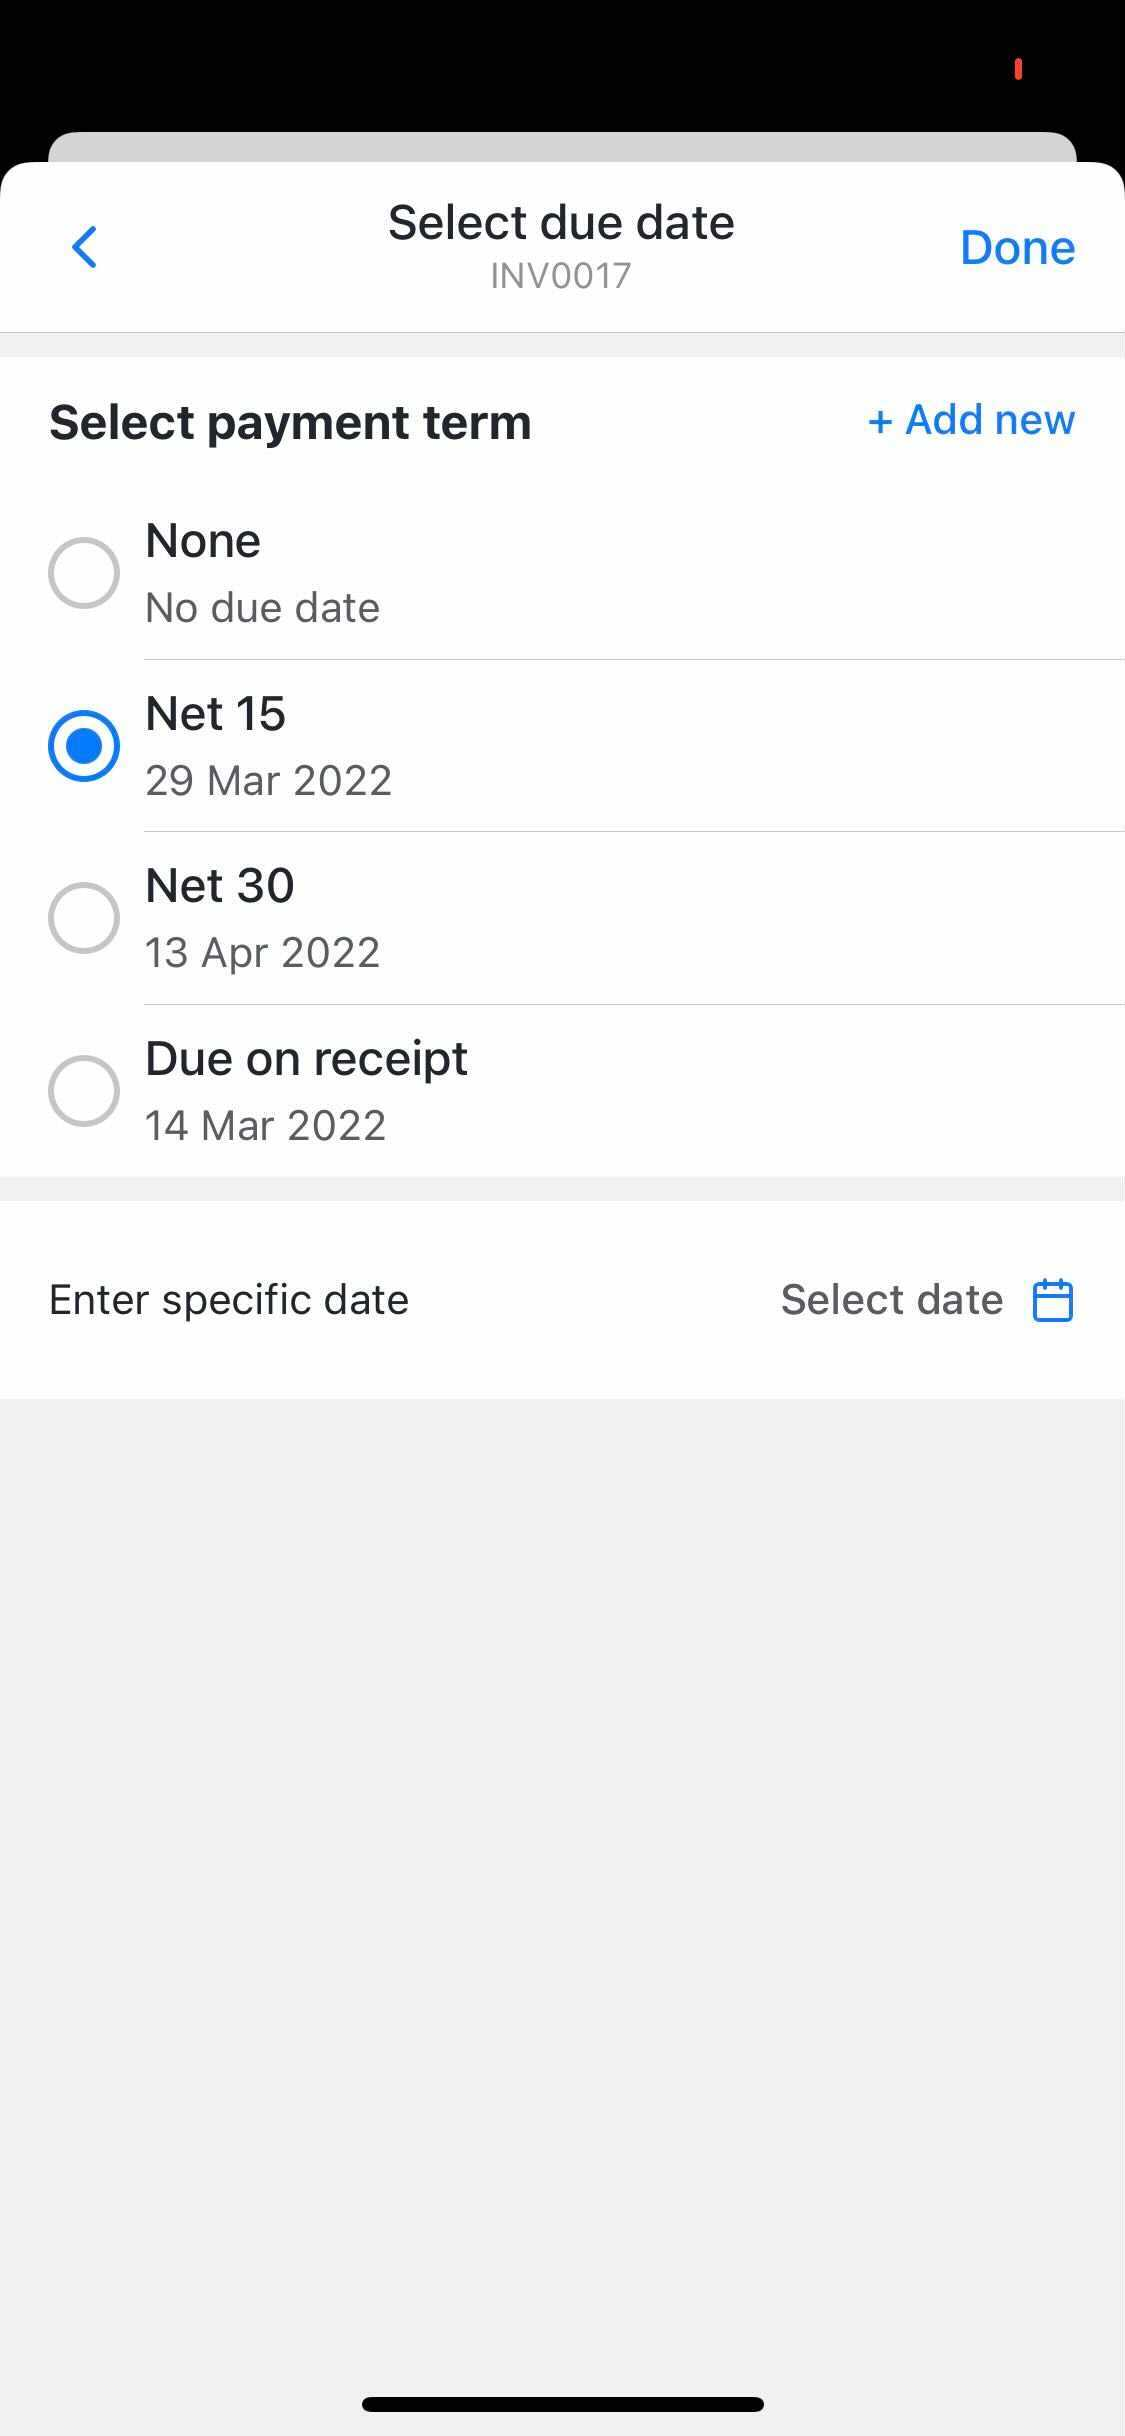
- Tap Select due date to set a due due for the invoice. Unpaid invoices past the due date will become overdue. Select a payment term (Net 15, Net 30 or Due on receipt) or enter a specific due date. If you have added a custom payment term in Reckon One, it will appear for selection. Default payment terms will be selected if you have set a payment term as default in Reckon One Invoice payment terms settings.Only active payment terms will be shown in. Refer to Invoice payment terms in Reckon One book settings.If you want to add a new payment term, tap on + New to create a new payment term which you can use in the future. Tap Done when you have selected a payment term or entered a specific due date.
 There is a Overdue filter on the invoices list. It assist by grouping invoices that have past the due date so you can follow up with the customer.
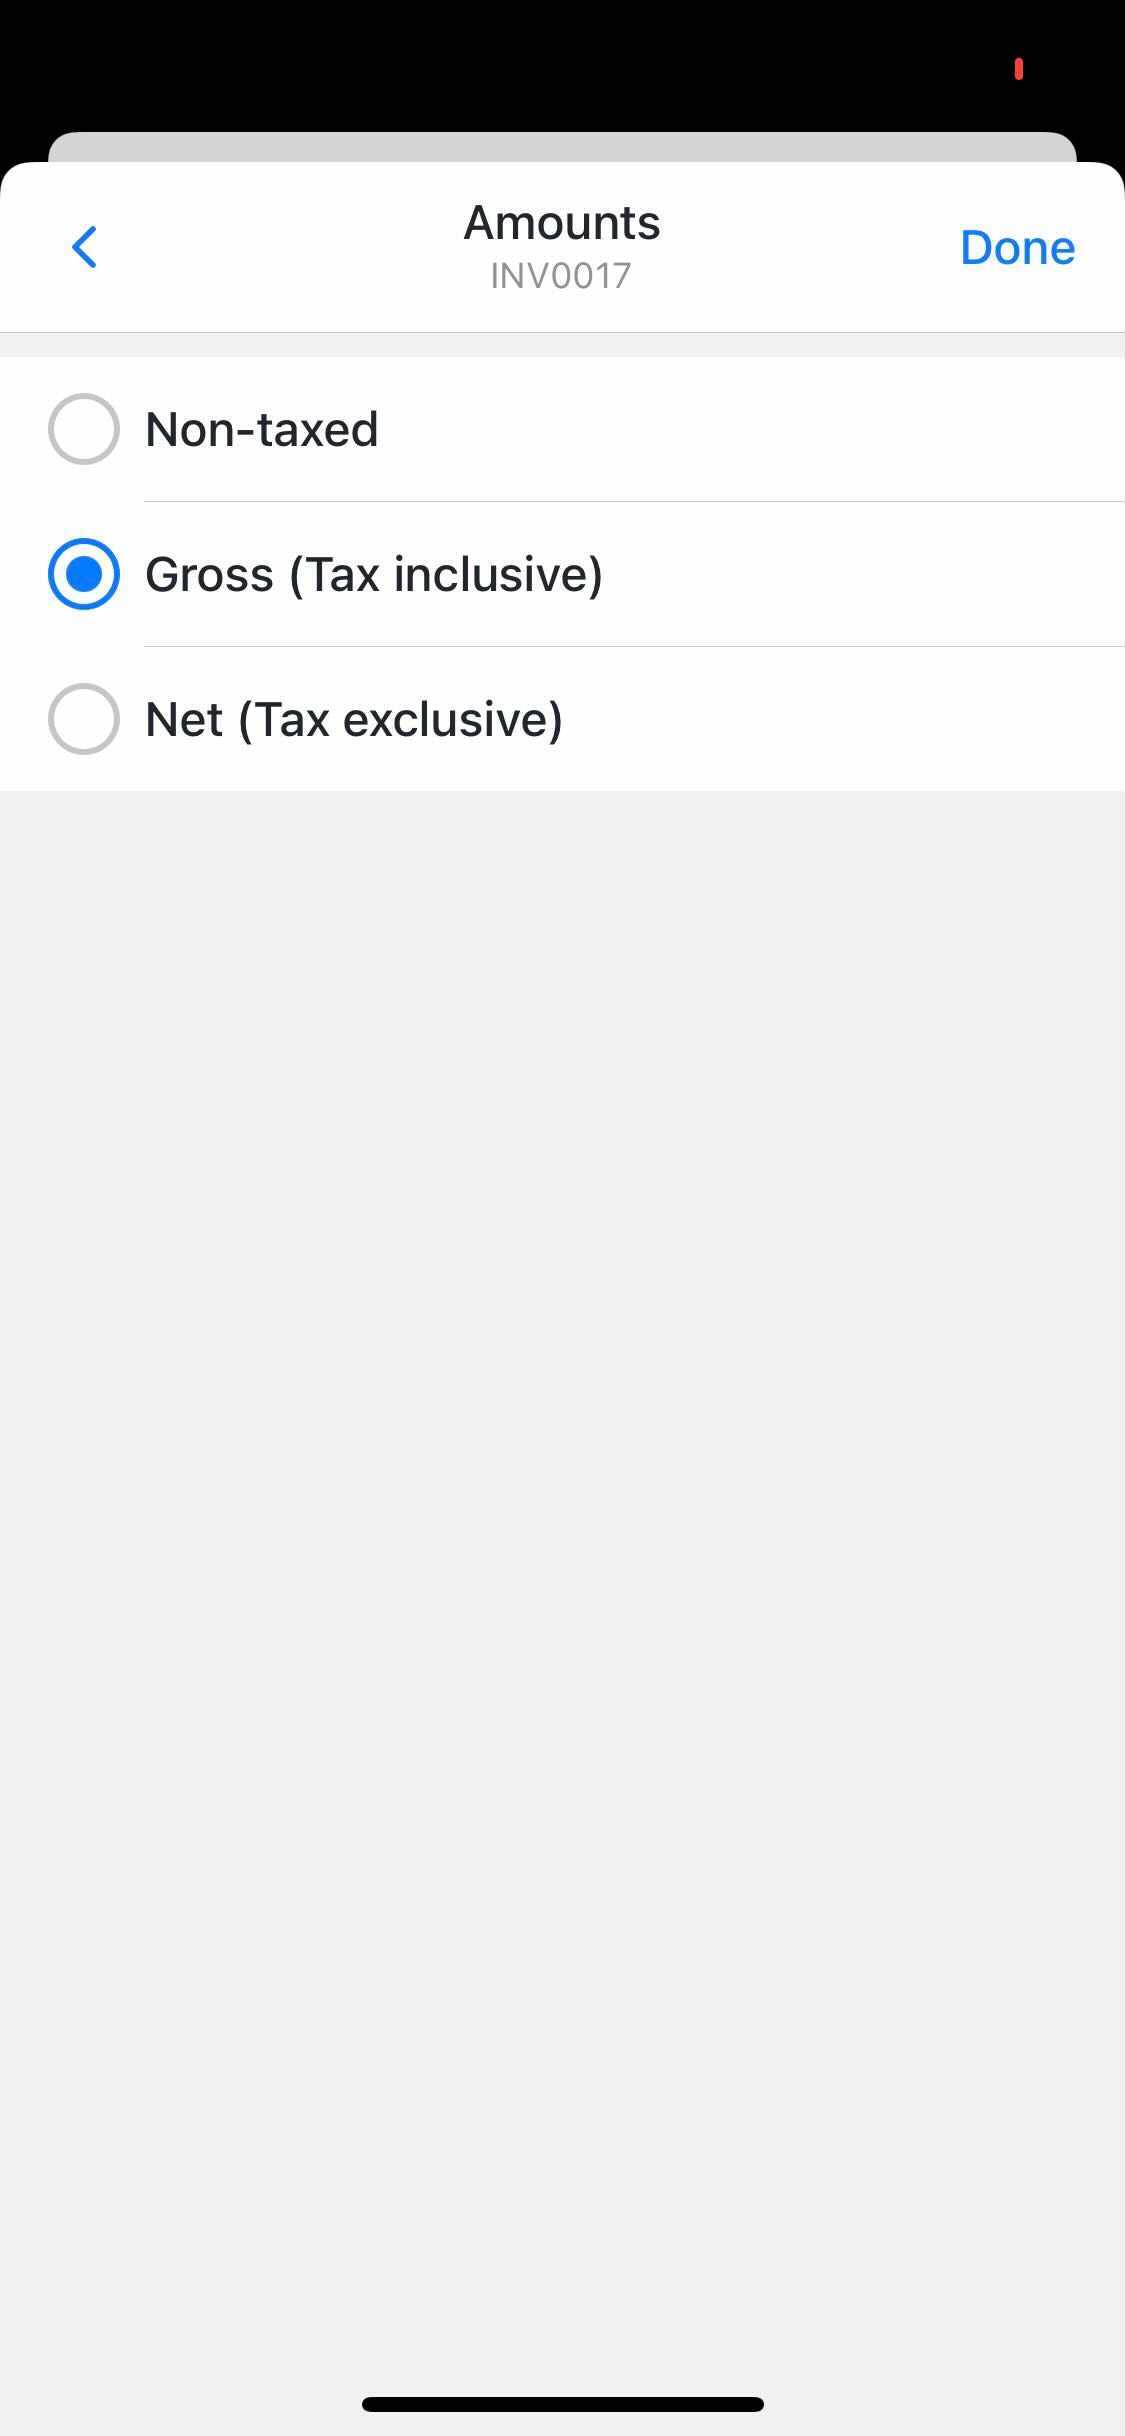
 - Select if the invoice amount is Non-taxed, Gross or Net. The default selection is set on Reckon One tax settings.
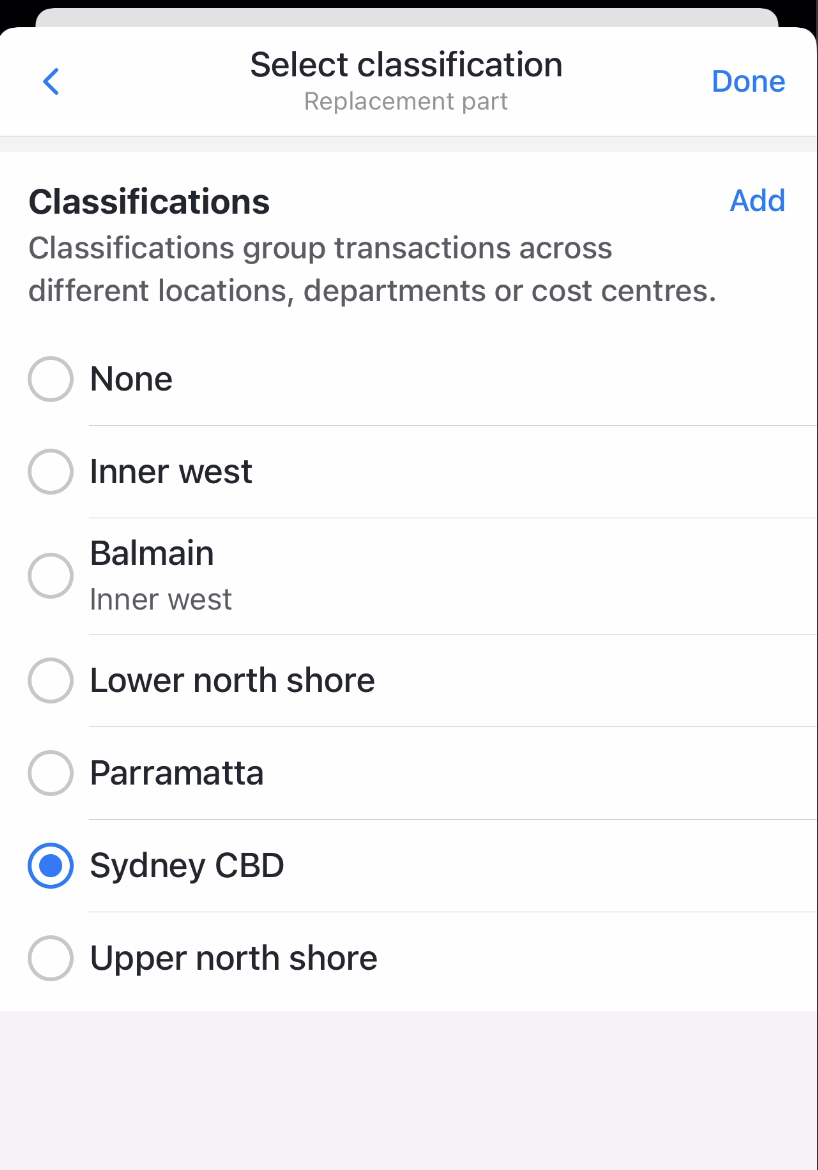
- Tap Classification to select an existing or create a new classification for the Invoice. You can skip classification if you do not use it on your book. You can also assign classification on individual invoice line item. The classification settings can be enabled or disabled from Reckon One classification settings.
- Tap Add items to select the items (product or service type) to be added onto the invoice. Only active items will be listed. You can select multiple items to add to the invoice and edit each item price, quantity and description later. Tap Done after you have selected the invoice items.Type the item name in the Search field to find the item quickly. This is handy if you have a large items list and save you time from scrolling through the list to find a particular item.
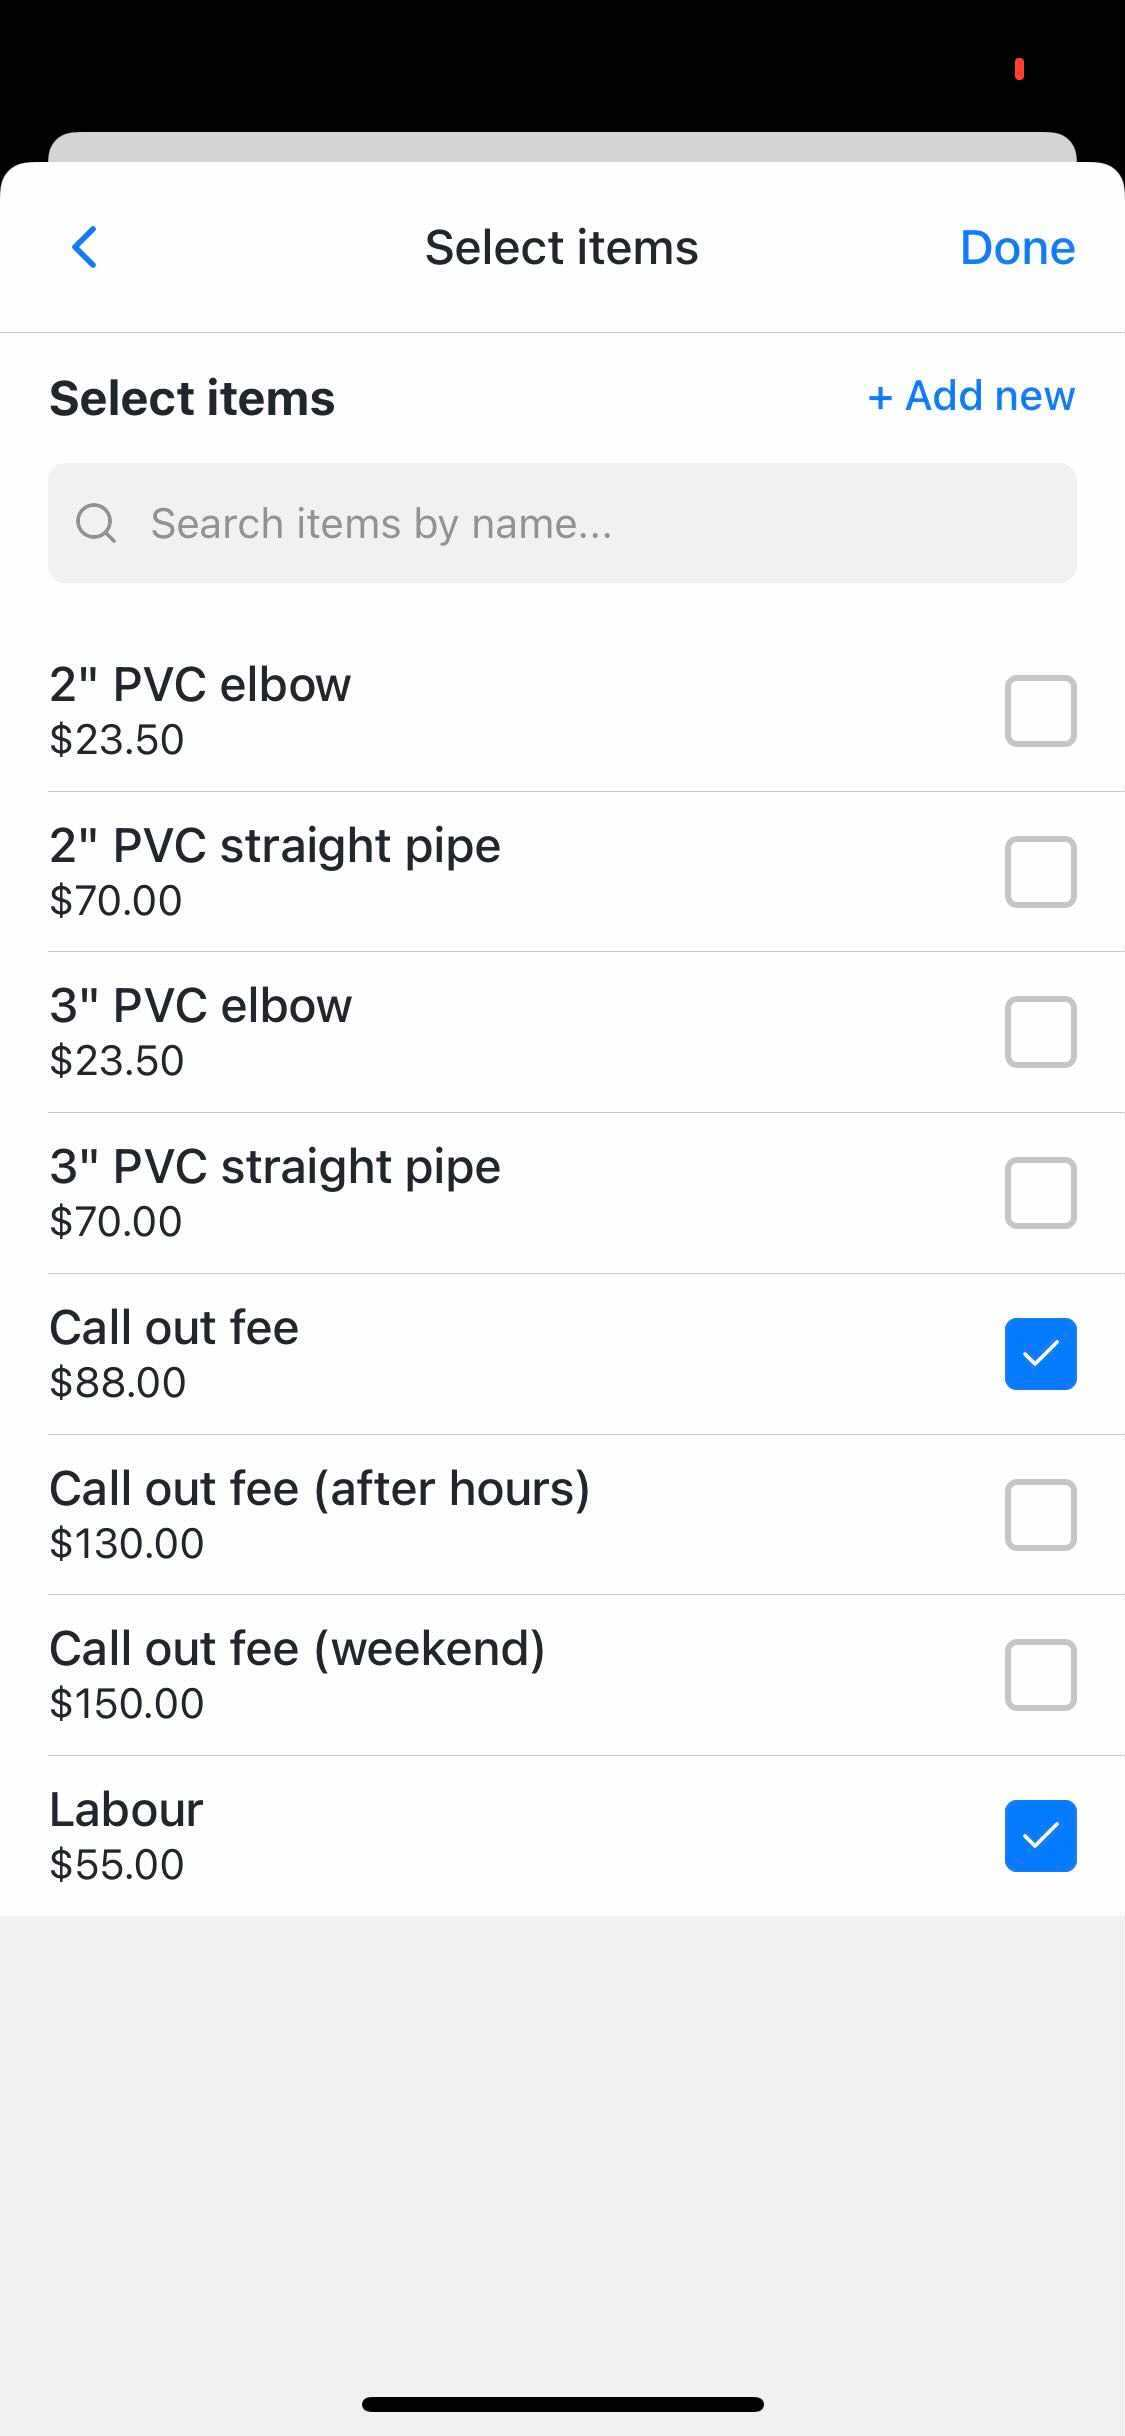 Tap + Add new to create a new item without going to item list in the Manage section.
- To update the item on the invoice, tap on the item on the invoice so bring the Update item details screen. You can edit the price, quantity, discount (dollar or percentage), description, tax code, project, classification and service date.
Tap Done when you have finish editing the item.Service date can be enable and disable from Reckon One Money in settings.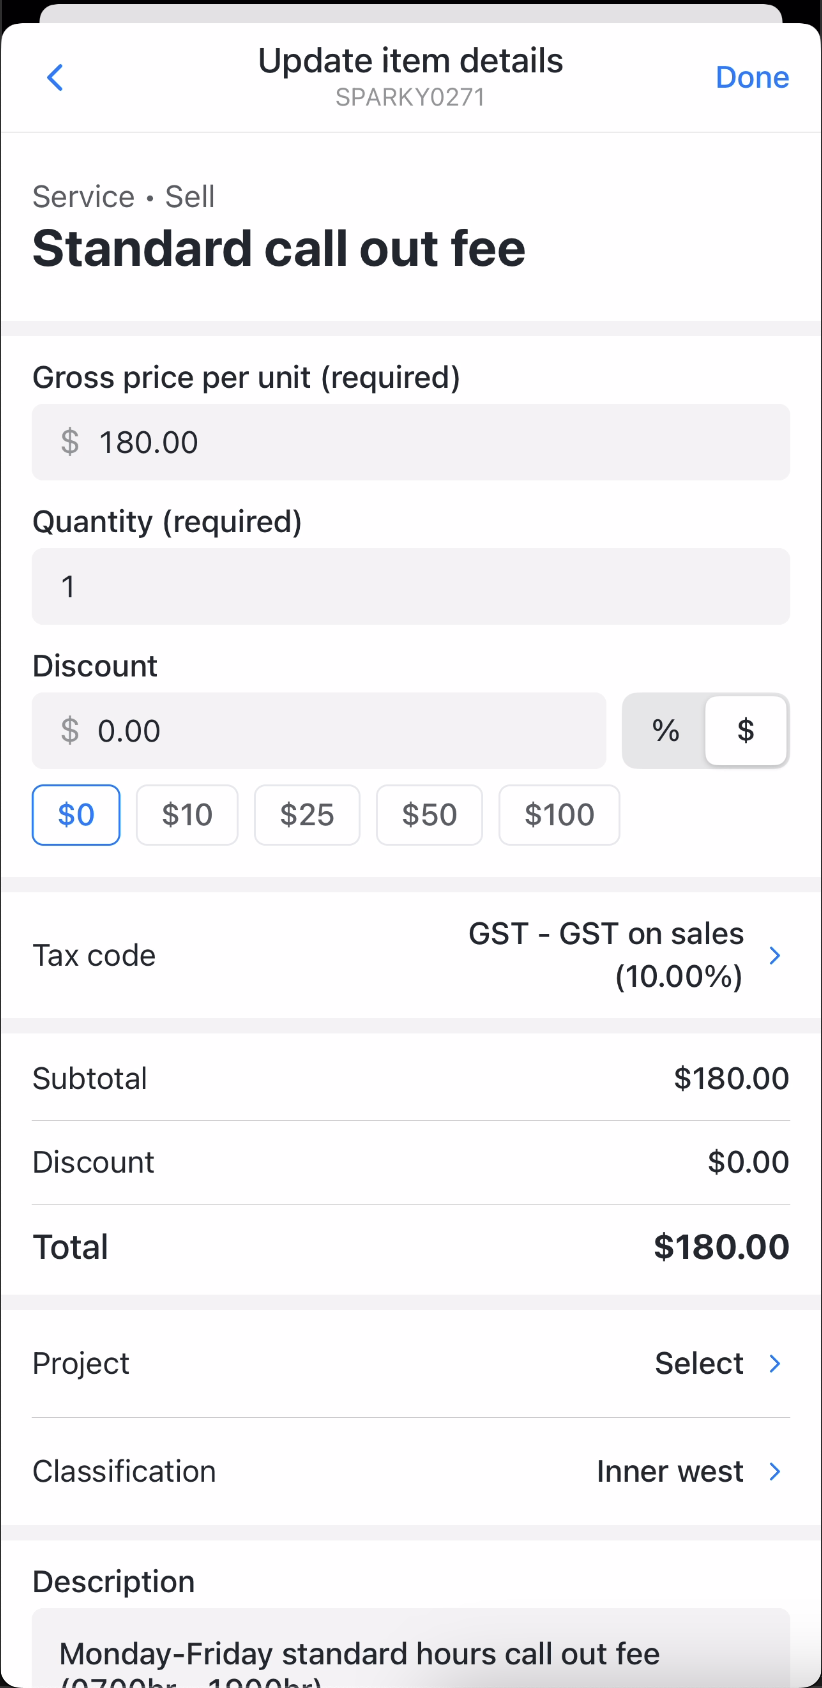
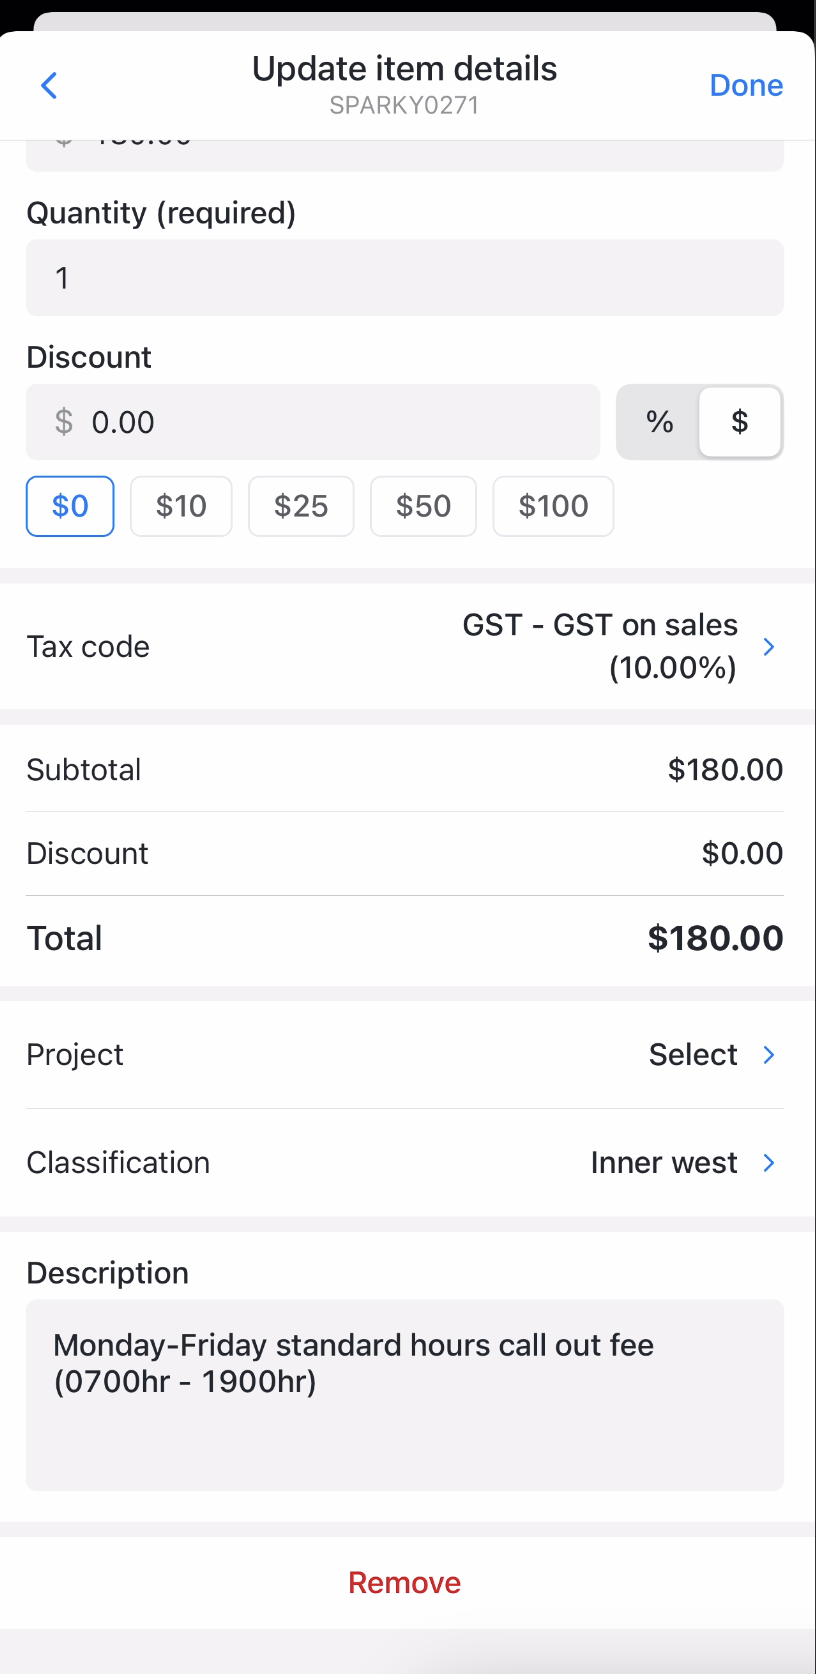
Project will be available if project module is active in your book. You can view existing your active and add new project from the Invoices mobile app.- To remove an item from the invoice, tap the item on the invoice. Scroll to the bottom of Update item details then tap Remove.
- To update the item on the invoice, tap on the item on the invoice so bring the Update item details screen. You can edit the price, quantity, discount (dollar or percentage), description, tax code, project, classification and service date.
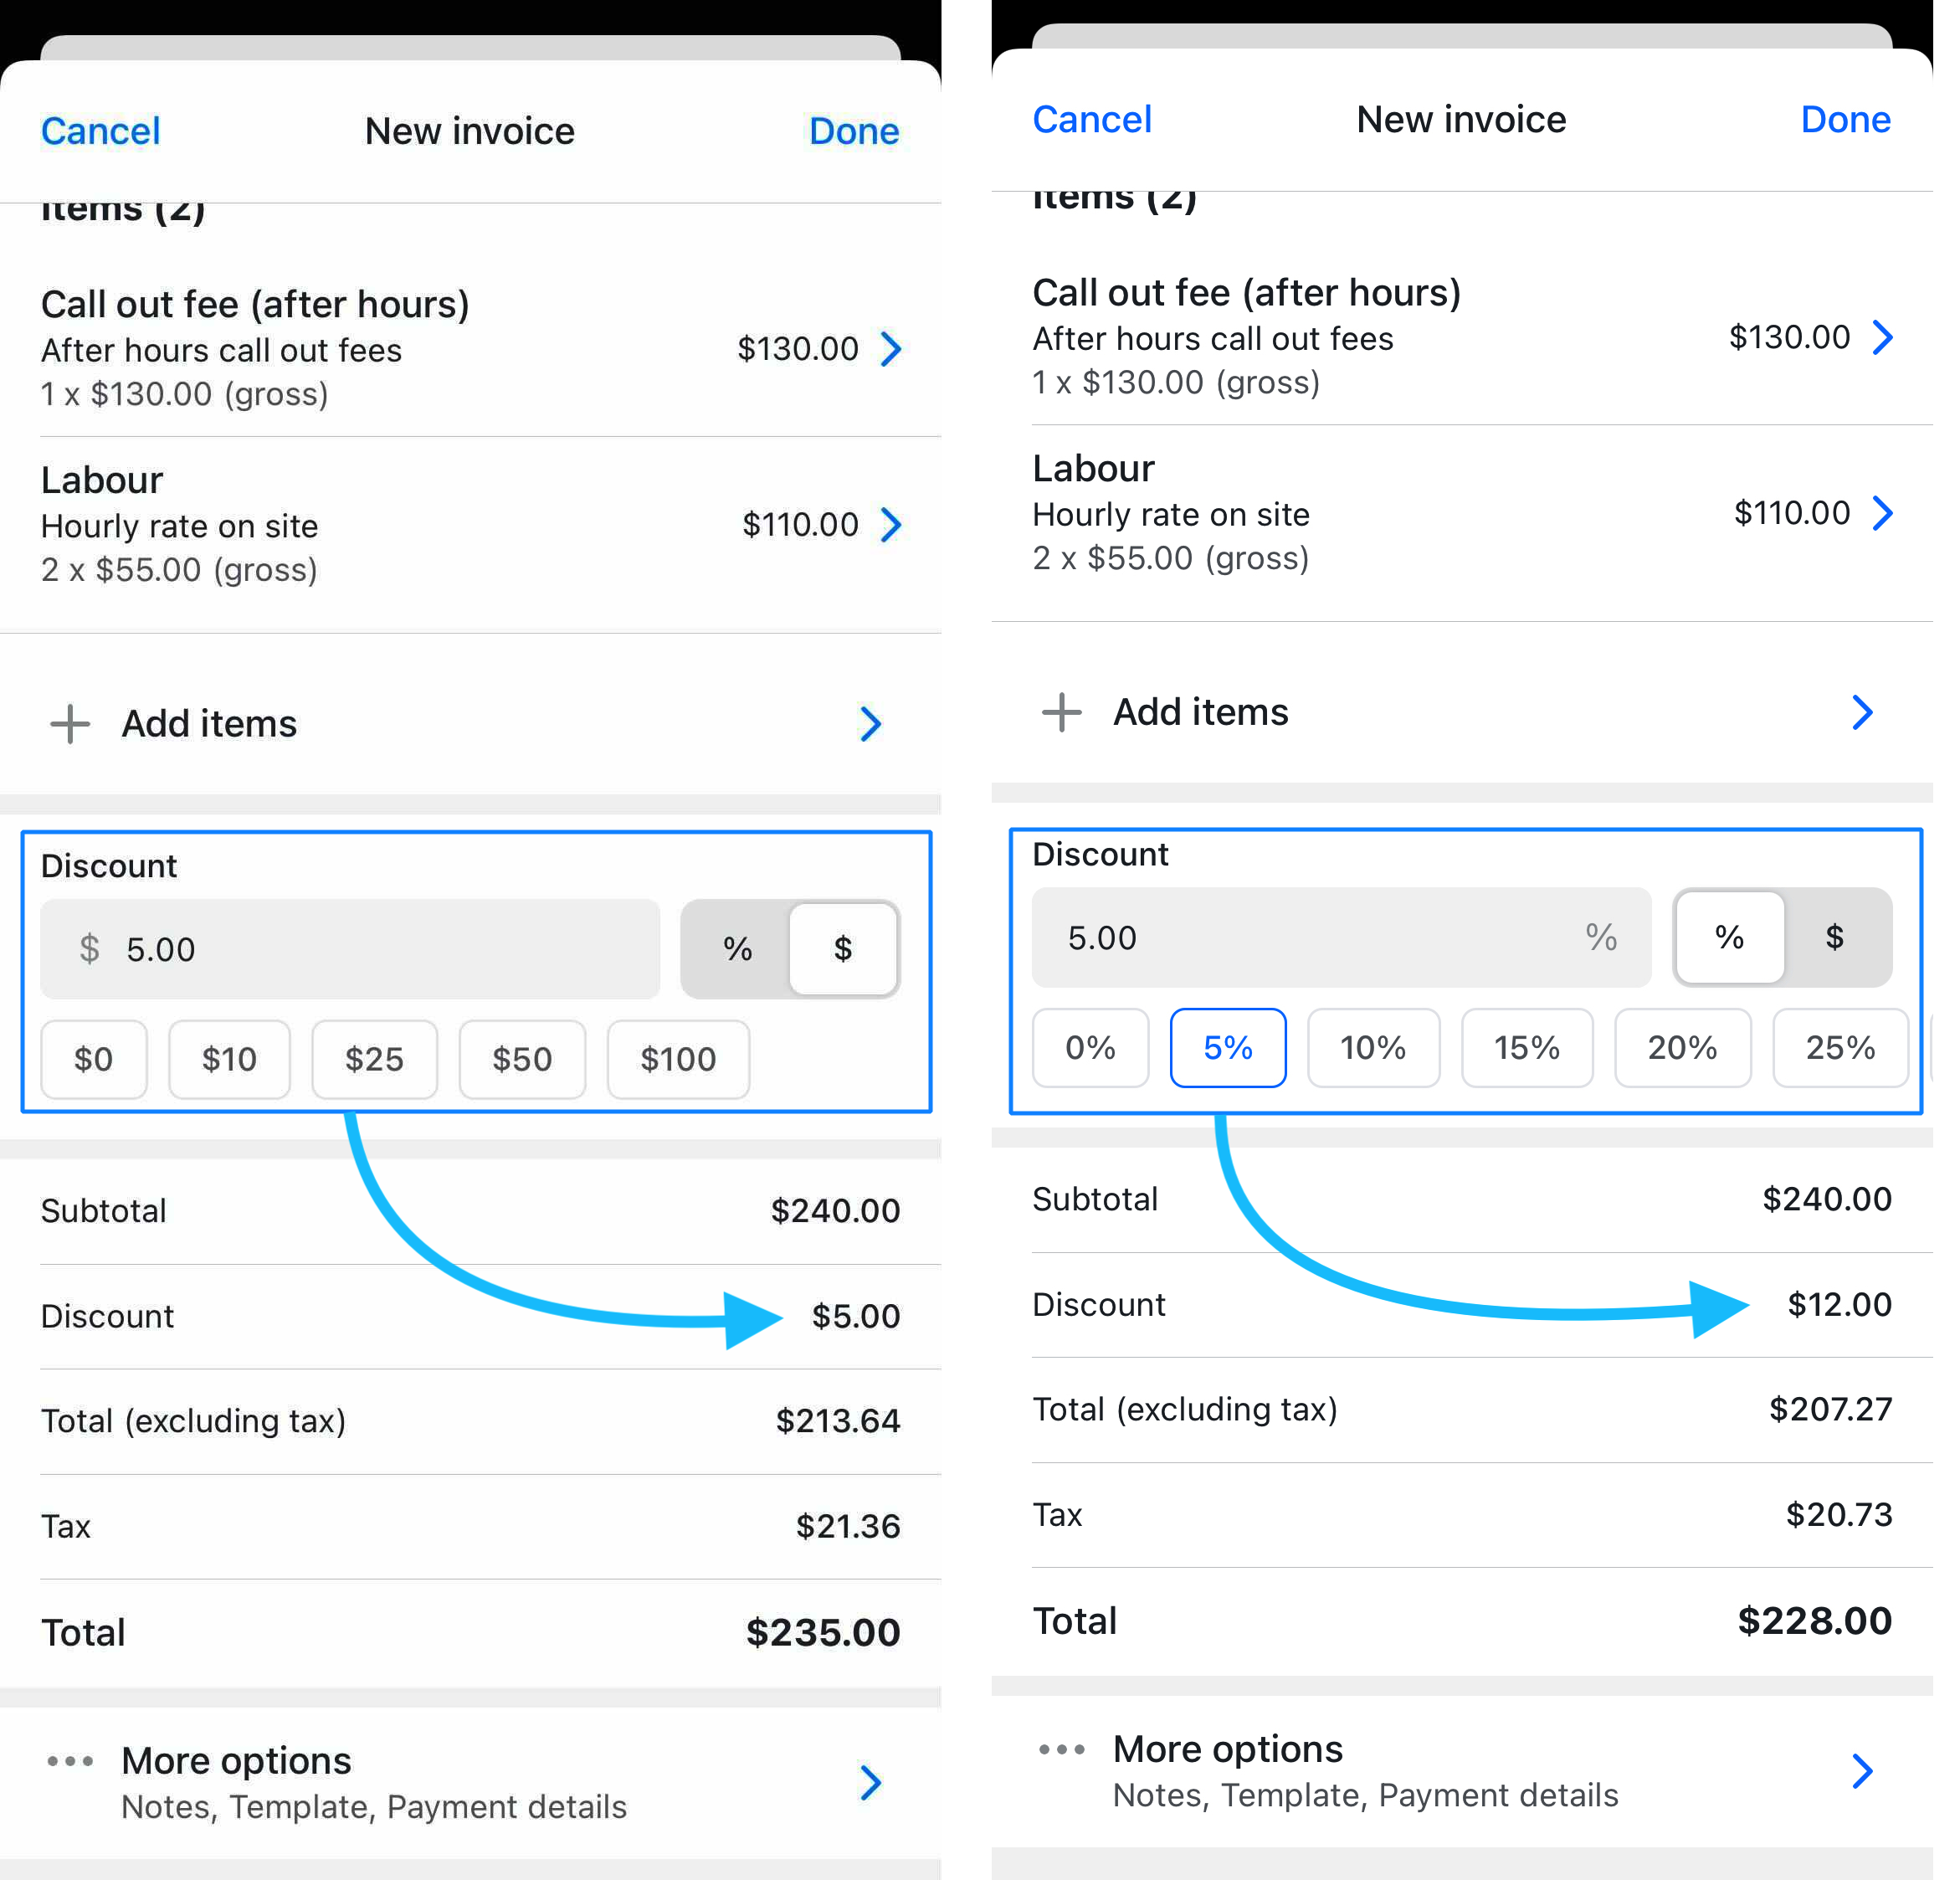
- You can apply Discount on the whole invoice instead of applying on per item basis. Toggle between dollar or percentage and enter a discount amount. The app will automatically calculate the invoice total less the discount amount or percentage.
- Tap More options to reveal more invoice options.
- Tap Change to add a note for your customer. The note will be printed on the invoice PDF.
- Tap Template to select 1 of the 7 default Reckon One invoice templates.You can preview and add a logo to your template.
- Tap Change on Payment details to add payment instructions so your customer knows how to pay the invoice. The payment details will be printed on the invoice PDF.To save time entering the payment details on every invoice, you can add a default invoice payment details content in Reckon One. So all new invoice created will have the default payment details text.
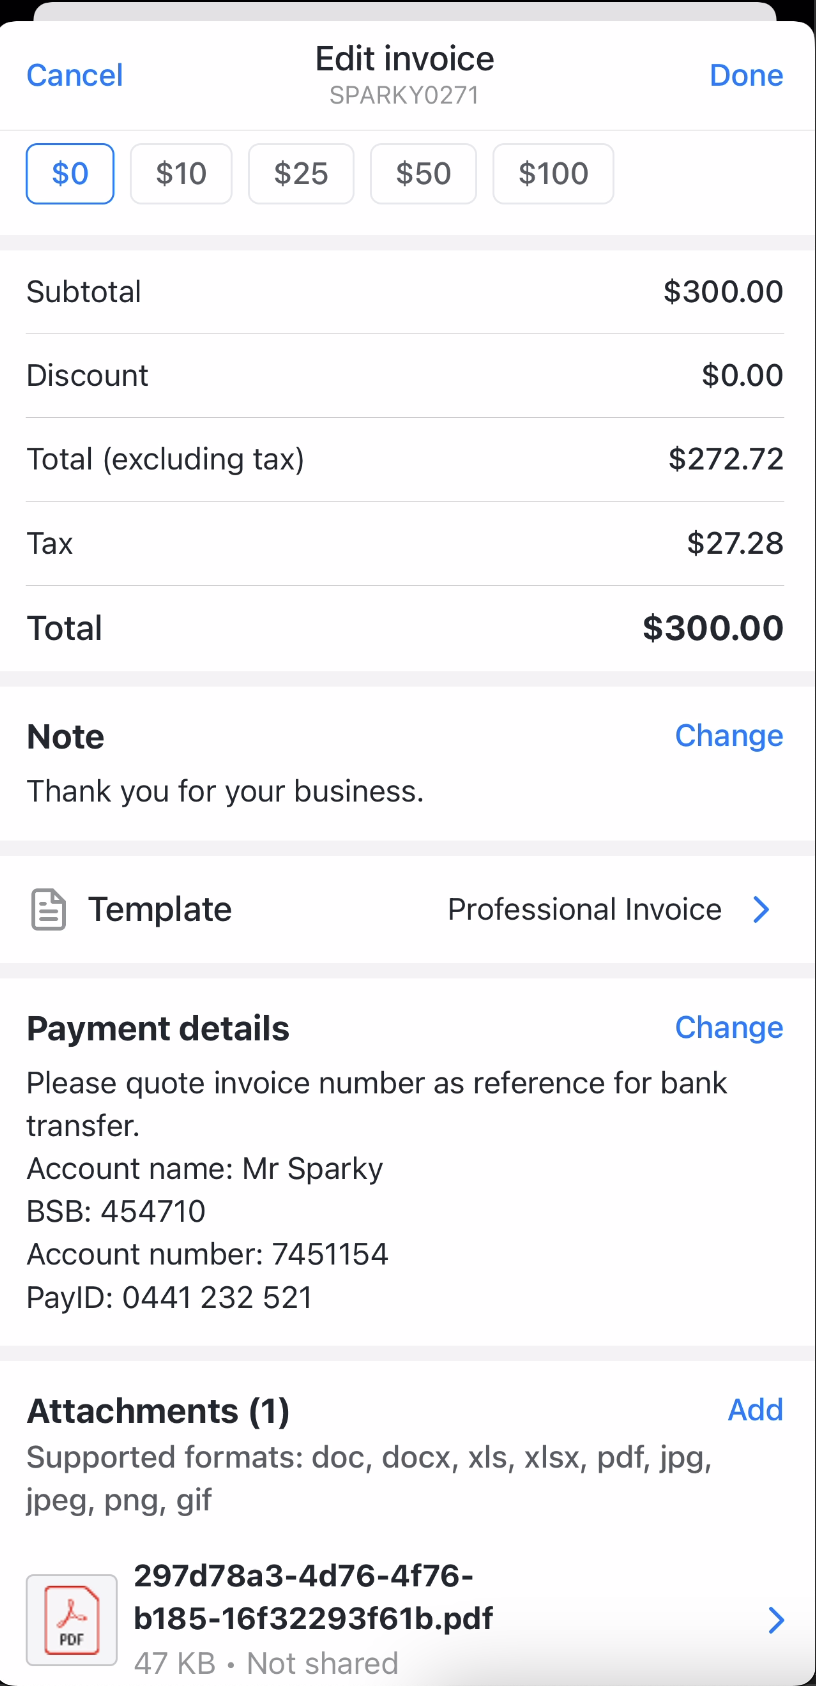
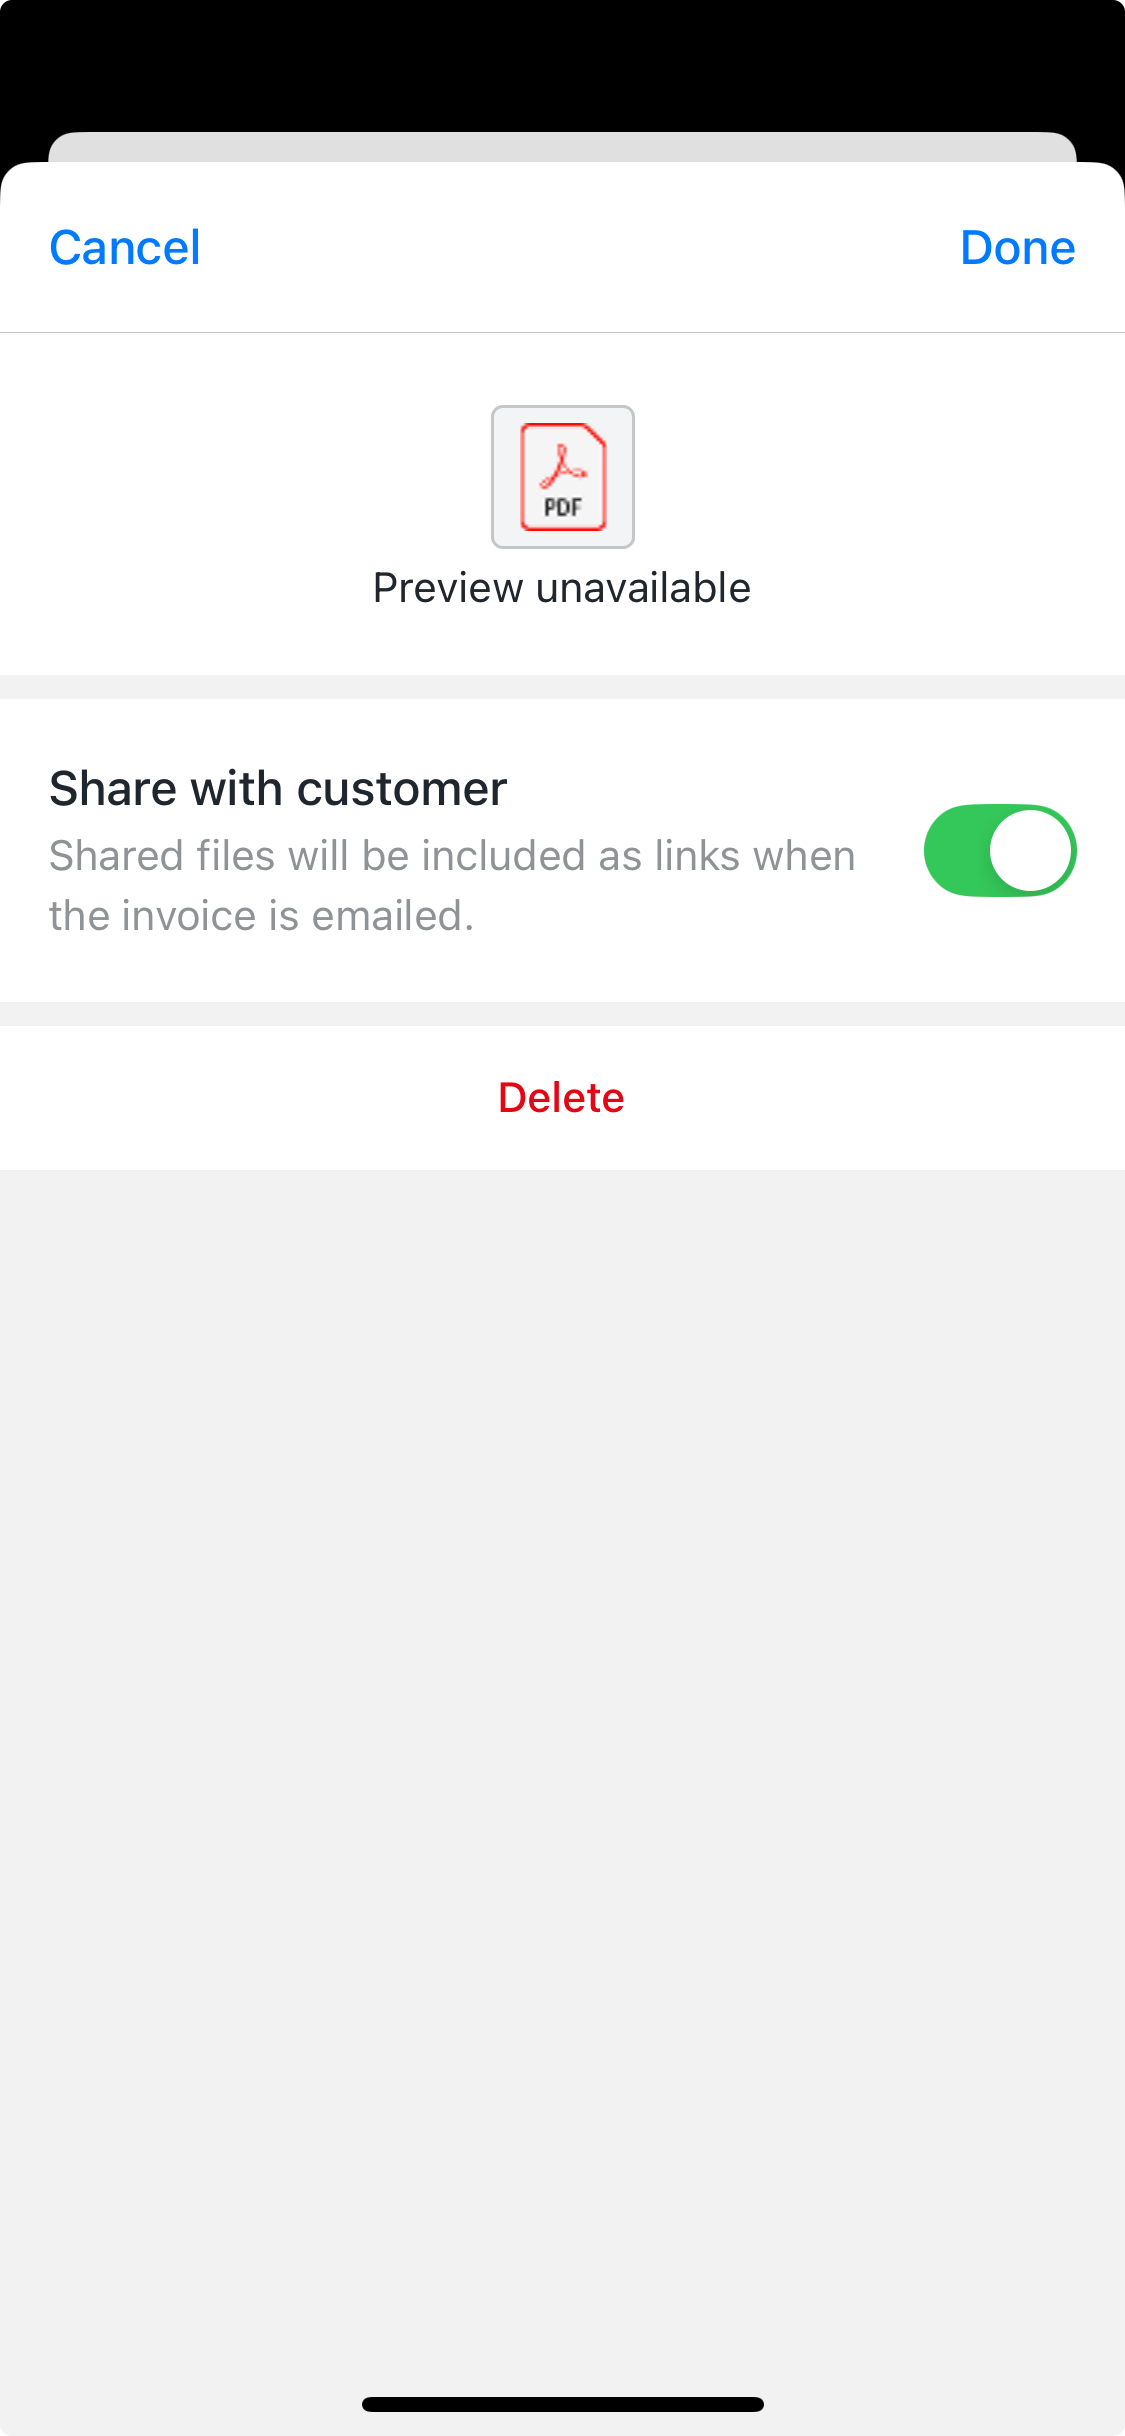
- Tap Add if you want to add attachments to the invoice. Each file must be 25 MB or smaller. The supported file types are doc, docx, xls, xlsx, tiff, pdf, jpg, jpeg, png, gif.To include the attachments when the invoice is emailed, turn on the Share with customer toggle.
- Tap Done on the start of the invoice to save the invoice. Invoices created from the Invoices app will be immediately available in Reckon One.
Need more help?
Ask the Reckon Community at: https://community.reckon.com/categories/reckonone
Or Log a Support Ticket: https://www.reckon.com/au/support/