Table of Contents
Projects
Projects allows a business to manage revenue and costs, review progress and forecast final results at a project level. A project can have criteria based on a start date and end date. Items can be weighted by customers, suppliers or a combination of these. Projects offer another dimension to business reporting. Unlimited number of Projects are available in Reckon One.
Creating a Project
From the vertical navigation menu, expand Day to Day menu and in the Business, section select Projects.
The Projects overview screen will display. Click Add to create a new Project.

Complete the Project name. As the Project is new, the Status is Active. There is also options for Inactive, Cancelled & Completed. You have the option to enter the Start Date and End Date for the Project.
Note: transactions cannot be added to a Project after the End Date.
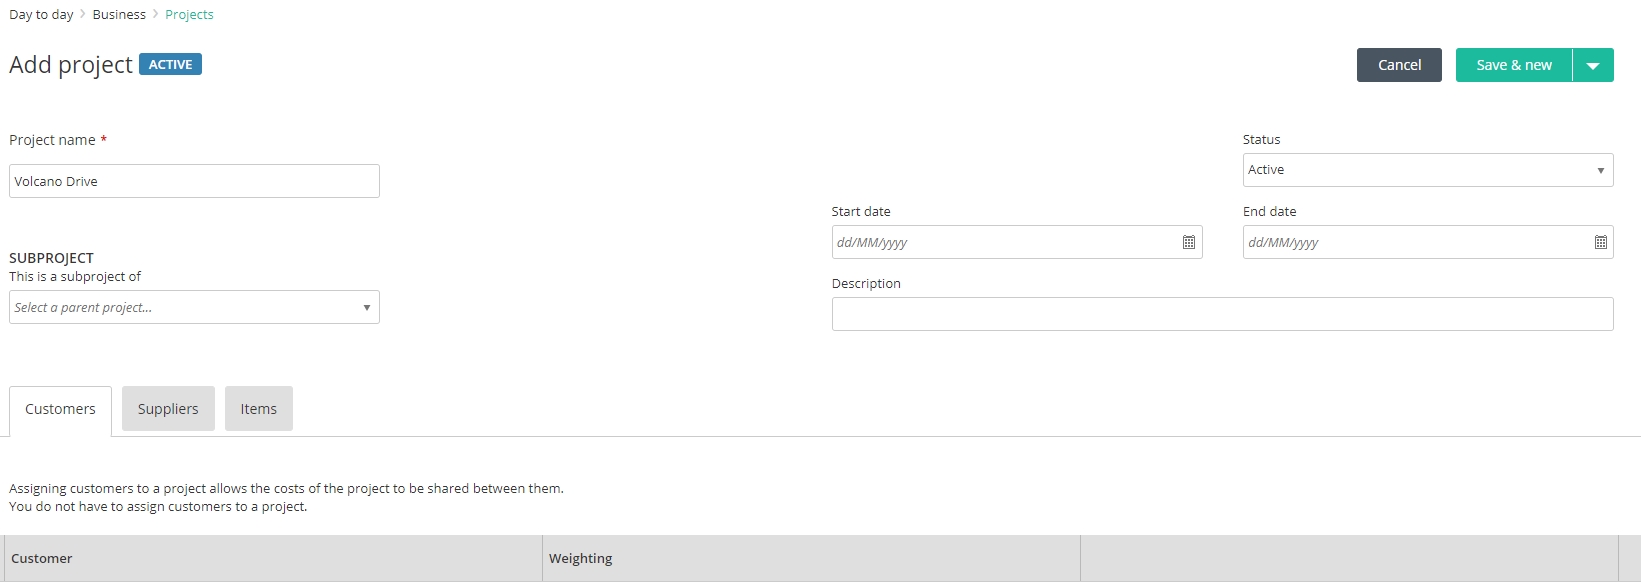
When you have finished, click Save & close.
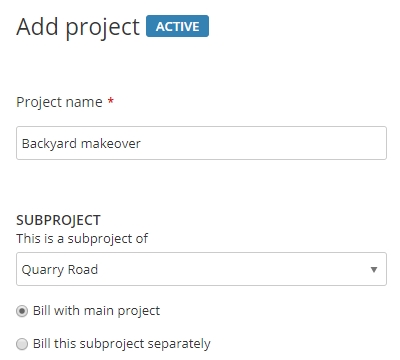
Sub projects.
Projects can also be created as Sub projects. A sub project allows an extra level of reporting for a specific part of a project. You can choose if it is to be billed with the main project or separately. You can use the other features that are available to a Project in a Sub project.
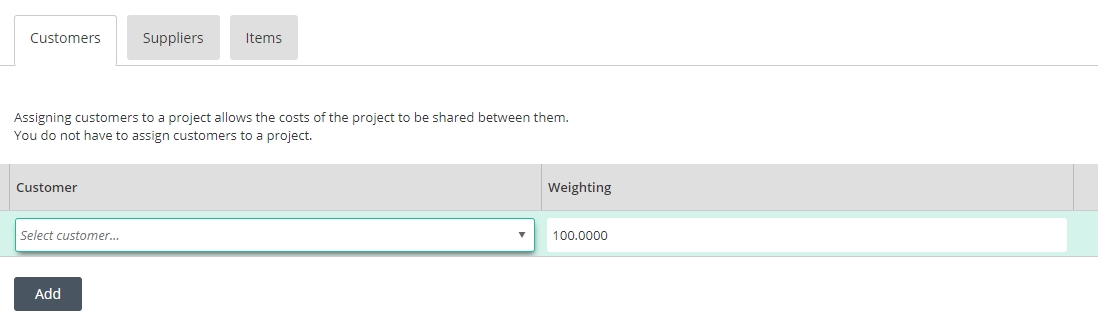
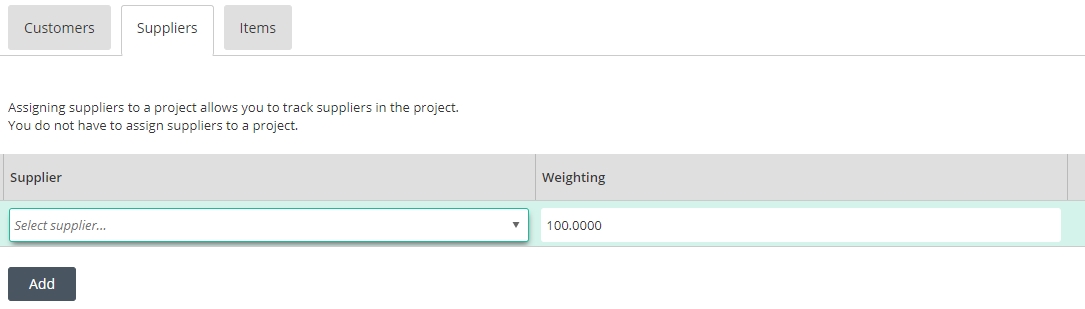
Linking Customers, Suppliers and Items
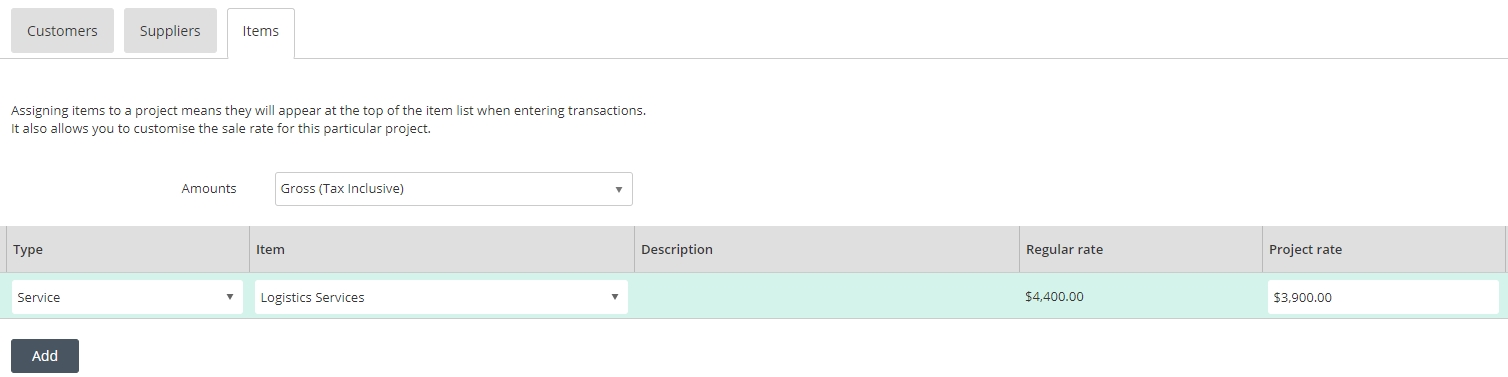
You can assign Customers, to share costs, and Suppliers, to track costs, to a Project. Items can have a Project rate assigned.
Assigning Customers
Assigning Suppliers
Project rate on Items
Using Projects
Now the project has been created, it can be assigned to Customer Transactions (Estimates, Invoices, Customer Adjustment Notes and Receive Money), Supplier transactions (Bills, Supplier Adjustment Notes and Make Payment), Bank feeds including importing and Journals via the Projects drop down list.
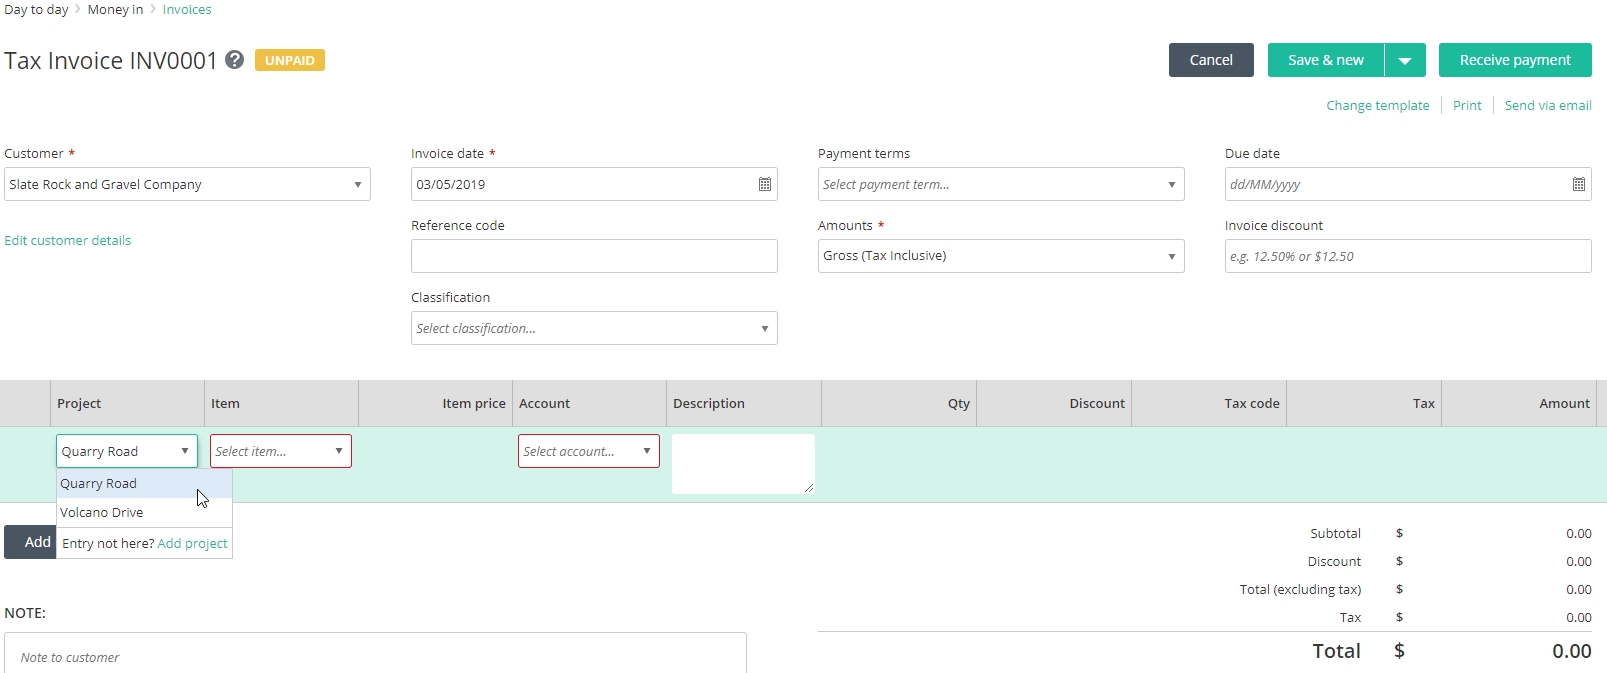
Invoice
To add the Project to the Invoice, select the Project from the drop down list.
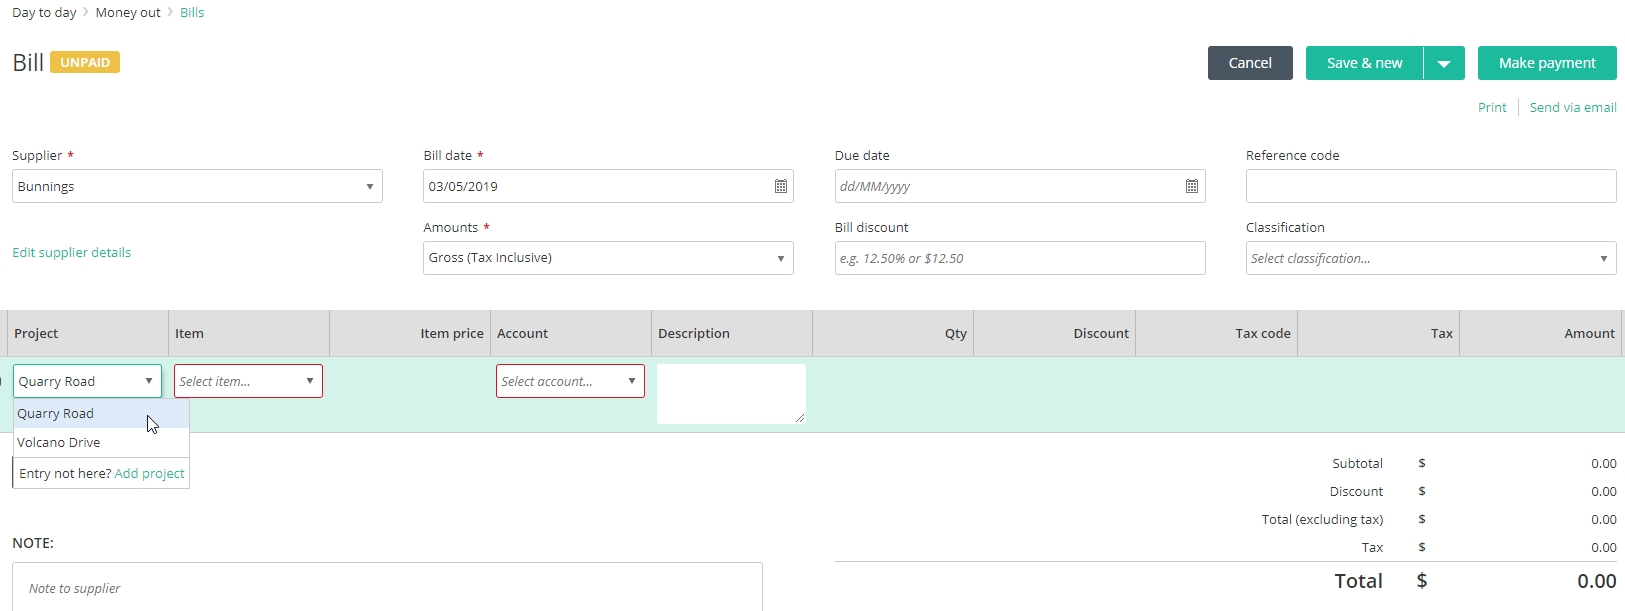
Bills
To add the Project to the Bill, select the Project from the drop down list.
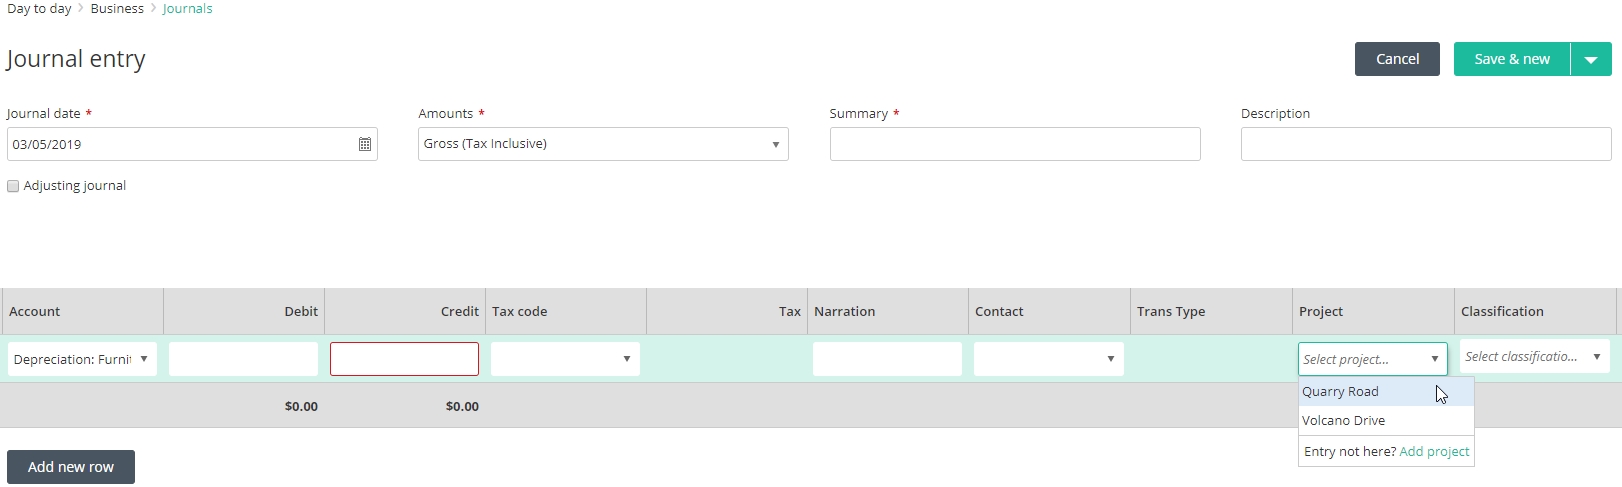
Journals
To add the Project to a journal, select the Project from the drop down list.
Bank Feeds
If you are using Bank Feeds or importing bank statements, Projects are also assigned via the drop down list.
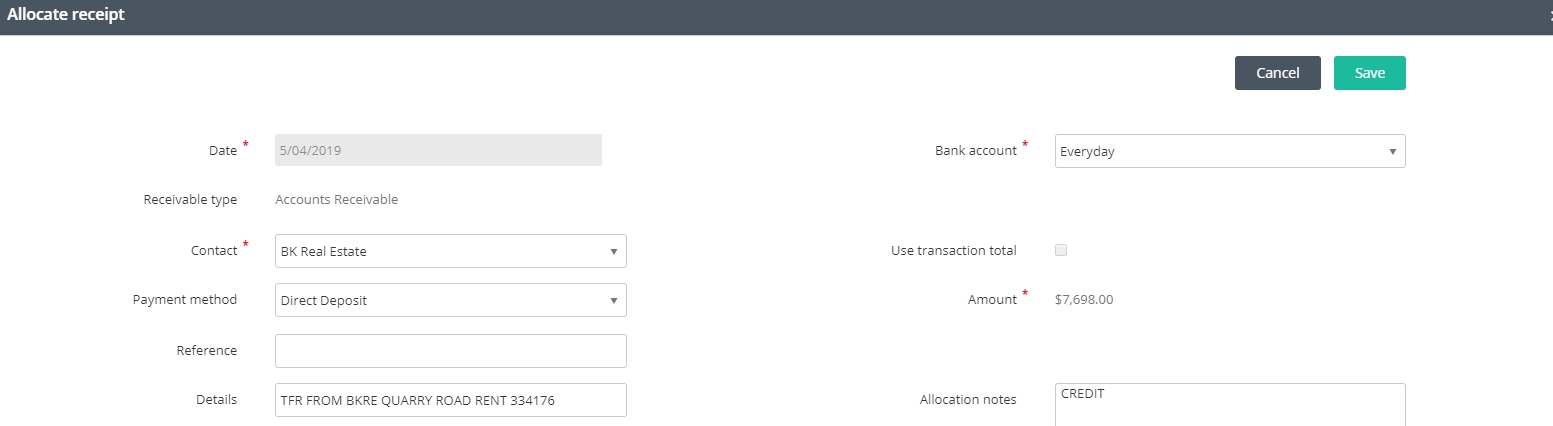
Money In
Select Allocate receipt, then Allocate detailed receipt
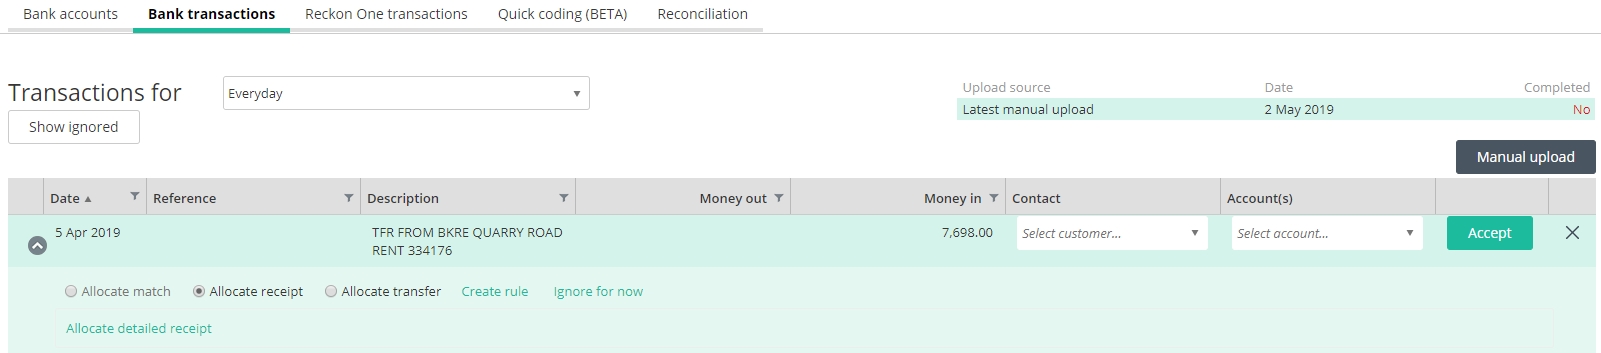
Select the Contact and Payment method
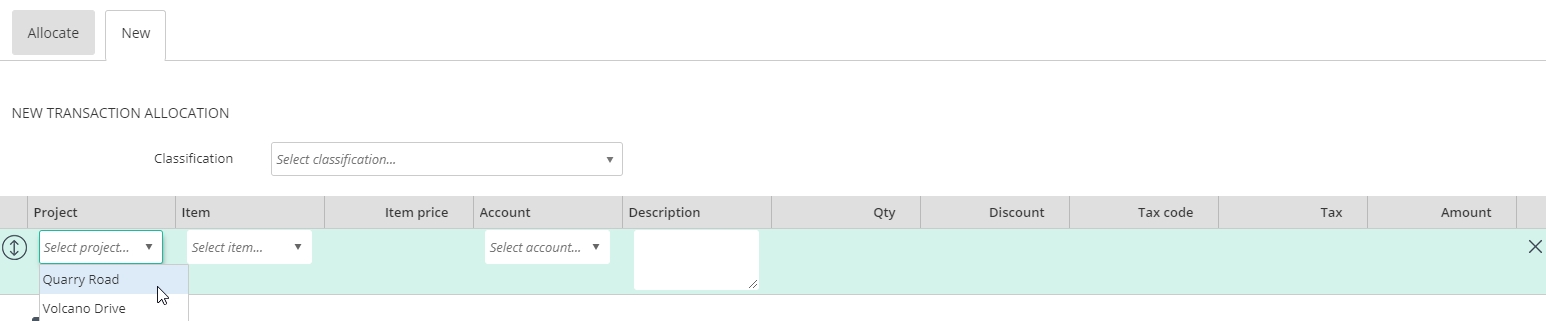
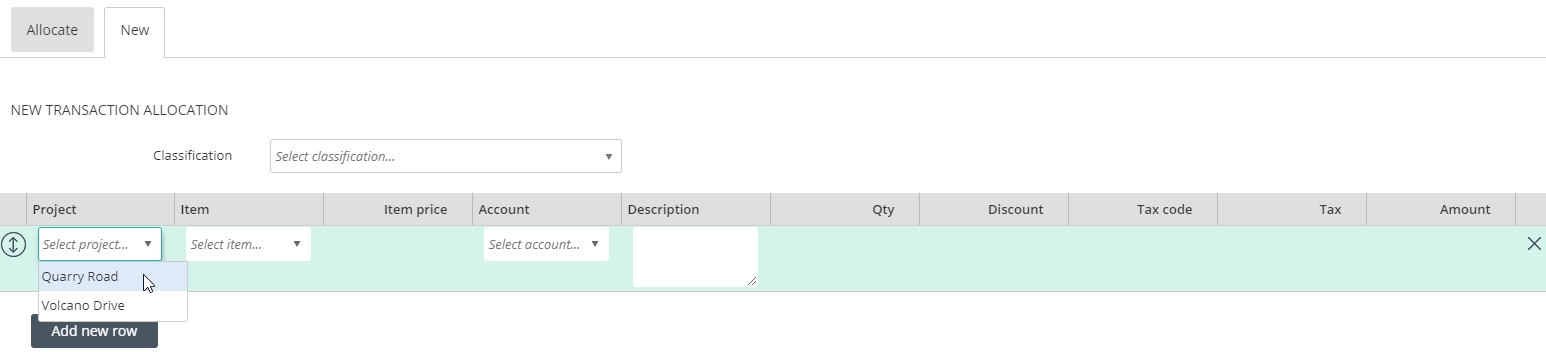
Click the New tab, then select the Project from the drop-down list. Complete the rest of the fields as required.
Tip: if the bank transaction is allocating against an Invoice, you just need to select the Invoice from the Allocate tab. The Project was selected when the Invoice was created.
Click Save
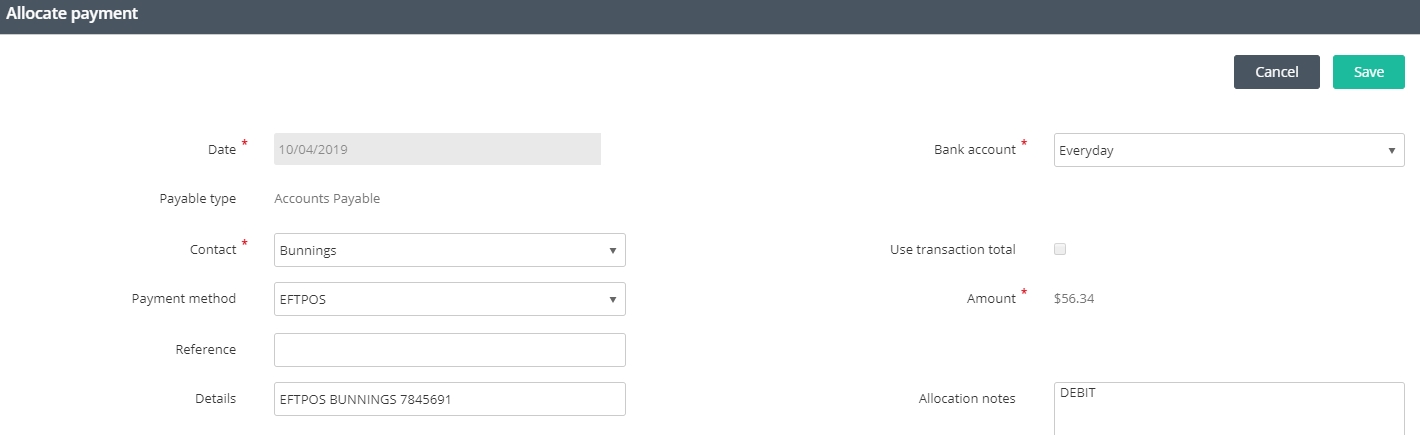
Money Out
Select Allocate payment, then Allocate detailed payment

Select the Contact and Payment method
Click the New tab, then select the Project from the drop down list. Complete the rest of the fields as required.
Note: if the bank transaction is allocating against a Bill, you just need to select the Bill from the Allocate tab. The Project was selected when the Bill was created.
Click Save
Projects Overview
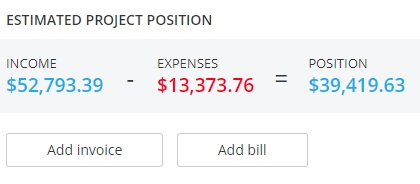
As transactions are recorded against the project, you can view the estimated project position at any time by viewing the project. Click on the relevant project from the Projects overview to open it and view.

Invoices and bills can be entered directly from the project by clicking on Add invoice or Add bill. Note: Requires the Invoices module to be active.
Reports
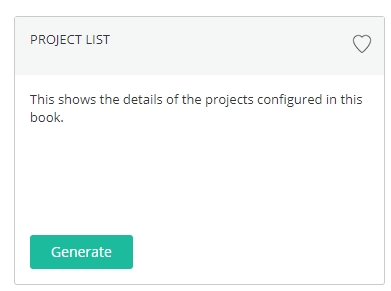
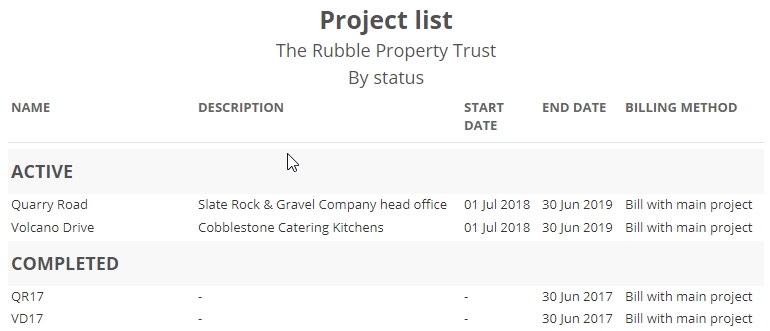
Project List
The Project List report is a great starting point as it can lists all projects, or filter for selected projects by status. When the report is generated you can view items, customers and suppliers that have been assigned to each project and what billing method has been chosen.
To run a Project List report, go to the Reporting in the side navigation.
Select Lists then click on Generate under Project List.

Click on Show more options to enable more filtering. Click Show fewer options to collapse the menu.
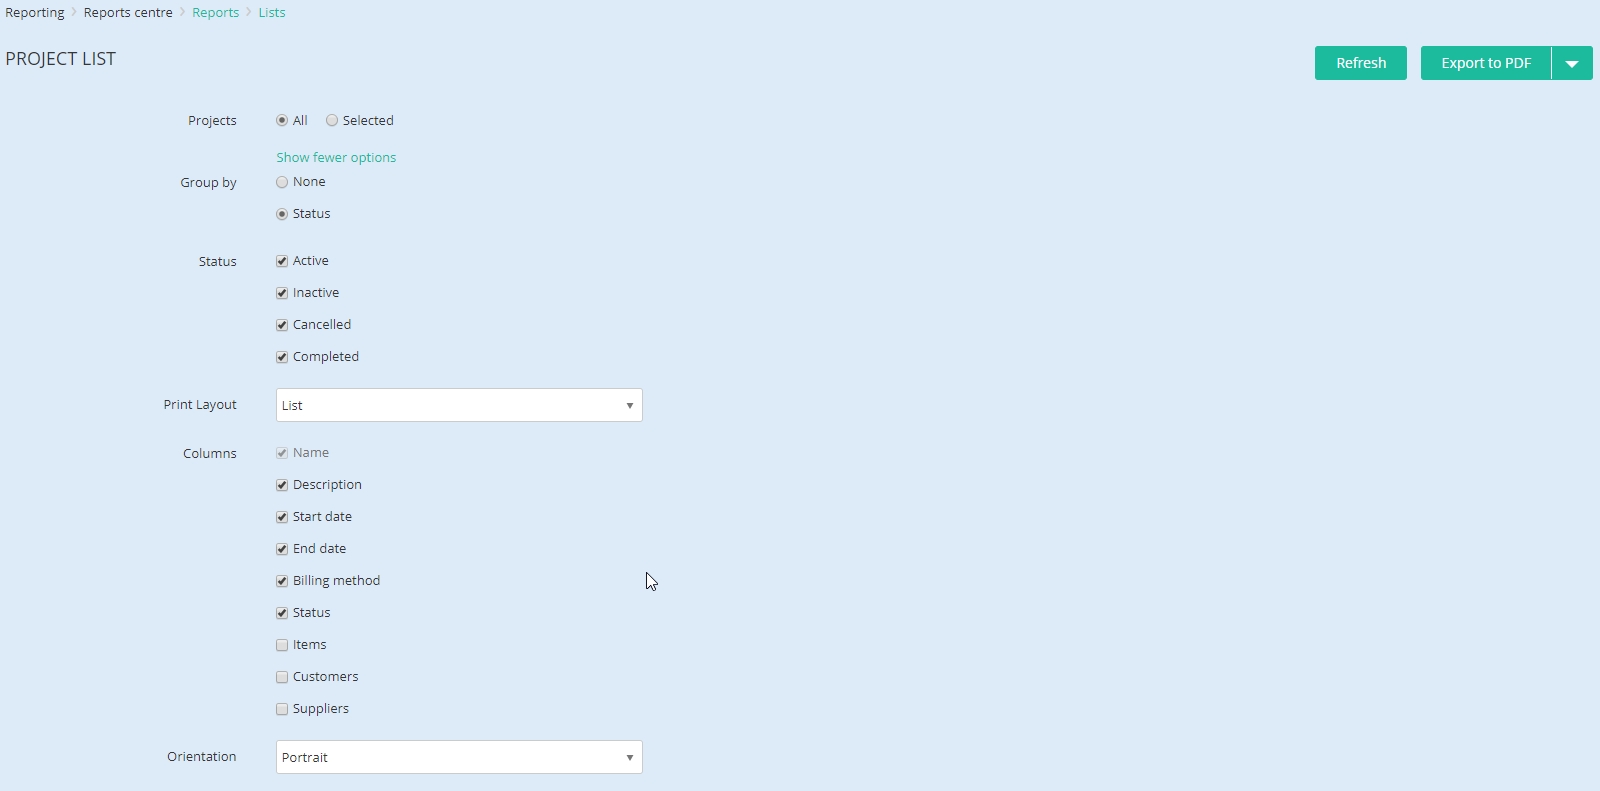
Click Refresh to display the report with new options.
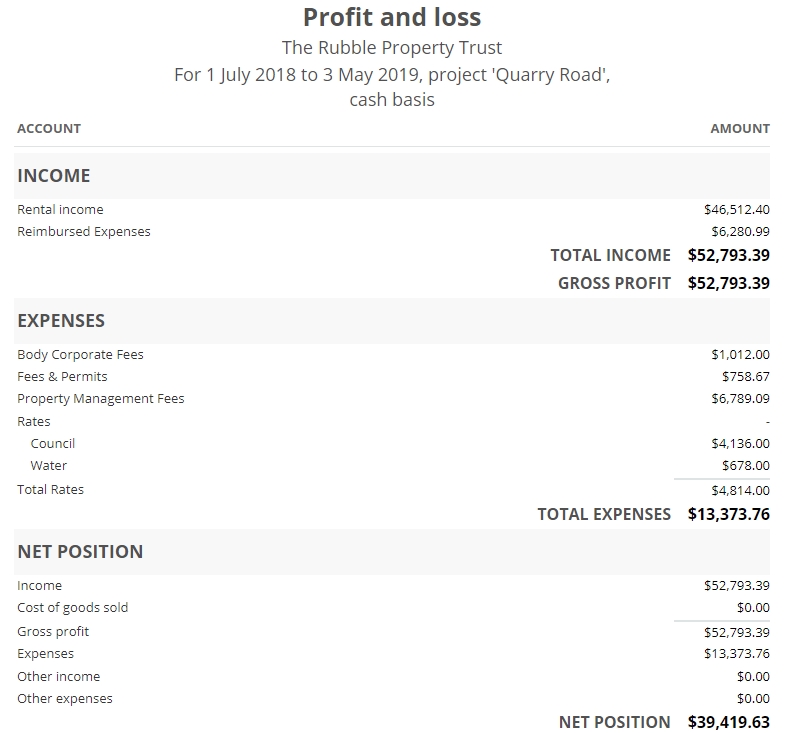
Profit and Loss report
You may also generate a Profit and loss report by a single Project and/or multiple Projects on the one report. After generating the Profit and Loss report, click Show more options, then select Projects: All or Selected, and choose the Project. Click Show fewer options to collapse the menu.
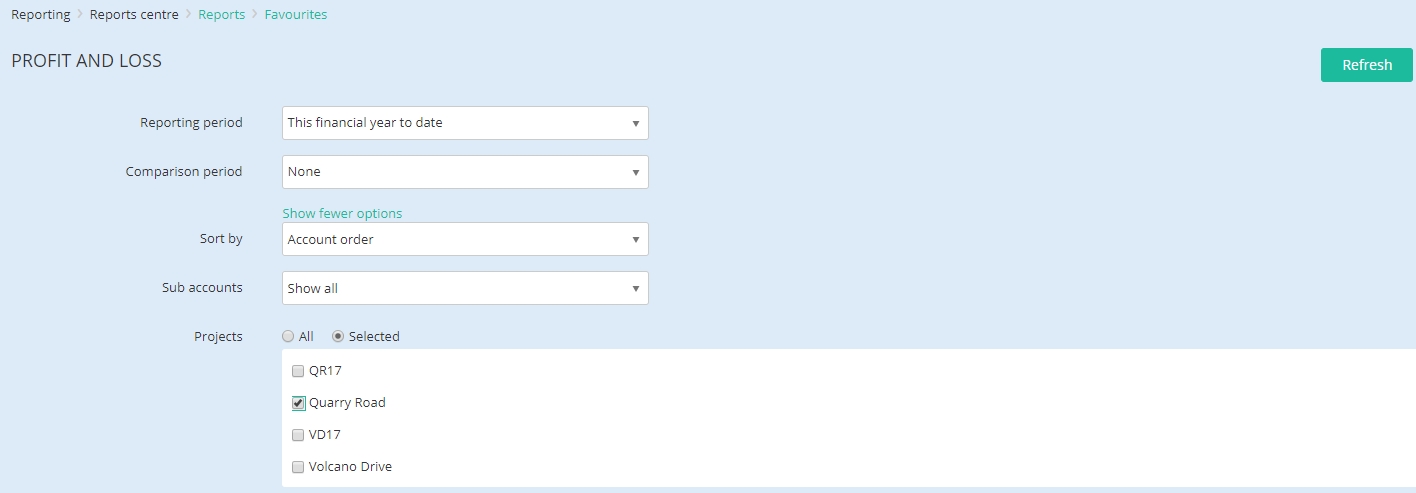
Click Refresh to display the report with selected Project.
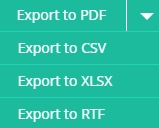
To download or print the report, choose Export to PDF from the drop down menu. You also have the choice of other export formats.
Need more help?
Ask the Reckon Community at: https://community.reckon.com/categories/reckonone
Or Log a Support Ticket: https://www.reckon.com/au/support/