Table of Contents
Template Settings
Overview
The below Settings will be visible based on the module you have enabled in Reckon One.
Estimates
Learn about estimates templates in Reckon One.
Invoices
Learn about invoice templates in Reckon One.
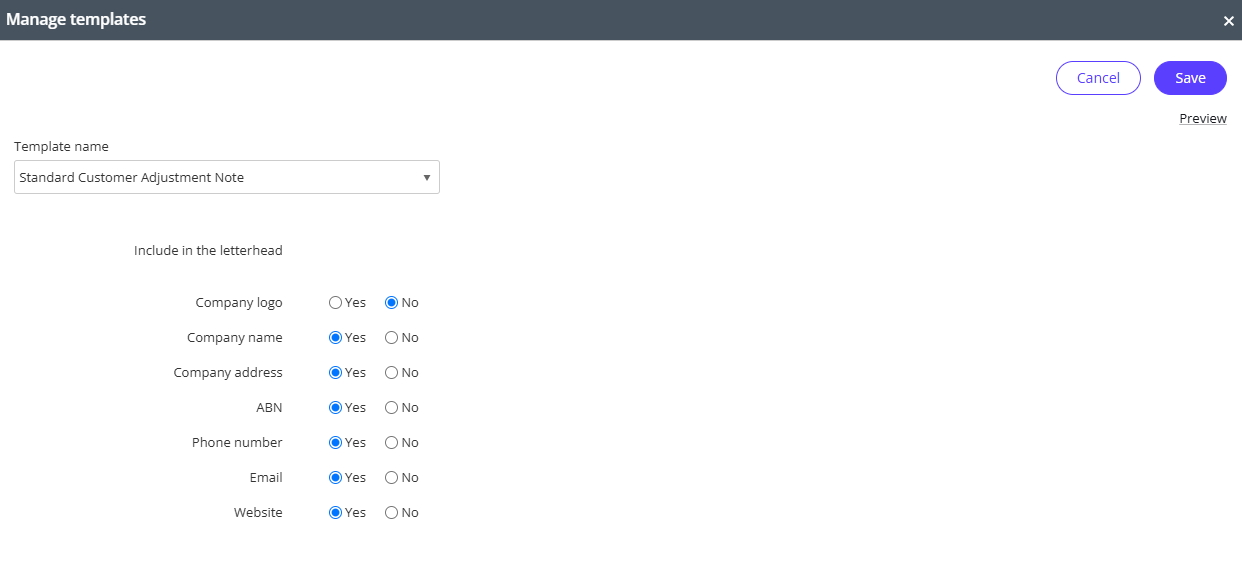
Customer Adjustment Notes
To access the list of templates and modify the settings, you will need to:
- Go to Settings > Day to Day > Money In
- Expand Customer Adjustment Notes > Manage templates (under Default template drop-down menu)

There are two types of templates available:
- Professional Customer adjustment note
- Standard Customer adjustment note
To customise what field(s) will show in the printed/emailed Customer Adjustment Note, choose Yes / No option for the available fields.
Header
You can add company logo, your business information etc. over here.
If details do not appear on your Customer Adjustment Notes, such as your business phone number, check to make sure the option is set to Yes, and that you have entered all relevant contact details under your book settings. Go to Settings > Book settings > Contact details.
Preview your changes
To see how your template will look like:
- Save the template changes
- Click on Manage templates
- Click the Preview link

Bills
Learn about bill templates.
Supplier Adjustment Notes
To access the list of templates and modify the settings, you will need to:
- Go to Settings > Day to Day > Money out
- Expand Supplier Adjustment Notes > Manage templates (under Default template drop-down menu)
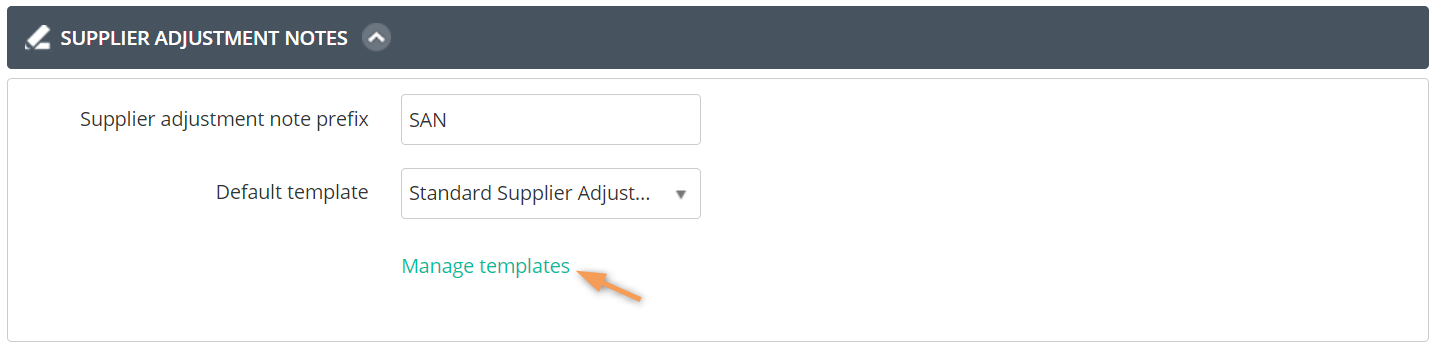
There is only one type of templates available at the moment:
- Standard Supplier Adjustment Notes
To customise what field(s) will show in the printed/emailed Supplier Adjustment Notes, choose Yes / No option for the available fields.
Header
You can change the name, add company logo, your business information etc. here.
If details do not appear on your Supplier Adjustment Note, such as your business phone number, check to make sure the option is set to Yes, and that you have entered all relevant contact details under your book settings. Go to Settings > Book settings > Contact details.

Preview your changes
To see how your template will look like:
- Save the template changes
- Click on Manage templates
- Click the Preview link
Employee Expenses
To access the list of templates and modify the settings, you will need to:
- Go to Settings > Day to Day > Employee expenses
- Expand Employee expenses > Manage templates (under Default template drop-down menu)
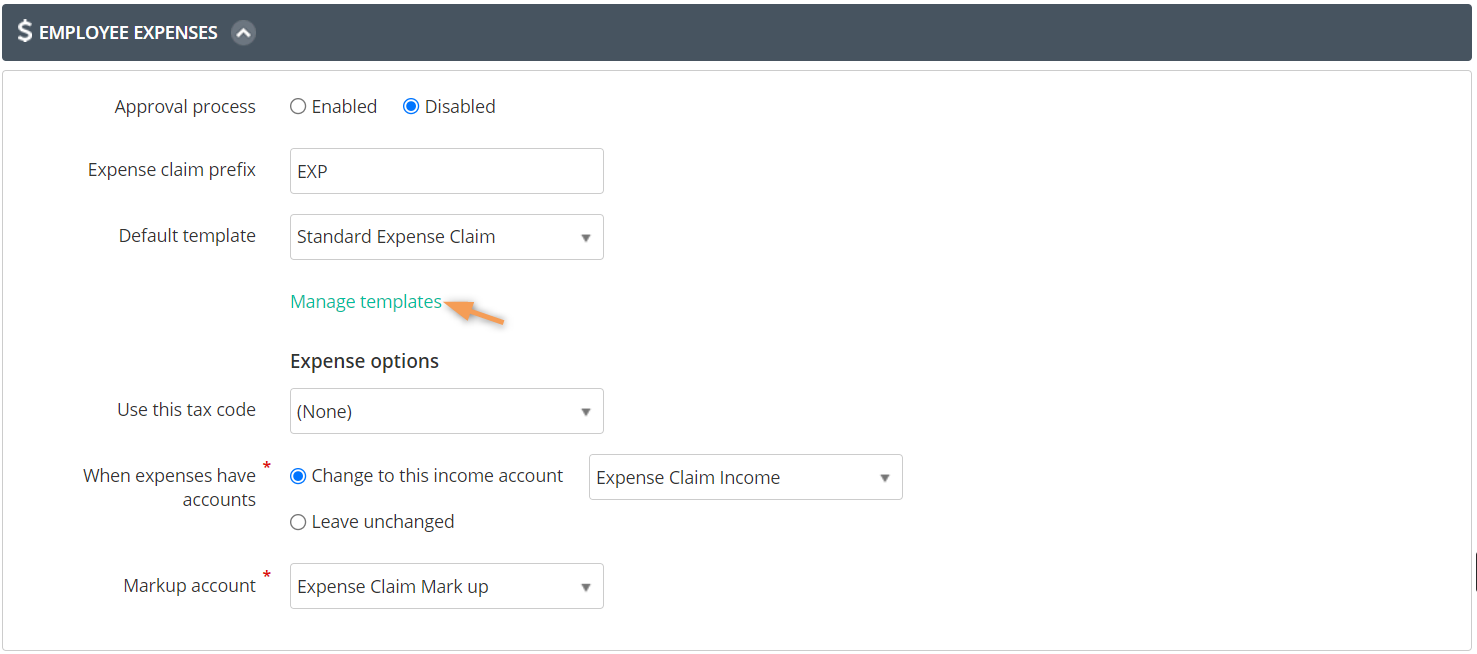
There is only one type of templates available at the moment.
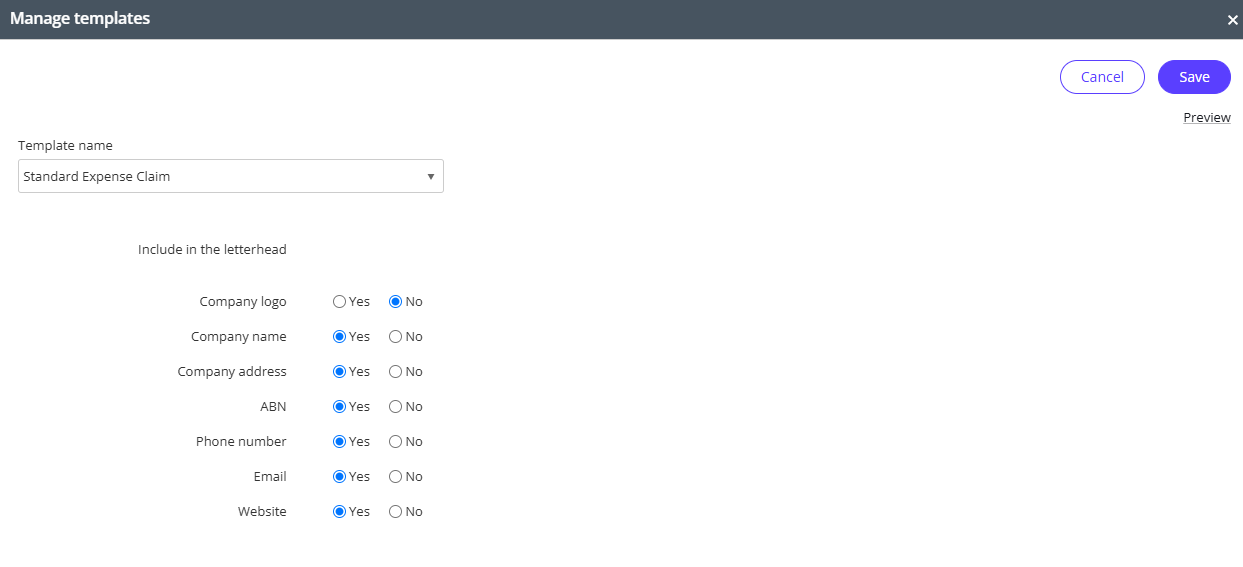
- Standard Expense Claim
To customise what field/s will show in the printed/emailed Employee Expenses, choose Yes/No option for the available fields.
Header
You can change the name, add company logo, your business information etc. here.
If details do not appear on your Supplier Adjustment Note, such as your business phone number, check to make sure the option is set to Yes, and that you have entered all relevant contact details under your book settings. Go to Settings > Book settings > Contact details.
Preview your changes
To see how your template will look like:
- Save the template changes
- Click on Manage templates
- Click the Preview link
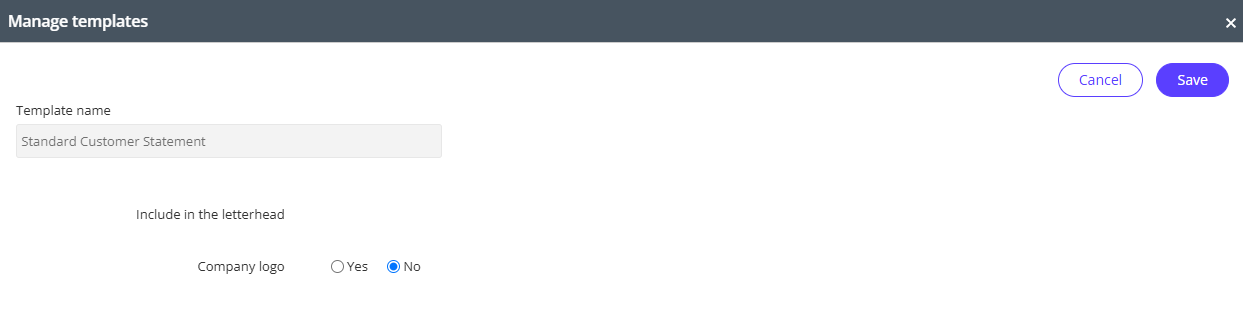
Customer Statements
To access the list of templates and modify the settings, you will need to:
- Go to Settings > Day to Day > Statements
- Expand Customer Statements > Manage templates (under Default template drop-down menu)

There is only one type of templates available at the moment.
- Standard Customer Statement
To customise what field/s will show in the printed/emailed Customer Statement, choose Yes/No option for the available fields.
Header
You can change add company logo here.
Need more help?
Ask the Reckon Community at: https://community.reckon.com/categories/reckonone
Or log a Support Ticket: https://www.reckon.com/au/support/