Table of Contents
- Best practices you can do to get the best Reckon Accounts Hosted Experience
- How to properly Log out of Reckon Accounts Hosted
- What can you do when your Hosted is stuck or frozen?
- Why is it important to create Backups regularly?
- Why it's important to keep the most recent Backup and remove large .TLG Files
- Why it's important to stay informed in Reckon Accounts Hosted
- Other Helpful Articles
Reckon Accounts Hosted - Best Practices
- Best practices you can do to get the best Reckon Accounts Hosted Experience
- How to properly Log out of Reckon Accounts Hosted
- What can you do when your Hosted is stuck or frozen?
- Why is it important to create Backups regularly?
- Why it's important to keep the most recent Backup and remove large .TLG Files
- Why it's important to stay informed in Reckon Accounts Hosted
- Other Helpful Articles
Best practices you can do to get the best Reckon Accounts Hosted Experience
How to properly Log out of Reckon Accounts Hosted
Logging out correctly ensures the system recognises your session has ended. If you don’t log out the right way, the backend may still think you’re active. This can prevent a smooth login the next time you try to access Hosted.
To log out correctly:
- Go to the File menu.
- Click Exit.
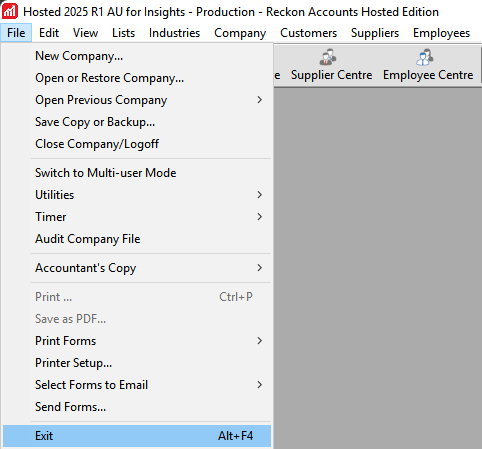
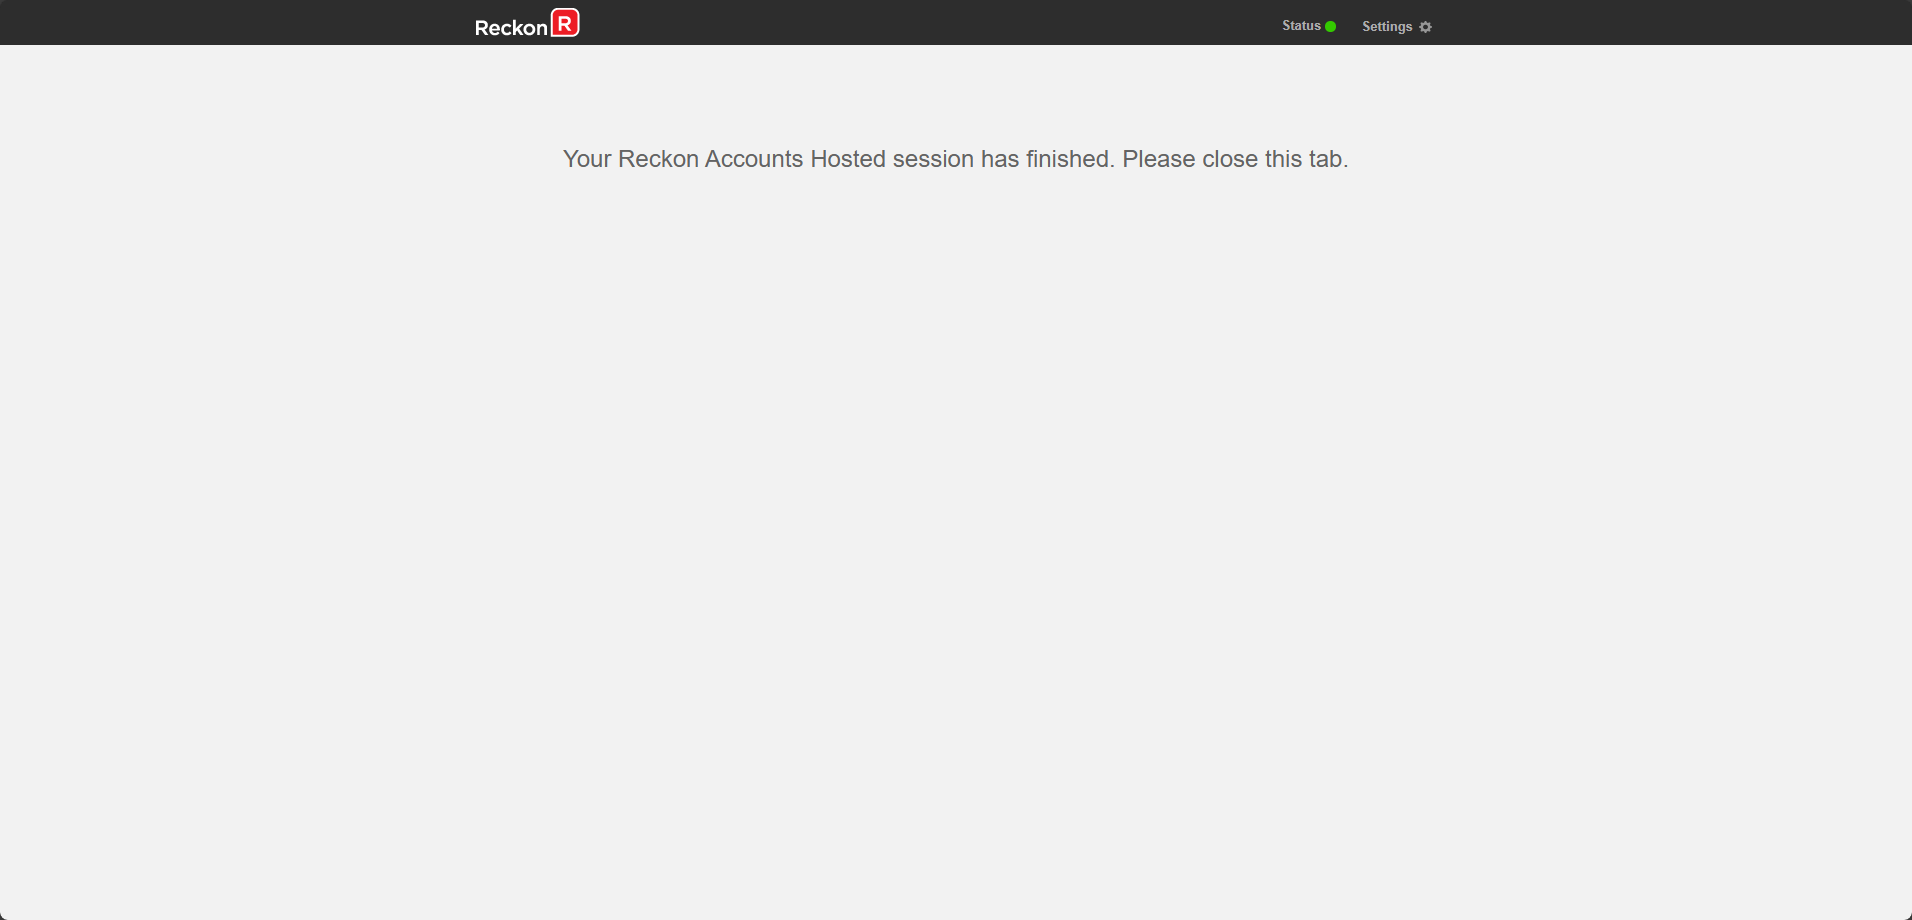
- Your Hosted screen will briefly turn black before displaying the 'Session Finished' page, confirming that you’ve successfully logged out
What can you do when your Hosted is stuck or frozen?
One of the most common issues reported in Reckon Accounts Hosted is when the application becomes stuck or unresponsive. This can often be caused by a loss of internet connection between your device and the Hosted environment. While there are other potential causes, the good news is that you can often fix it yourself by logging off the stuck session.
Using the Control Panel to log off your session can save you time, especially during busy periods like the end of the financial year, when our support team experiences high demand.
- Go to your Reckon Accounts Hosted Dashboard.
- Click the Control Panel button.
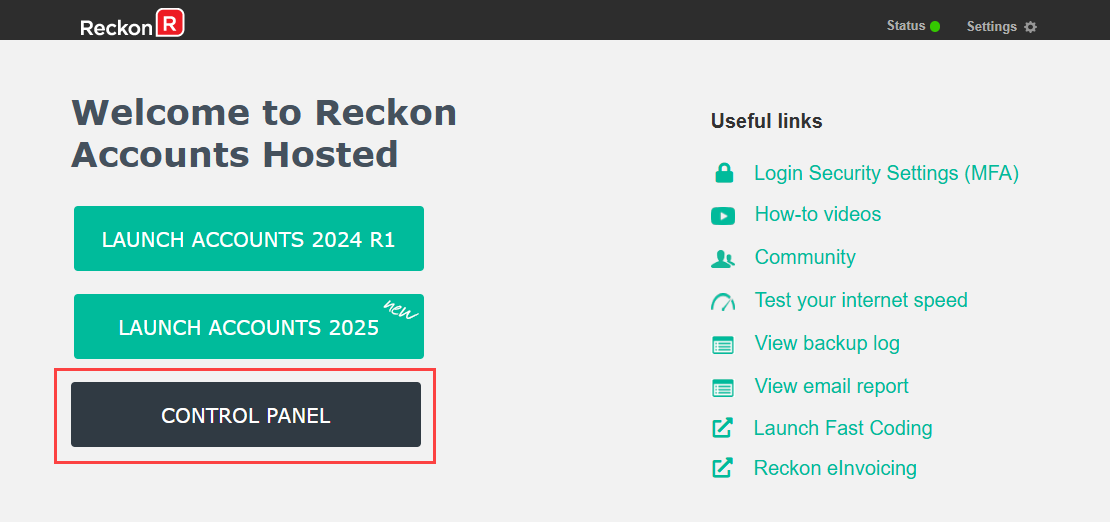
- In the Control Panel, select Log Off Remote Sessions from the left-hand menu.
- You’ll see a list of active user sessions. Find the User ID that’s stuck and click Log Off Session.
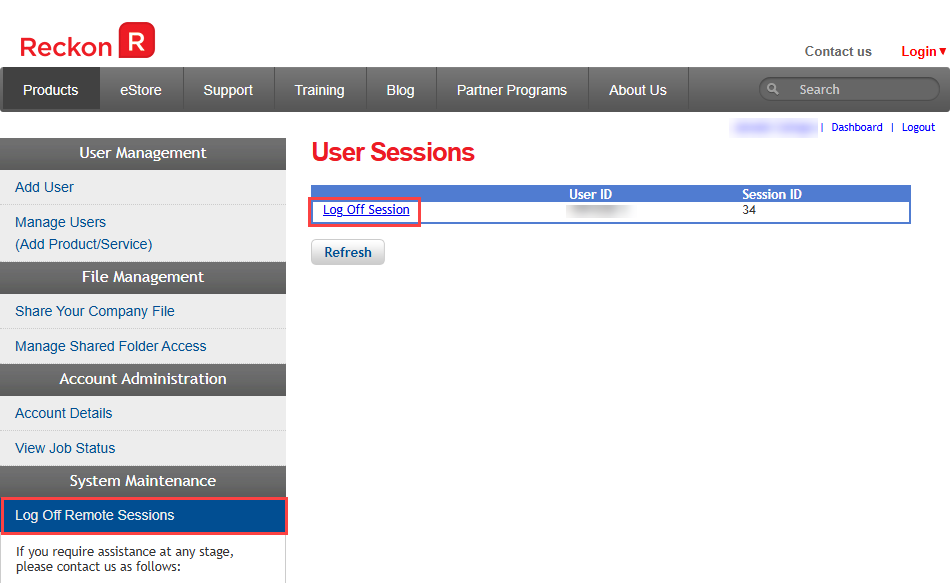
- Once logged off, return to the dashboard and log in again as usual.
Why is it important to create Backups regularly?
When using your Reckon Accounts company file (.QBW), a transaction log file (.TLG) is also created. This log file grows over time and can become very large if a proper backup (.QBB) isn’t made regularly. A large .TLG file can slow down Reckon Accounts Hosted performance.
Creating regular backups:
- Prevents the
.TLGfile from growing too large - Ensures you always have a current, restorable copy of your company data
How to Create a Backup File (Regular .QBB or Portable .QBM)
- Make sure you are logged in to Reckon Accounts Hosted.
- Go to the File menu and select Save Copy or Backup...
- Choose between:
- Backup copy (
.QBB) – a full backup of your company file. - Portable company file (
.QBM) – a smaller, compressed version of your company file.Portable backups take longer to create and restore. However, they compress the file and perform a verification as part of the process, which is great for file integrity.
- Backup copy (
Why it's important to keep the most recent Backup and remove large .TLG Files
Keeping too many backup files stored in your Hosted B: drive or having a large .TLG (Transaction Log) file can negatively affect the performance of Reckon Accounts Hosted.
The .TLG file grows in size when a backup hasn’t been made in a while. Similarly, having multiple large backup files in your Hosted environment can slow things down.
Recommended Practice:
- Keep only the most recent backup (ideally no more than 3 months old) in your Hosted B: drive.
- Download and store older backups on your local computer or a secure external location.
Steps to Download previous Backups:
- Log in and launch Reckon Accounts Hosted.
- You don’t need to open a company file. From the Toolbar, click My Files.
- Select your B Drive (Backup drive).
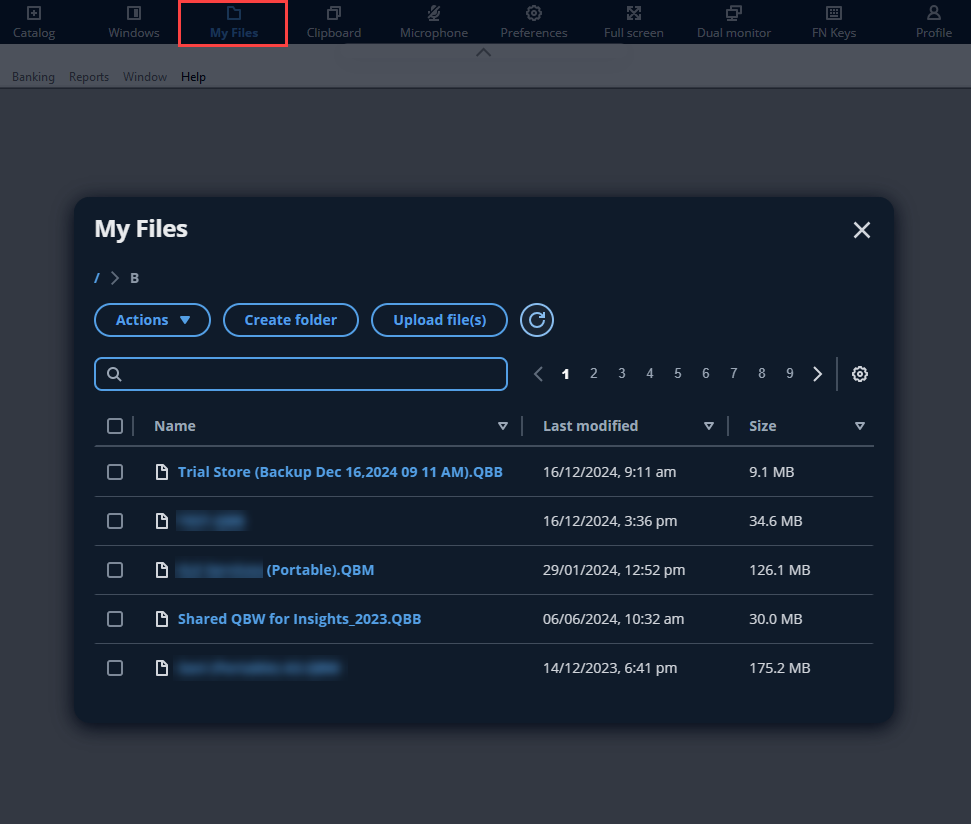
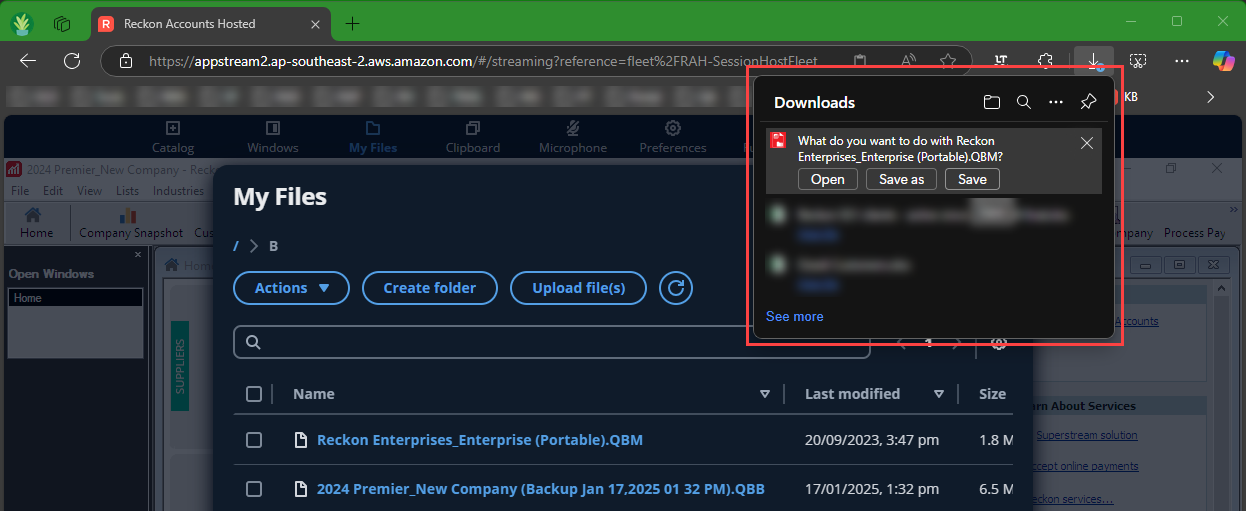
- For one file, simply click on the backup and your browser will prompt you for the next action.This action and download location is dependent on your browser settings.
- For more than one file, mark all the files you wish to download
- Then, click on Actions > Download.Your browser will prompt you for the next action. This action and download location is dependent on your browser settings.
- Once safely stored, you can delete them from the B: drive to improve performance.
Why it's important to stay informed in Reckon Accounts Hosted
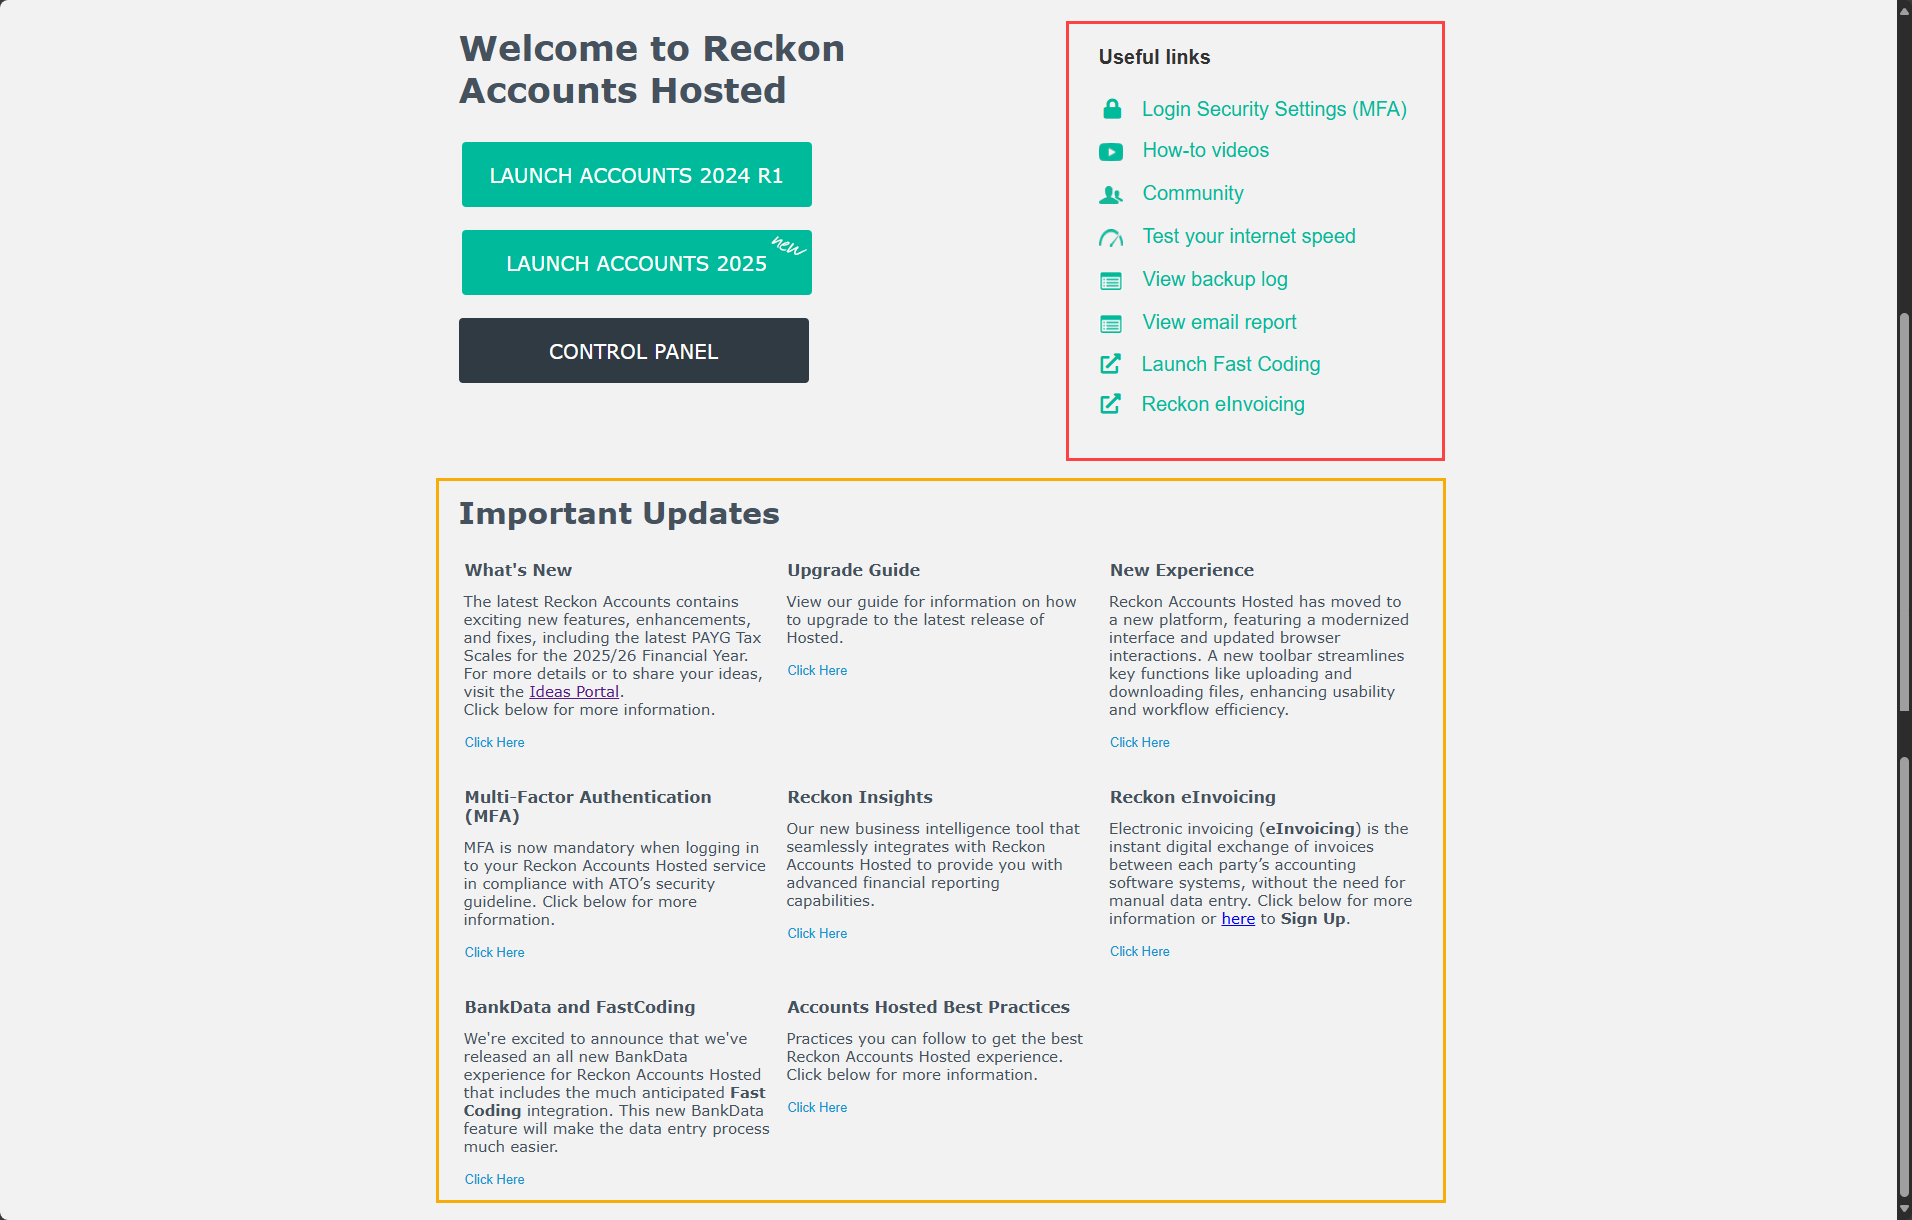
Reckon Accounts Hosted includes helpful tools and information to ensure you're getting the most out of the platform. Being aware of what’s available on your Hosted dashboard can save you time and improve your experience.
- Useful Links (Right-hand side of the dashboard)
- Login Security Settings (MFA): To manage your MFA setup for your Hosted account.
- How-to videos: Access a wide range of video tutorials to help you navigate and make the most of Reckon Accounts Hosted.
- Community: If you encounter an issue, chances are others have too. The Reckon Community is a great place to find solutions and ask questions.
- Test your internet speed: Quickly check your internet connection to see if it may be affecting performance.
- View backup log: Easily check when your last backup was created without the need to open your company file.
- View email report: See a log of all emails sent from Reckon Accounts Hosted.
- Launch Fast Coding: The quickest way to access BankData directly from the dashboard.
- Reckon eInvoicing: Enable seamless digital exchange of invoices between accounting systems, reducing manual data entry.
- Important Updates (Bottom of the Dashboard)
At the bottom of the dashboard, you'll find critical system updates, service notices, and announcements. Staying informed here ensures you don't miss important changes or new features.
Other Helpful Articles
How to improve performance by resetting the TLG file.
Hosted Tips and Tricks.
Download your company file for offline use.
How to share company files in Reckon Accounts Hosted.
Need more help?
Ask the Reckon Community at: https://community.reckon.com/categories/accountshosted
Or Log a Support Ticket: https://www.reckon.com/au/support/