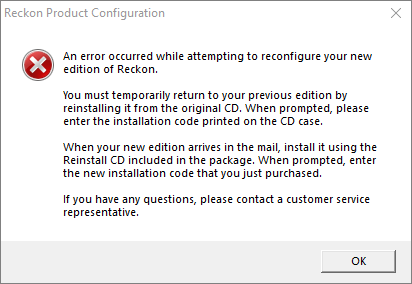
An error occurred while attempting to reconfigure your new edition of Reckon.
Legacy KB ID: 3783
Question
When I successfully install Reckon Accounts (formerly QuickBooks), open it for the first time and select the edition I want to use, why do I get the following message:
“An error occurred while attempting to reconfigure your new edition of Reckon (or QuickBooks) .....”
Answer
Reckon Accounts is unable to change the main registry key that controls the edition that Reckon Accounts uses.
The problem may be related to a conflict between Reckon Accounts and another software application on your PC that is preventing Reckon Accounts writing to the Registry. Ensure the user has full administrative privileges to all registry keys (or use the built-in administrator account) then try installing Reckon Accounts in Selective Startup mode (click here for instructions).
If you still get the same error then continue with this article as Reckon Accounts has failed to write the flavor to one key and failed to create the Install Date key. Without updating/creating these keys you will not be able to apply service packs, patches or tax table updates.
Workaround
Please follow these steps:
- Create a Restore Point.
- Open the Registry Editor - Start > Run > type regedit > OK (XP: regedt32)
- If you did not make a Restore Point make a backup of the Registry - File > Export > select a location and name > select All > Save.
- Open the Registry Key HKEY_LOCAL_MACHINE > Software > Wow6432Node > Intuit > QuickBooksRegistration > nn.0 > superpro; where nn represents the number version of your Reckon Accounts. Eg: 2016=25; 2012/13=20; 2008/09=17
(For 32-bit systems: HKEY_LOCAL_MACHINE > Software > Intuit > QuickBooksRegistration > nn.0 > superpro) - On the right-hand side, right click on ActivatedProduct and select Modify.
- In the Value data field, replace the existing content (@_activated) with the code that represents the industry edition you wish to install. Codes for Enterprise are in brackets:
- General Edition – replace with superpro (bel)
- Retail Edition – replace with retail (belretail)
- Contractor Edition – replace with contractor (belcontractor)
- Wholesale & Manufacturing Edition – replace with wholesale (belwholesale)
- Nonprofit Edition – replace with nonprofit (belnonprofit)
- Professional Edition – replace with professional (belprofessional)
- Accountant Edition – replace with accountant (belaccountant)
- Click OK to save the changes.
- Open the Registry again and go to:
- HKEY_LOCAL_MACHINE > Software > Wow6432Node > Intuit > QuickBooksCommon > History > Install
(For 32-bit systems: HKEY_LOCAL_MACHINE > Software > Intuit > QuickBooksCommon > History > Install) - A subkey named with the date and time in the format: yyyymmddhhmmss;
- The date and time should be before the current system timeclock and after the last date and time of a Reckon Accounts installation.
- HKEY_LOCAL_MACHINE > Software > Wow6432Node > Intuit > QuickBooksCommon > History > Install
- If no date and time key exists, create one:
- Highlight the Install sub-key, right click and select New > Key;
- Rename the key New Key #1 to a date and time before your current system clock – eg: 20110213112233
- In the right pane create 4 New Value keys by:
- Right-click the background and select New;
- Select type: string value.
- Leave the first field default alone
- Right click New Value #1 and select Rename and change the name to flavor
- Right click flavour and select Modify;
- In the Value data box, add the flavor of your Reckon Accounts(Enterprise codes in brackets):
- General Edition – enter superpro (bel);
- Retail Edition – enter retail (belretail)
- Contractor Edition – enter contractor (belcontractor)
- Wholesale & Manufacturing Edition – enter wholesale (belwholesale)
- Nonprofit Edition – enter nonprofit (belnonprofit)
- Professional Edition – enter professional (belprofessional)
- Click OK to save the field;
- Right click New Value #2 and rename to path with the value field of your installation directory. Eg: C:\Program Files\Intuit\Reckon Accounts 20xx\ (or...\QuickBooks 20xx-xx\)
- Right click New Value #3 and rename to trial with the value field of 0 (zero);
- Right click New Value #4 and rename to version with the value field of nn; where nn represents the version number of your QuickBooks/Reckon Accounts:
- 2020: 29
- 2016 = 25
- 2012/13 = 21
- 2008/09 = 17
- When all fields renamed and modified close the Registry
- Launch Reckon Accounts and it should open to your industry edition.
Need more help?
Ask the Reckon Community at: https://community.reckon.com/categories/reckonaccounts
Or Log a Support Ticket: https://www.reckon.com/au/support/