Table of Contents
Other Provider
In Reckon Cloud POS, you can import your Customers and Inventory from other software.
You will need to export the lists of Customers and Inventory to Excel and then follow Cloud POS's Excel template to map the data accordingly. Once you've mapped it, you can then import those lists into Reckon Cloud POS.
To import a csv file of Customers/Inventory Items, perform the below steps:
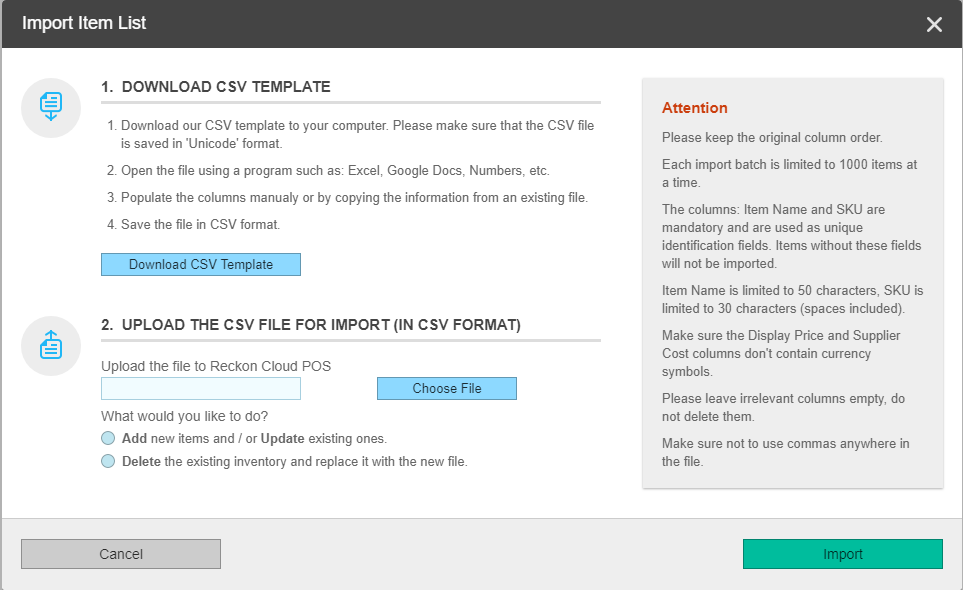
Example of importing Inventory
- Go to INVENTORY in Reckon Cloud POS
- Click on Import
- This is where you can "Download" the template file
- Open the file in Microsoft Excel and then enter the data for the specific fields
Field Name | Description | Mandatory? |
Item Name | Name of the Item | Mandatory |
Item SKU | Enter barcode (required field, enter any unique number if the item doesn't have any barcode) | Mandatory |
Supplier name | Enter supplier's name (if applicable) | Optional |
Supplier Cost | Cost of the item (Enter 0 if there's no cost) (please note not to include the $ symbol in the price) | Mandatory |
Tax Rate | Enter the rate only. Eg: 10 for 10% (Please note not to enter the % symbol) | Optional |
Retail Price | Selling price (Enter 0 if there's no price) (please note not to include the $ symbol in the price) | Mandatory |
Qty In Stock | Enter Quantity on hand (stock level) | Optional |
Available for preorder (0 or 1) | Enter 1 for yes and 0 for no | Mandatory |
Category 1st level | Enter the name of the 1st level Category if you want to utilise layers/groups for items | Optional |
Category 2nd level | Enter the name of the 2nd level Category if you want to utilise layers/groups for items | Optional |
Category 3rd level | Enter the name of the 3rd level Category if you want to utilise layers/groups for items | Optional |
Available in store (0 or 1) | Enter 1 for yes and 0 for no | Mandatory |
Available online (0 or 1) | Enter 0 (Not applicable yet) | Mandatory |
Show in featured (0 or 1) | Enter 0 (Not applicable yet) | Mandatory |
Mark as new (0 or 1) | Enter 0 (Not applicable yet) | Mandatory |
- Once your file is saved, go back to Reckon Cloud POS, then click on Import again and select the saved file.
- You have 2 options here to choose from:
- Add/update the entries as they get uploaded to your Reckon Cloud POS Store, or
- Delete all of the current Inventory items and add the ones from your uploaded file.
- Click on Import to start importing the Inventory items.
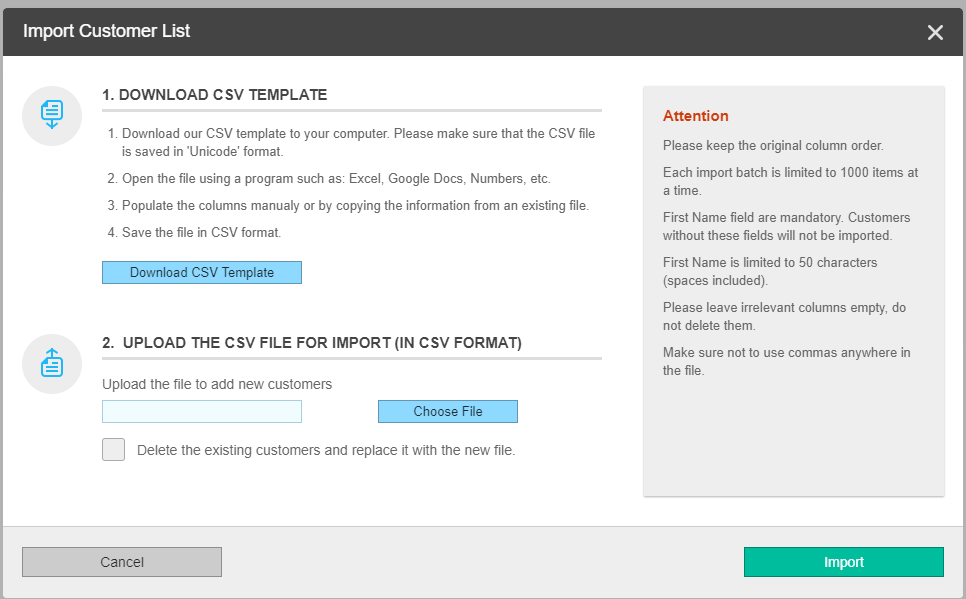
Example of importing Customers
- Go to CUSTOMERS in Reckon Cloud POS
- Click on Import
- This is where you can "Download" the template file
- Open the file in Microsoft Excel and then enter the data for the specific fields
Field name | Description | Mandatory? |
First Name | First name of the Customer | Mandatory |
Last Name | Last name of the Customer | Optional |
Phone | Phone number of the Customer | Optional |
Second Phone | Another phone number of the Customer | Optional |
Mobile | Mobile number of the Customer | Optional |
Second Mobile | Another mobile number of the customer | Optional |
Fax | Fax number of the Customer | Optional |
Email address of the Customer | Optional | |
Address | Address (street/PO Box etc.) of the Customer | Optional |
City | Suburb of the Customer's address | Optional |
State | State of the Customer's address | Optional |
Zipcode | Post Code of the Customer's address | Optional |
Country | Country of the Customer's address | Optional |
Shipping Address | Shipping Address (street/PO Box etc.) of the Customer | Optional |
Shipping City | Suburb of the Customer's Shipping address | Optional |
Shipping State | State of the Customer's Shipping address | Optional |
Shipping Zipcode | Post Code of the Customer's Shipping address | Optional |
Shipping Country | Country of the Customer's Shipping address | Optional |
Customer's Facebook account link | Optional | |
Twitter Handle | Customer's Twitter account link | Optional |
Date of Birth (dd/mm/yyyy) | Date of Birth of the Customer in dd/mm/yyyy format | Optional |
Gender (m or f) | Gender of the Customer | Optional |
Comment | Any comments/notes for the Customer record | Optional |

- Once your file is saved, go back to Reckon Cloud POS, then click on Import again and select the saved file.
- If you want to delete the existing Customers in your Reckon Cloud POS, select "Delete the existing customers and replace it with the new file
- Click on Import to start importing the Customer/s.