Table of Contents
- Overview
- Supported transactions
- Onboarding checklist
- Getting started
- Reckon eInvoicing overview
- Connecting another book to Reckon eInvoicing
- Switching between organisations
- Inviting your customers and suppliers
- Receiving bills in the Reckon eInvoicing portal
- Review invoices received
- Action invoices received
- Example of status page
- Setting rules to automate bills received
- Manage a rule that was set for a supplier
- Sending and receiving transactions process
- Manage organisations
- My account
eInvoicing - Reckon One
- Overview
- Supported transactions
- Onboarding checklist
- Getting started
- Reckon eInvoicing overview
- Connecting another book to Reckon eInvoicing
- Switching between organisations
- Inviting your customers and suppliers
- Receiving bills in the Reckon eInvoicing portal
- Review invoices received
- Action invoices received
- Example of status page
- Setting rules to automate bills received
- Manage a rule that was set for a supplier
- Sending and receiving transactions process
- Manage organisations
- My account
Overview
Reckon One is eInvoicing ready, which means you can now send and receive invoices and bills through the secure Peppol network.
Supported transactions
Reckon One is eInvoicing ready for the below transaction types:
Onboarding checklist
Before getting started with the Reckon eInvoicing, it is highly recommended that the necessary information is available within your Reckon One Book for a smooth onboarding experience.
We have therefore compiled a list for you.
Enable Approval process
Invoices created in your book will be sent via eInvoicing automatically when the Invoice's status is Approved.
For successful delivery of an eInvoice, your client needs to be registered for Peppol network. Learn about inviting your clients to move to eInvoicing.
Approved on creation if you are on Reckon One Accounting Plus.You can enable the Approval process in your Book by following the steps below:
- Open your book > click on the cogs menu (Administration) > Settings
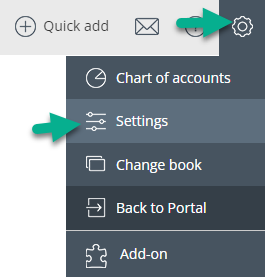
- Under Day to Day, click on Money in
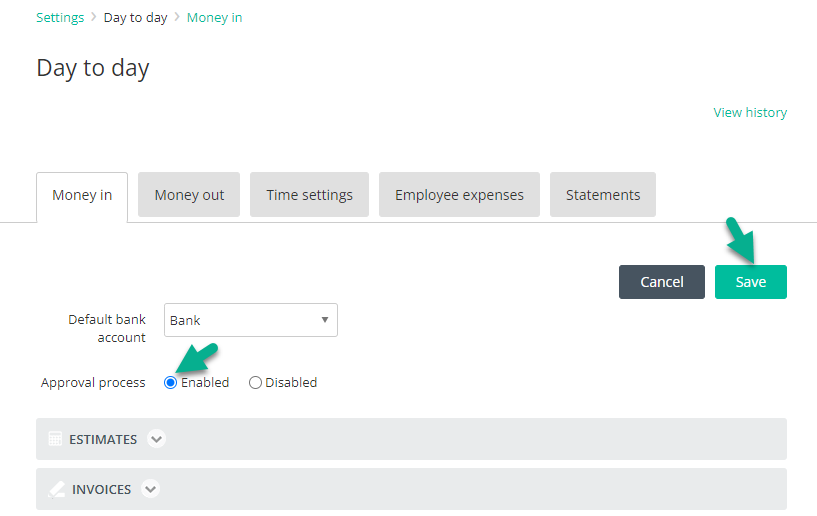
- Choose Enabled for Approval process and click Save
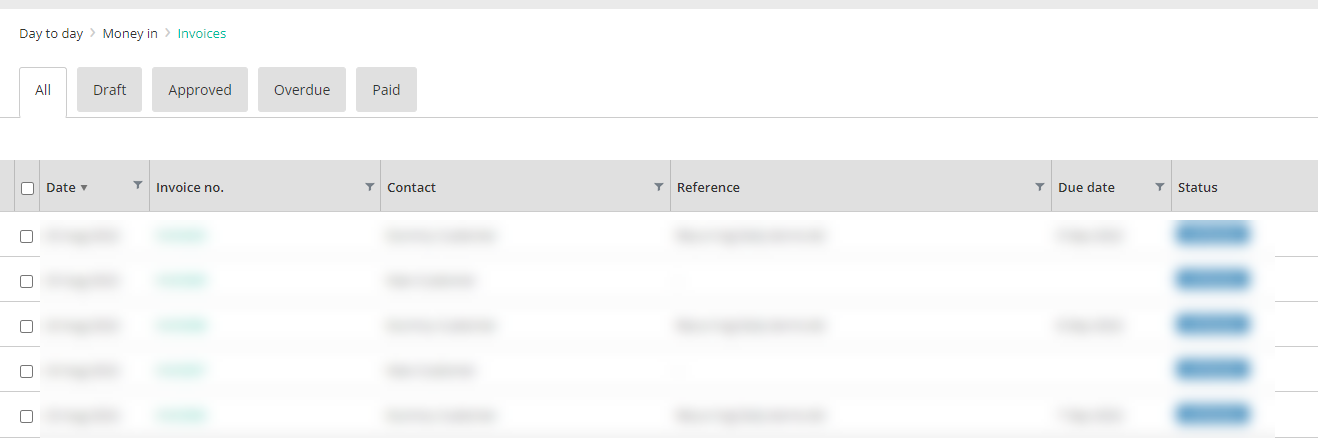
- In your Invoices list, you will now see new tabs with different status
- To learn more about how Approvals work, read this help article
ABN/NZBN and general Information in book setting details
- ABN is required for Australian books
- NZBN is required for NZ books
When you create your Reckon eInvoicing account you are registering your ABN/NZBN on the Peppol network to receive various business documents, such as an invoice.
All Reckon Hosted users will be required to enter the organisation's ABN during the onboarding process.
In your Reckon One Book, navigate to Settings > General > Book Settings
- Ensure your email address has been added to the Reply to email address
- Under the tab General Details ensure that these areas are complete:
- Company name
- Legal Name
- ABN/WPN or NZBN
- Navigate to the other tabs and ensure that you have added your details to:
- Legal address
- Physical address
- Contact details

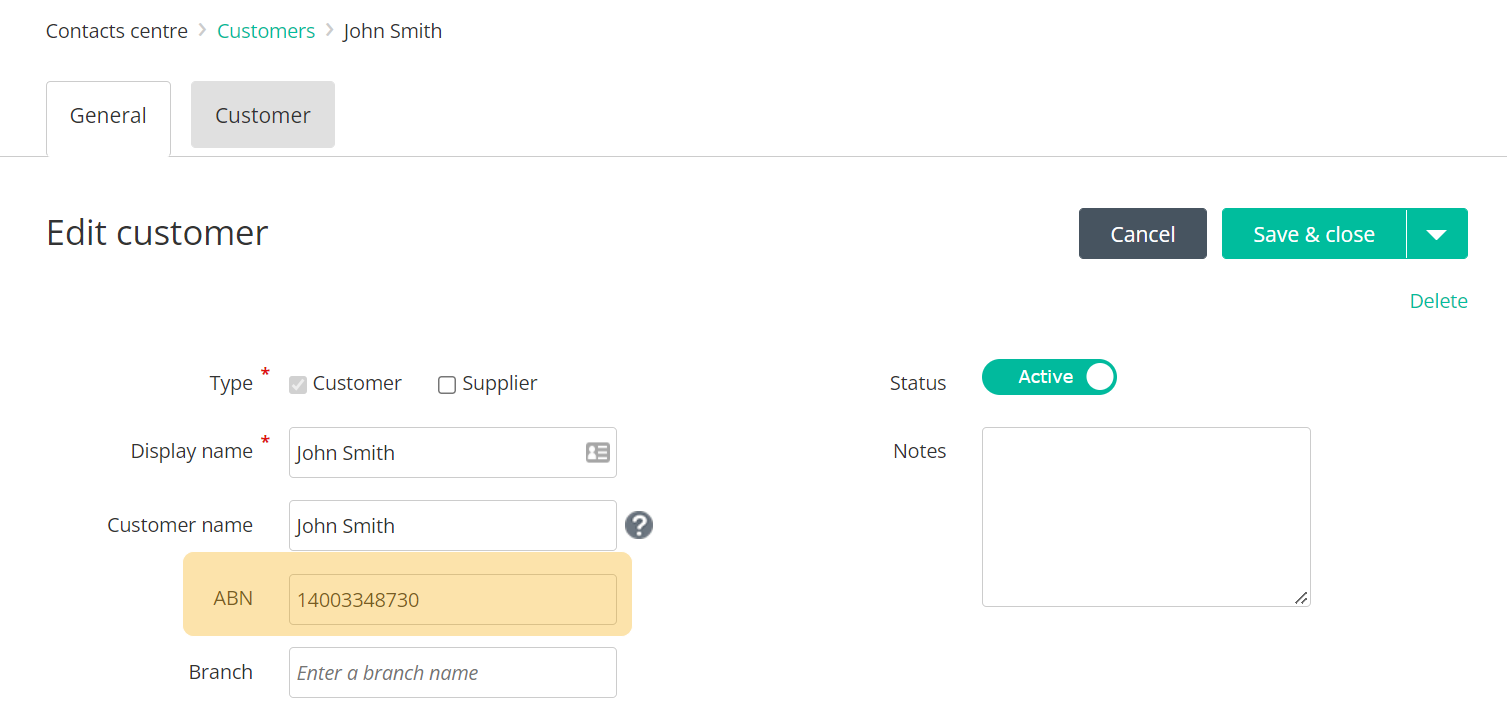
ABN/NZBN details for your customers and suppliers
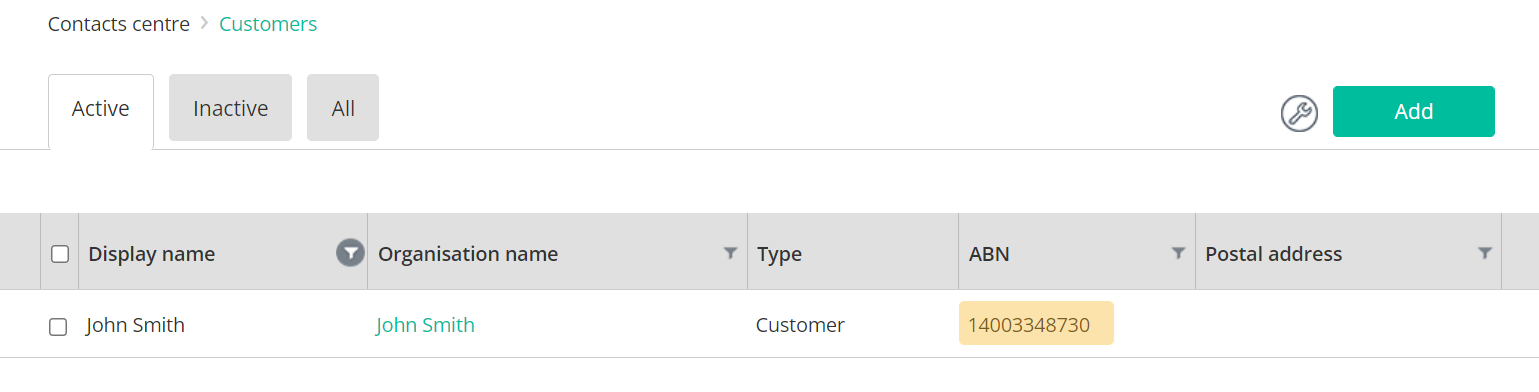
The ABN/NZBN and Legal Name for your Customers and Suppliers are the most important areas to have completed in your Reckon Book. Entities are required to be registered via the Peppol network for eInvoicing.
To add ABN/NZBN to a customer, please open the Customer/Supplier record from the Contacts Centre > Customers/Suppliers.
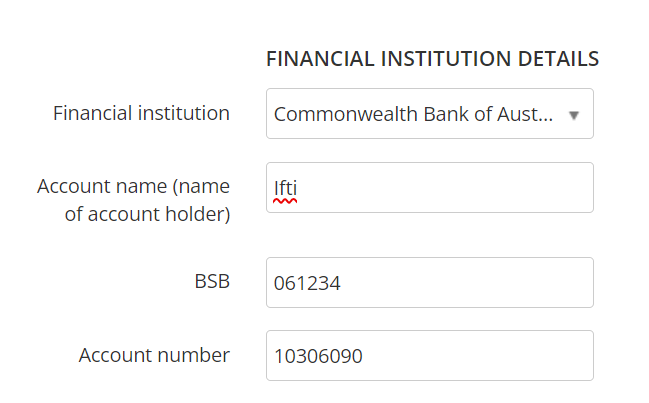
Bank account details
In your Reckon One Book, navigate to Banking > Bank Accounts and select “Edit” to edit your bank account:
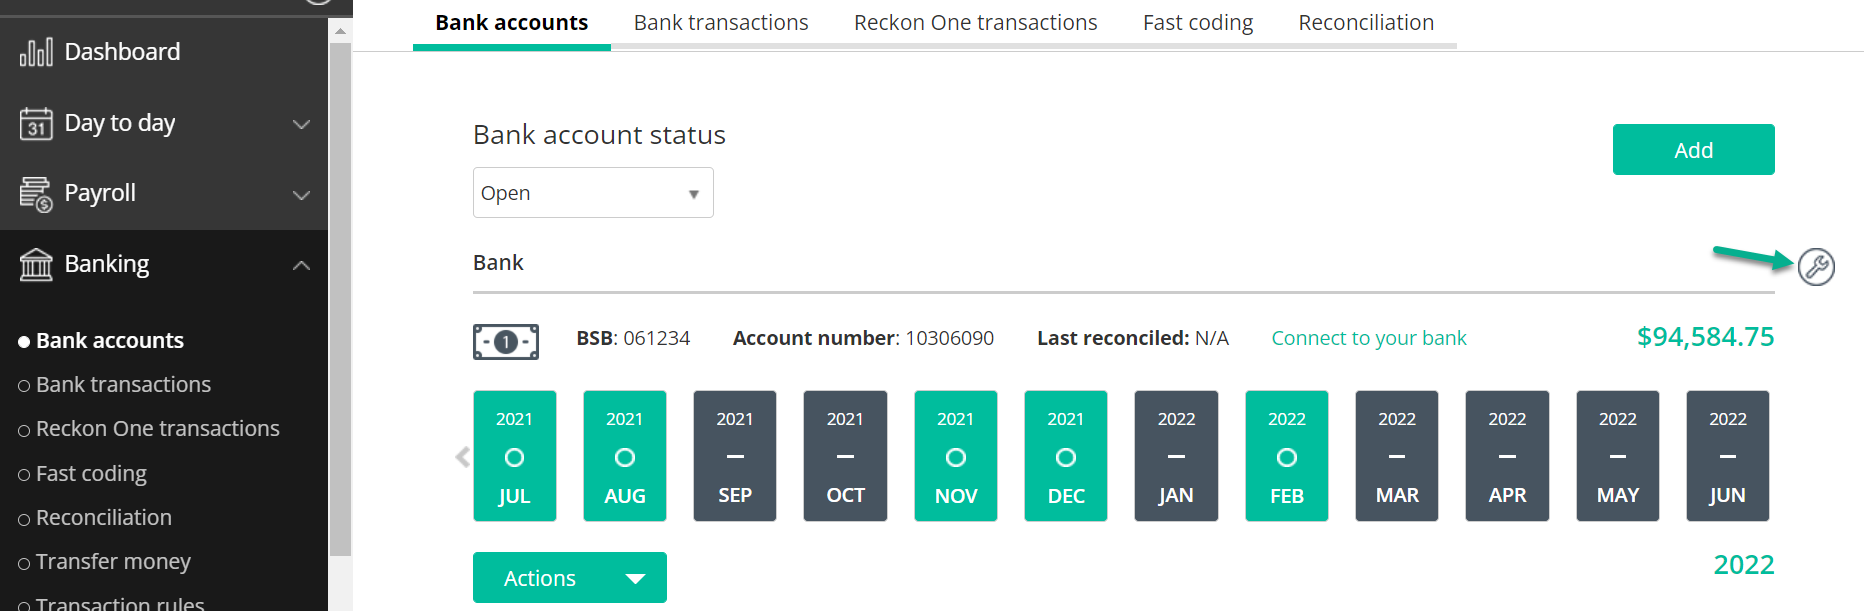
Ensure that your Bank account details are added:
Getting started
To access Reckon eInvoicing for Reckon One, you will need to:
- Log in to the Reckon Customer Portal > eInvoicing
- Click SIGN UP to register and start using Reckon eInvoicing.
- Click LOG IN if you are an existing Reckon eInvoicing user.
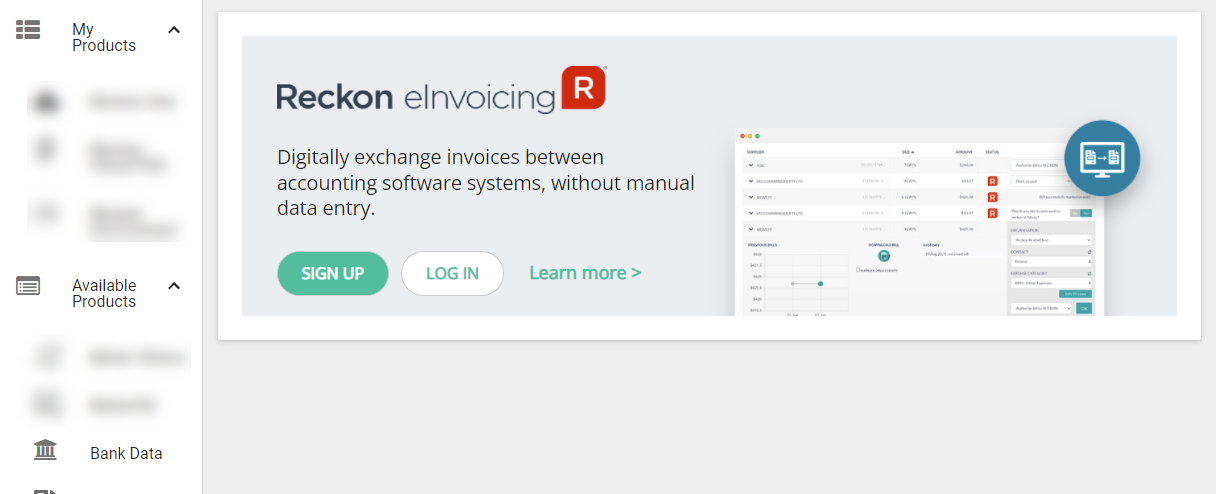
- You can also access the Reckon eInvoicing directly by accessing reckon.promis.co
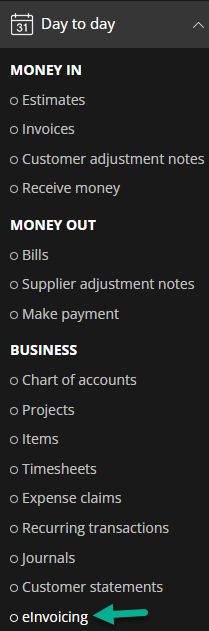
- There is an eInvoicing shortcut under the Day to Day section within the Reckon One application
Sign up
Before you can start using Reckon eInvoicing, you will need to create an account and connect your Reckon One book.
Steps:
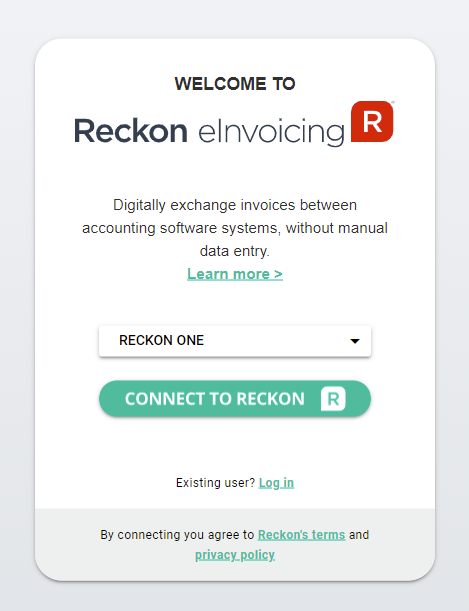
- Go to Reckon eInvoicing Sign up page
- Ensure that Reckon One product is selected and then click on the Connect to Reckon button
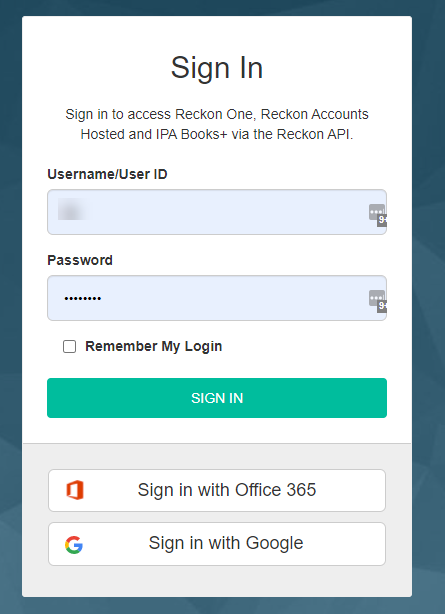
- Then log in with your Reckon Portal account details (that you use to access Reckon One)
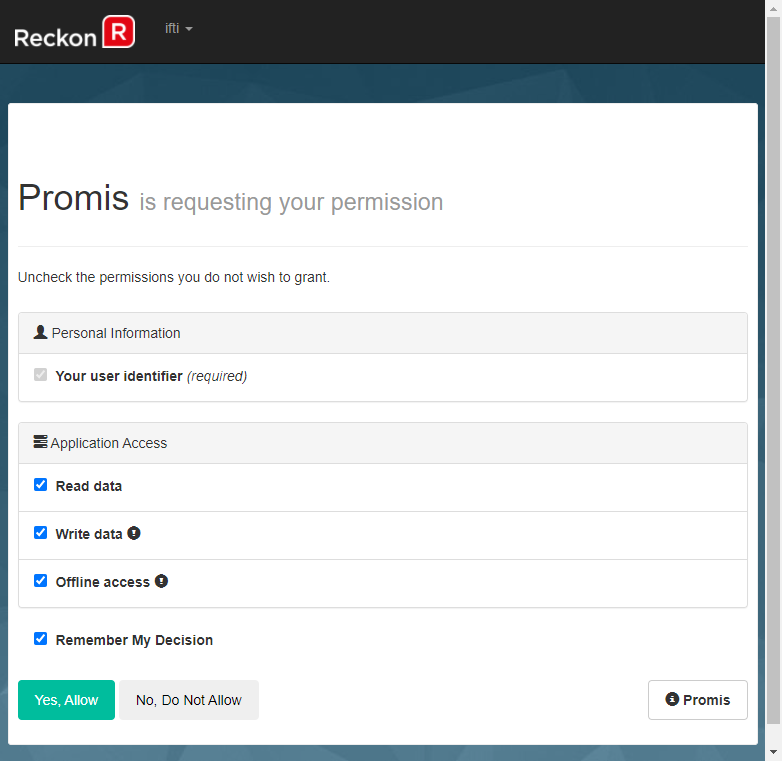
- You will have to give access to Promis (provider of the eInvoicing solution via OZEDI) for Reckon eInvoicing to connect to your Reckon One book/sReckon eInvoicing uses the Reckon API to integrate with your Reckon One Book. You will need to allow access and to do this you will need to be an Administrator of the book.
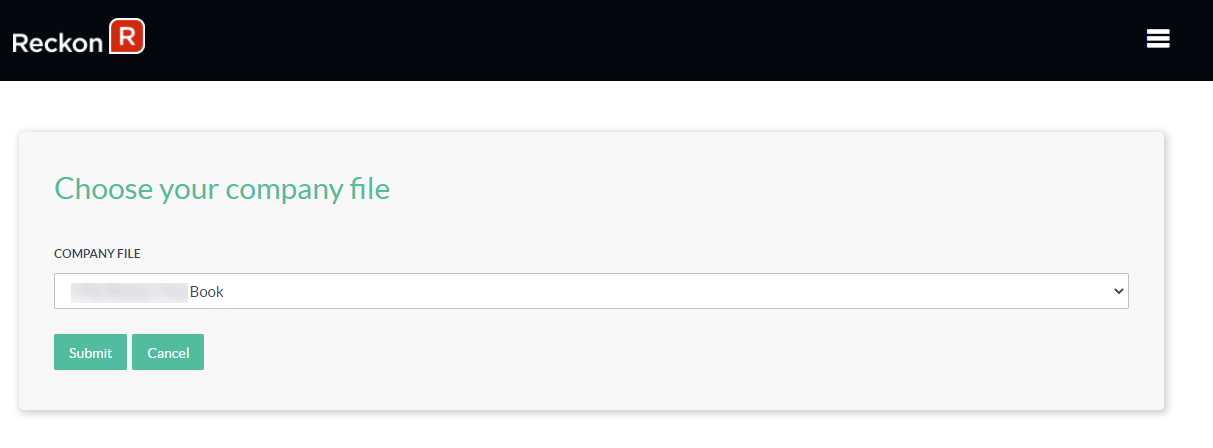
- You will then view the list of your Book(s). Choose your Book and click Submit.
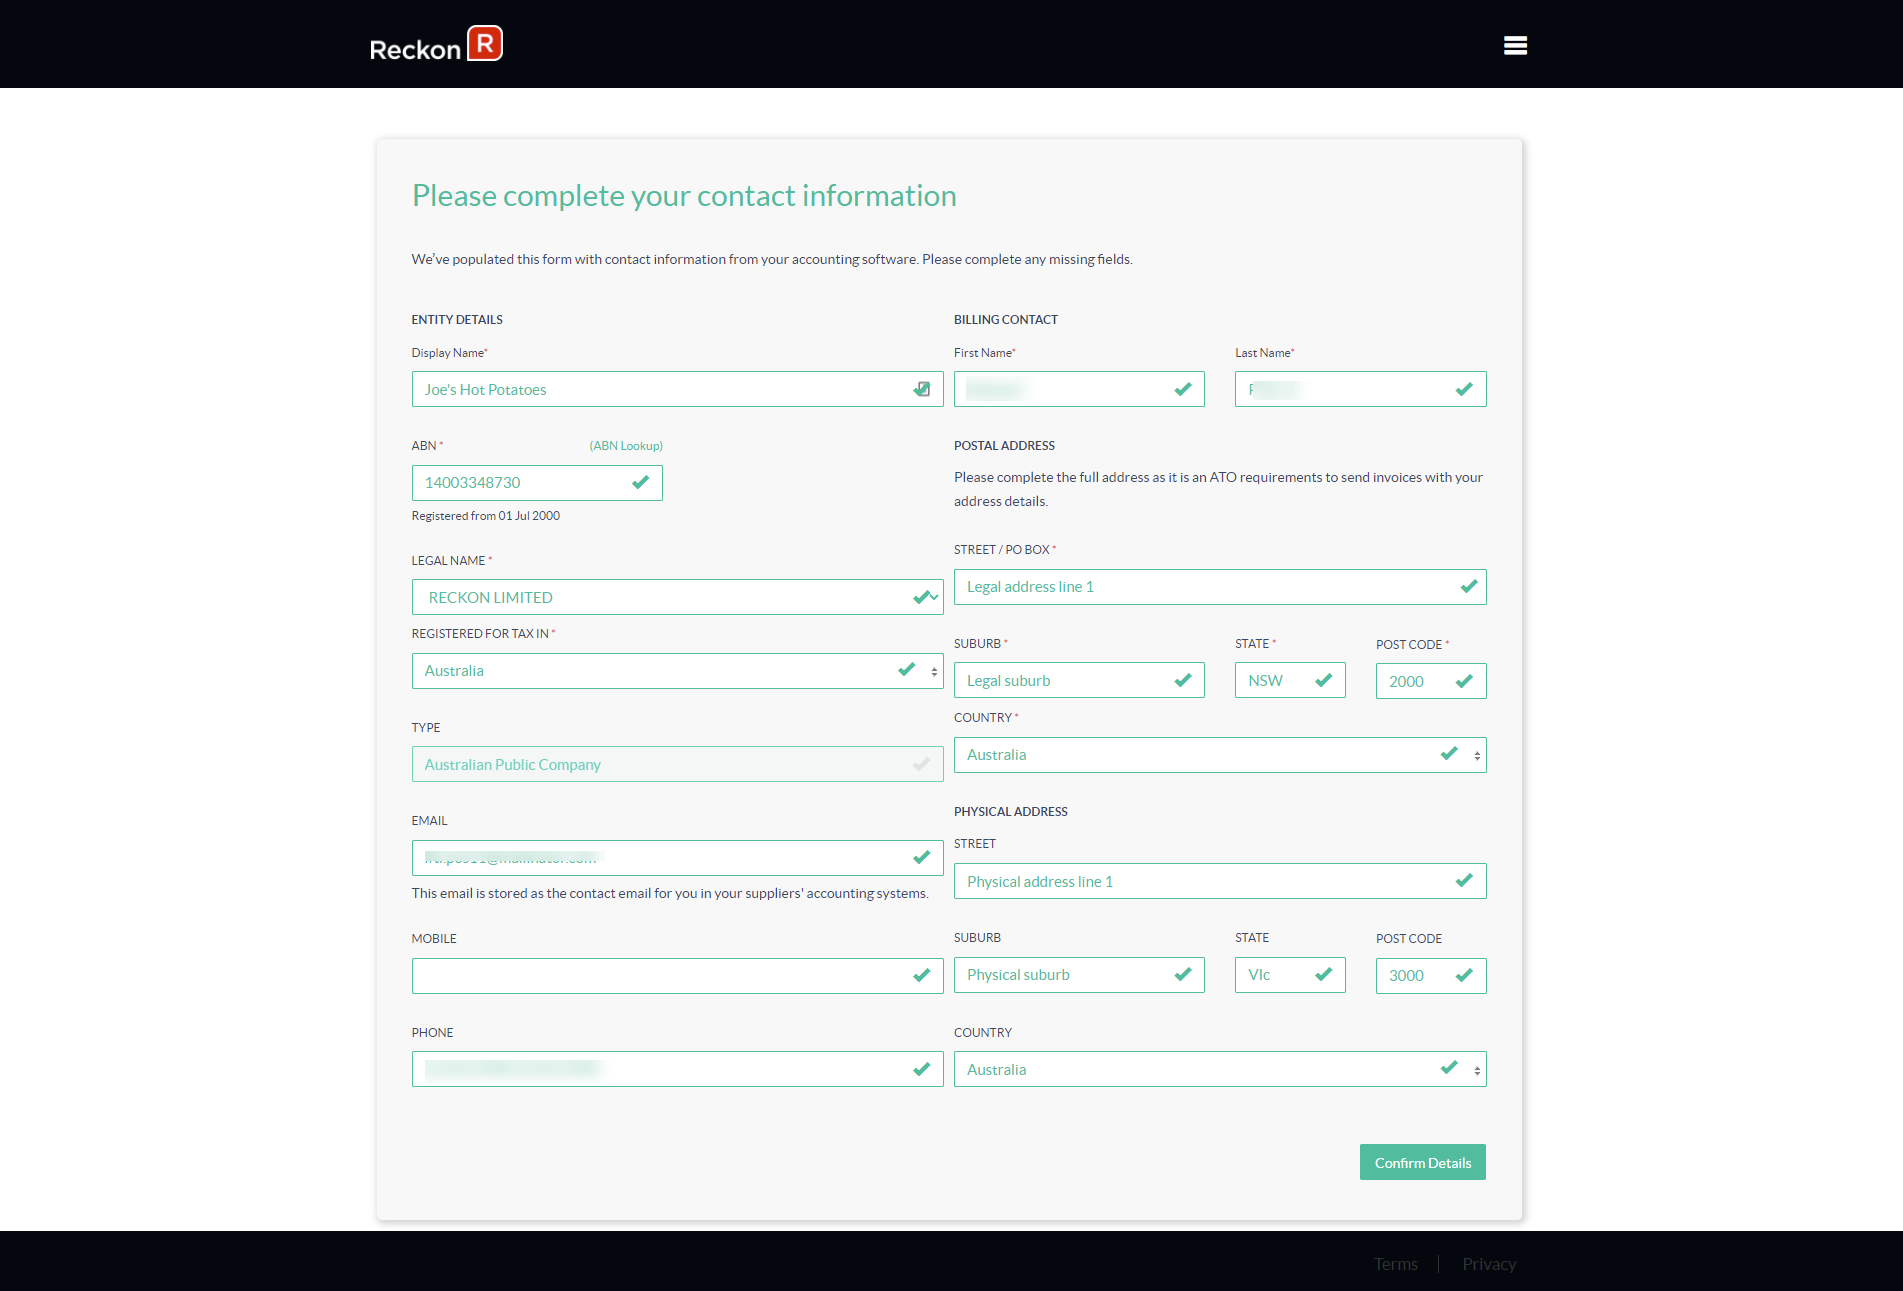
- Confirm the Contact information details and make changes or additions as required.
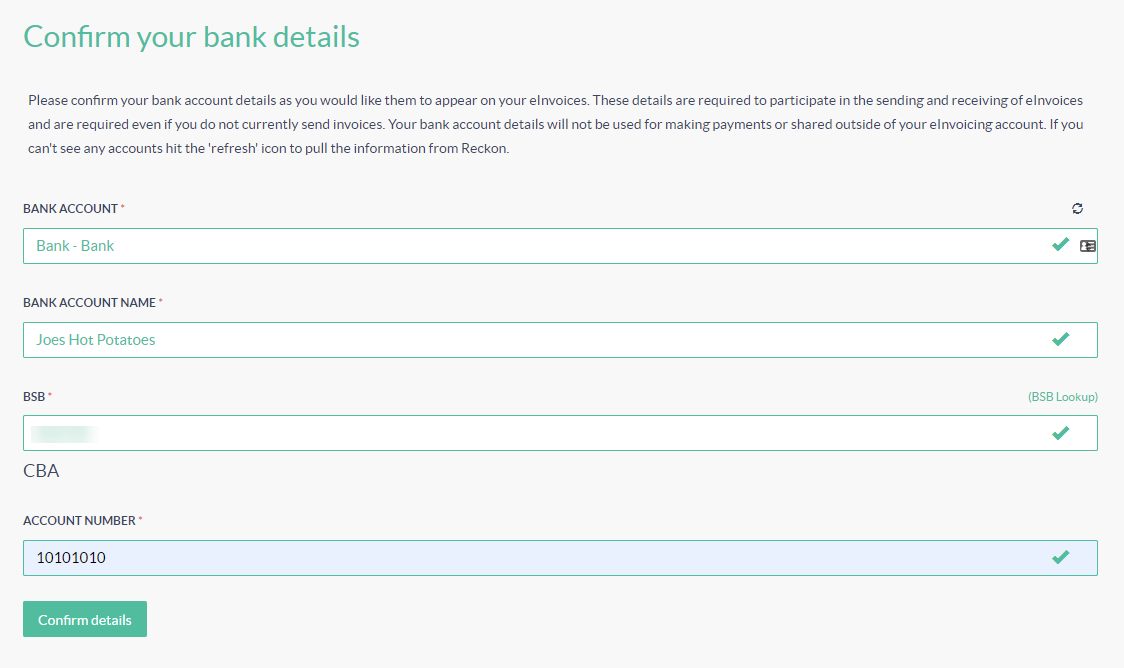
- Confirm the Bank details.
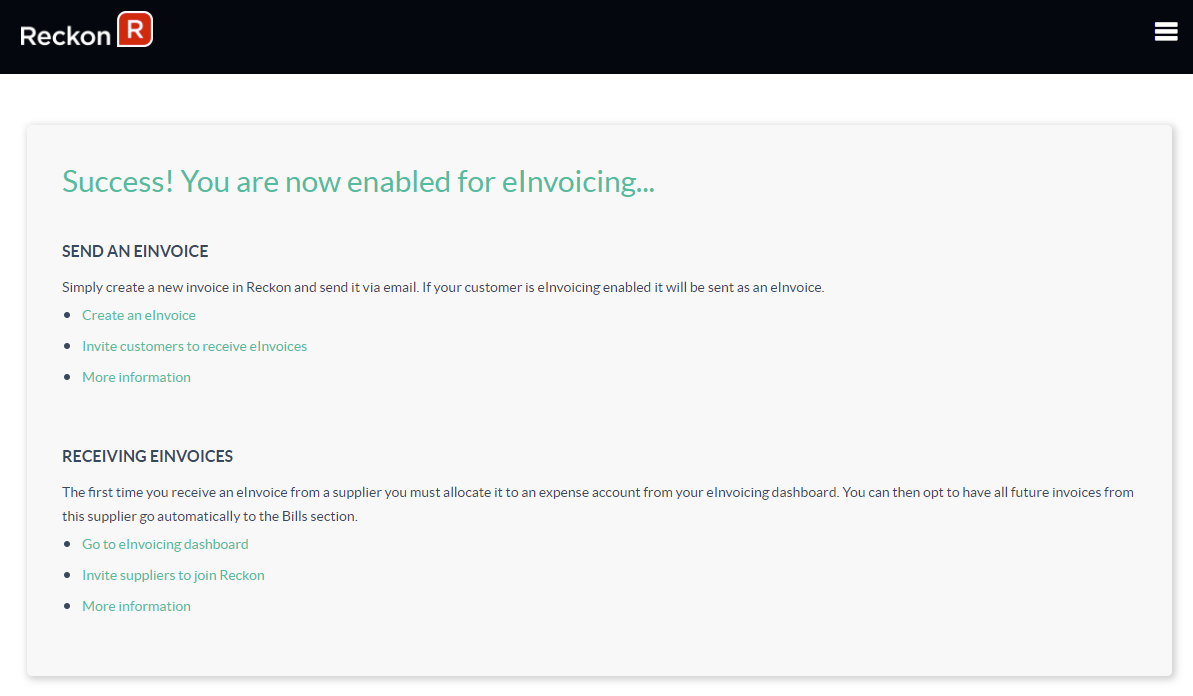
- You are now enabled for eInvoicing.
- Log out of your Reckon eInvoicing Dashboard by selecting the menu above and select “Logout”.
- You will then receive an email to advise that you have a temporary password for your new Reckon eInvoicing Dashboard.
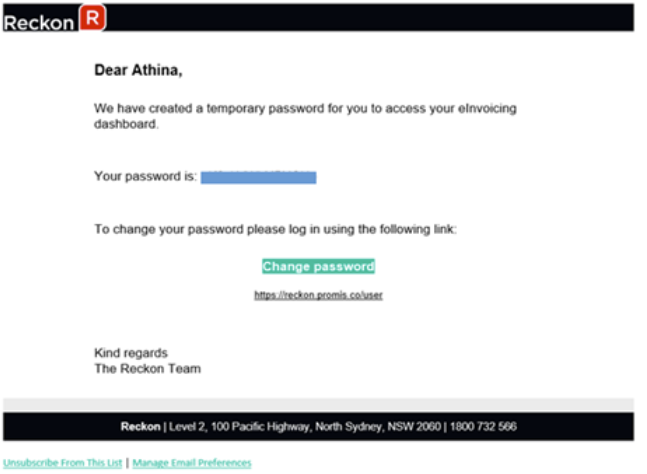
- Log back in and input the temporary password.
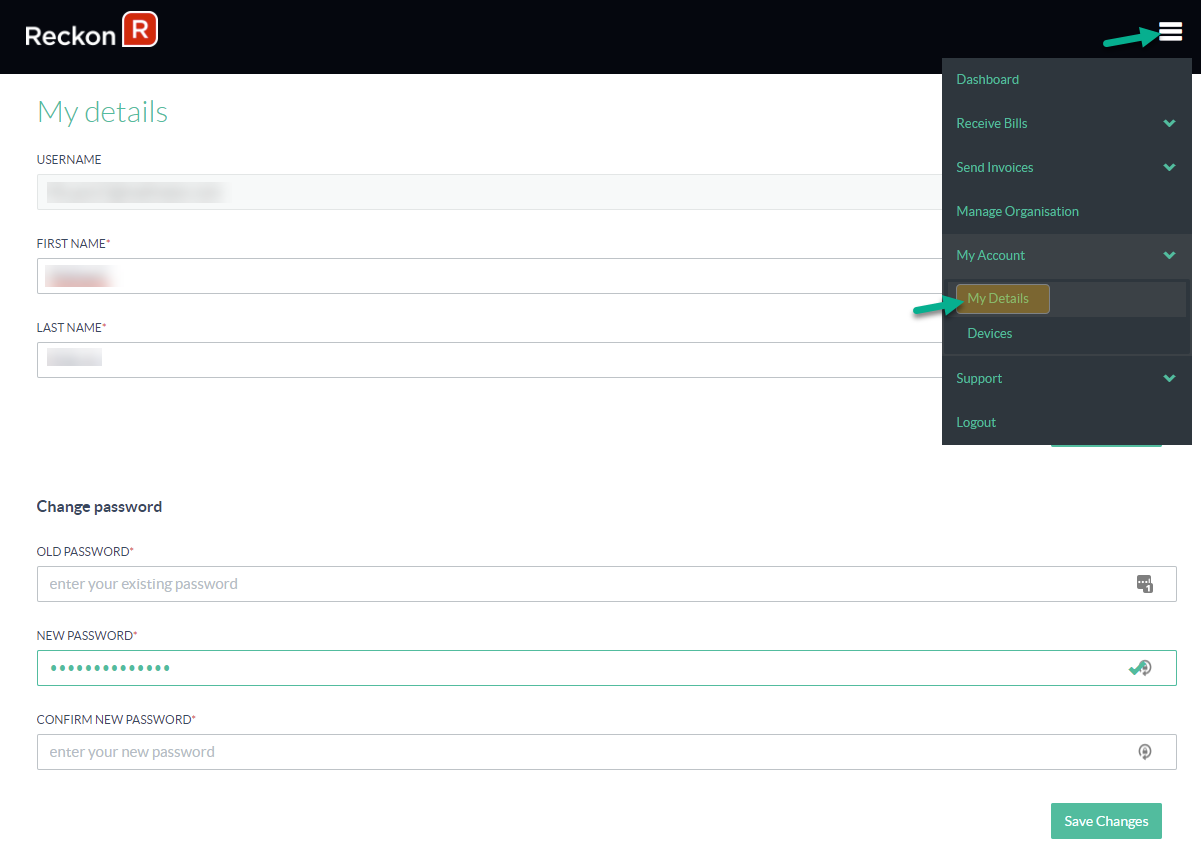
- Optional: Go to menu, under My account > My Details and change your password from the temporary password provided to your new password.
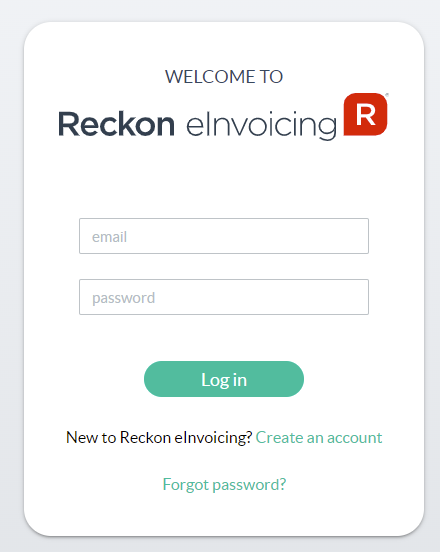
Log in (existing user)
If you are an existing user of Reckon eInvoicing, you can access your organisation by visiting reckon.promis.co/login.
Reckon eInvoicing overview
Read on to learn about the Reckon eInvoicing Portal and its features.
Connecting another book to Reckon eInvoicing
If you have multiple Reckon One books and you want to connect another Book to the Reckon eInvoicing, you will need to go through the above Sign up process again.
You will then see another organisation within your Reckon eInvoicing Portal and you can switch between them.
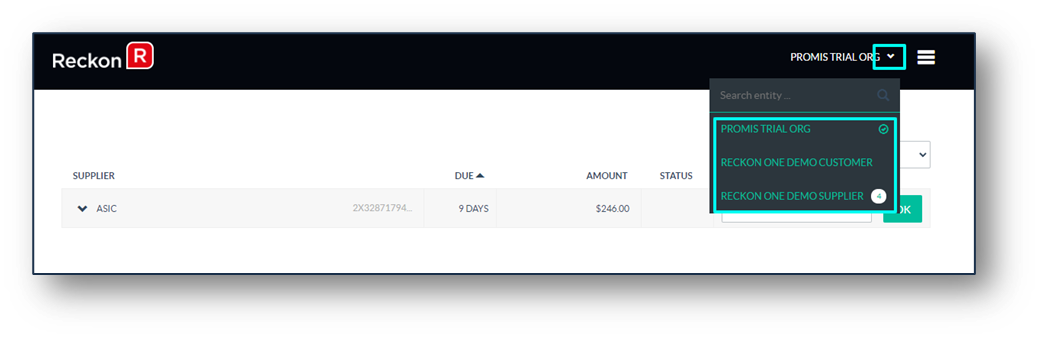
Switching between organisations
If you have multiple organisations in Reckon eInvoicing, you can switch to another organisation within Reckon eInvoicing by clicking on the Organisation drop-down menu, next to the Menu.
You can also search for the organisation name to locate and select it.
Inviting your customers and suppliers
Your customer/suppliers must be registered on the Peppol network to be able to send and receive eInvoicing transactions. To assist in their registration can can simply invite them from the Reckon eInvoicing portal.
- Log in to the Reckon Invoicing
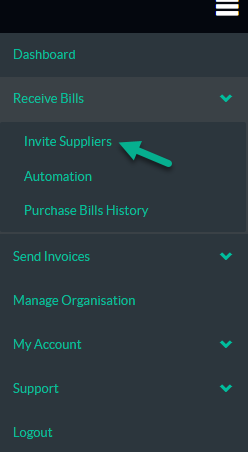
- To invite Suppliers, from the menu, click Invite Suppliers.
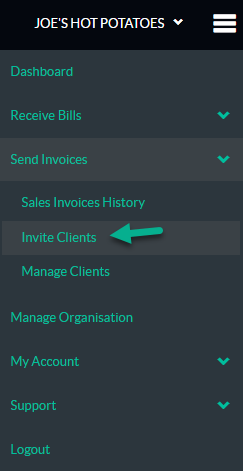
- To invite Customers, from the menu, click Invite Customers.
You will be able to send a personalised invitation email to your customers and suppliers to join Reckon eInvoicing.
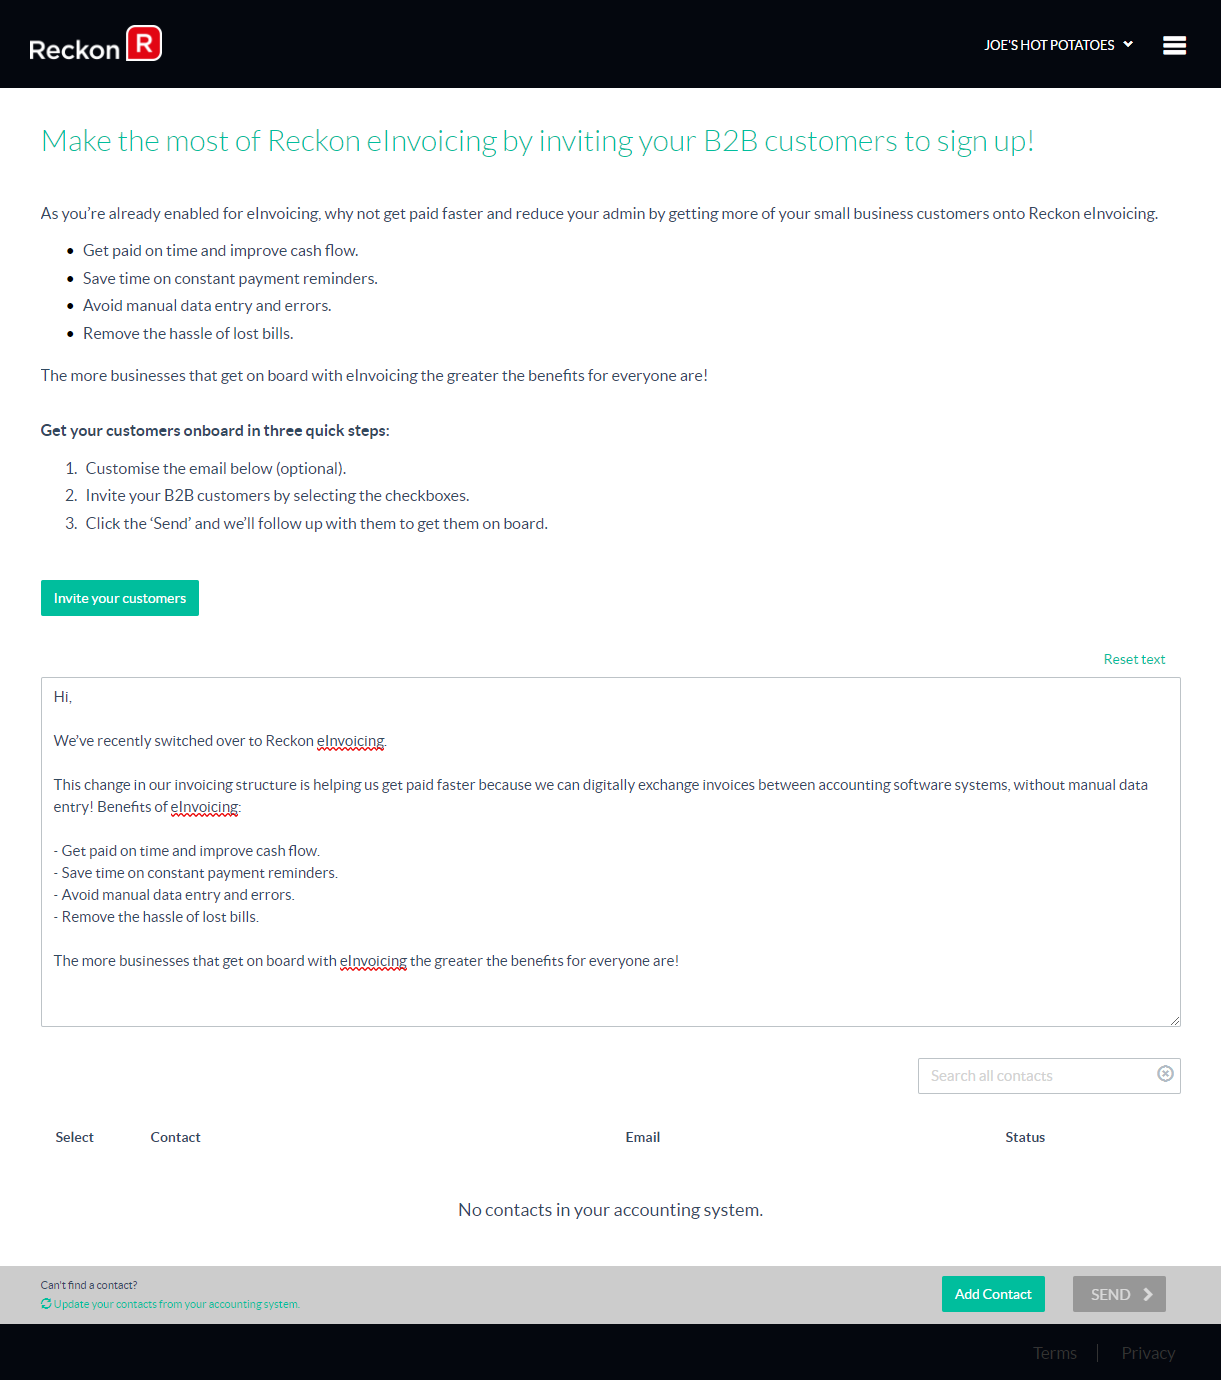
Alternatively, you can add additional contacts in your Reckon One book, refresh this screen, then invite the additional contacts.
Invited contacts show as “Invited” until the invitation has been accepted. Once accepted, the Reckon logo will appear against them in the status column.
The user can always resend the invitation if required.

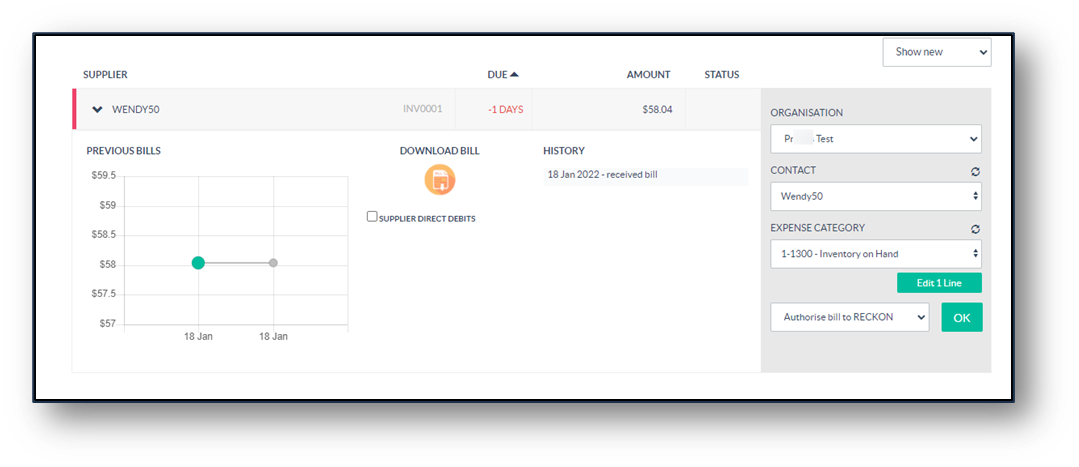
Receiving bills in the Reckon eInvoicing portal
The first time a Bill is received from a particular supplier you will be asked to allocate an expense account to that bill. If there are multiple lines in the invoice these can be assigned to different account codes by using the dropdown.
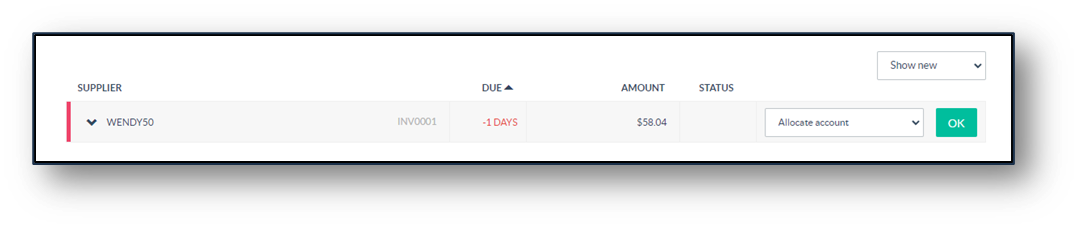
Reckon eInvoicing will then automatically apply that same expense account to any future bills from that supplier. The user can always amend that account manually on a subsequent bill as long as they have not enabled auto send of their bills.
Once an account has been allocated select ‘Authorise bill to Reckon’ to send that bill to the Reckon company. Authorised bills will disappear from the dashboard once refreshed.
At this point, the opportunity is given to automatically send all future bills from that supplier to the Reckon company.
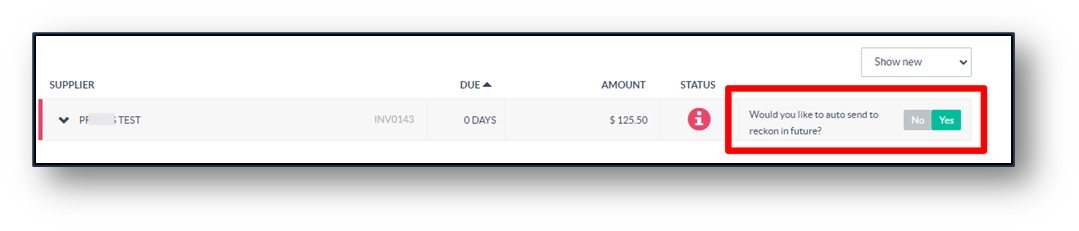
For users that like to review each bill or adjust the expense account used on different bills, they might want to select ‘No’ to 'auto send'. This will ensure active review of bills when a new bill is received.
If they select to automatically authorise future bills from that supplier, Reckon eInvoicing will create a rule that all bills up to the amount authorised in that particular bill will go through to the Reckon company without the need for review.
Any bills above that initial amount will still appear for review and authorisation. The automation rule can be changed in the automation menu item under Receive bills.
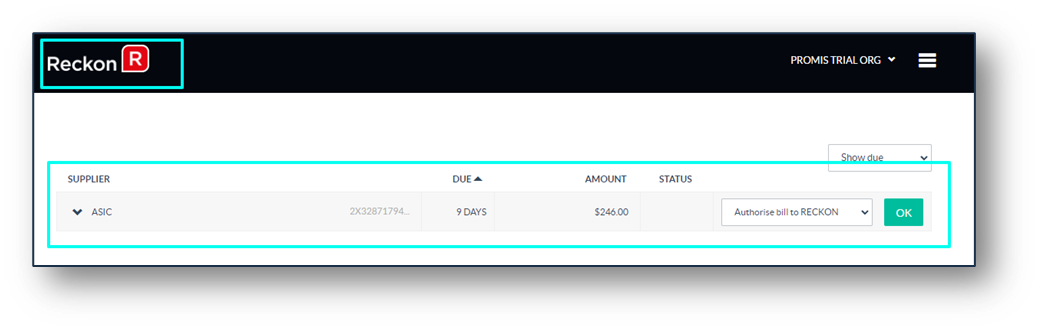
Review invoices received
To see any invoices received to your organisation select the Reckon Icon to take you to the Dashboard.
If open invoices that have been received remain unactioned you will be sent an email titled ‘Reminder’ on a daily basis.
Action invoices received
Use the drop-down to action the invoice. This may include allocating the accounts or authorising to Reckon.
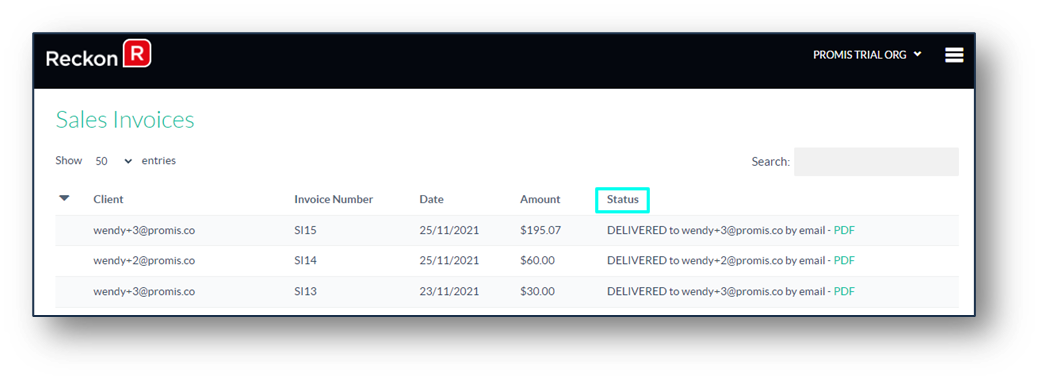
Example of status page
To see if your eInvoice was successfully delivered, you are able check the ‘Status” column in this area.
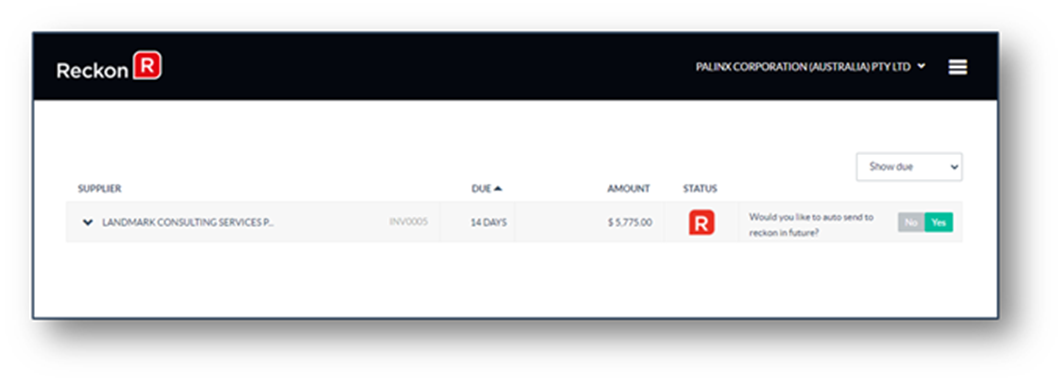
Setting rules to automate bills received
You can set rules so that invoices up to a certain amount can be authorised and pushed into Reckon automatically. This can be completed when the Bill is received and is on your dashboard to be authorised (or disputed).
To set rules, click on “Would you like to auto send to Reckon in future?” Yes/No.
Manage a rule that was set for a supplier
In your main menu dropdown, click on Receive Bills > Automation. All Rules that you have set for a Supplier previously are able to be managed here.
Sending and receiving transactions process
Sending
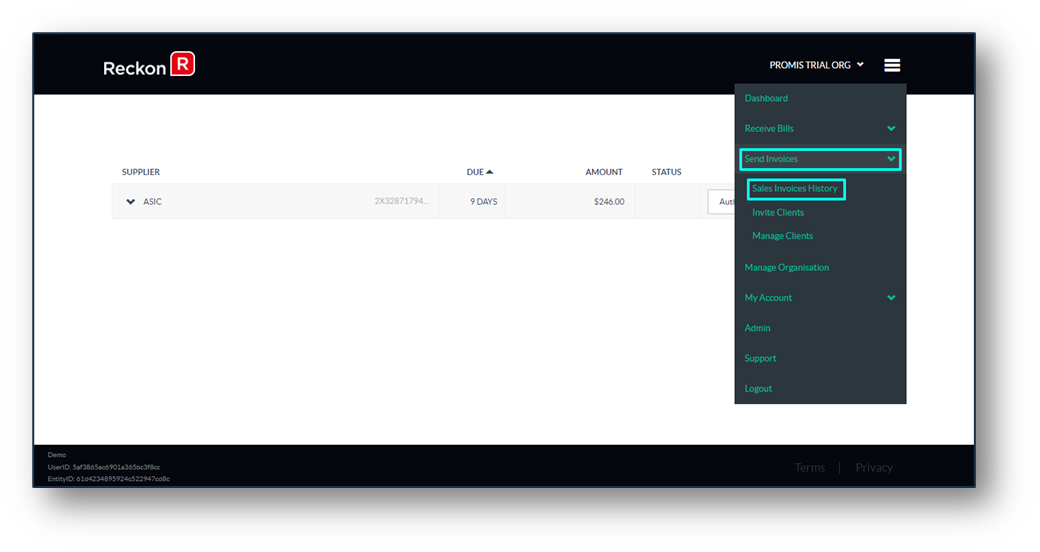
- Create and send an invoice out of Reckon One via email as you would normally. Take note of the invoice number.
- Once the invoice has come through, you can check the sent invoice in Sales Invoice History (refer to Review Invoices Sent section in this document).
- Back in your book, you will see a note has been added to the invoice “Delivered as an eInvoice….”.
Receiving
- The invoice should appear in the Reckon eInvoicing Dashboard for the customer after about 15 minutes.
- The invoice to be actioned will appear in the Reckon eInvoicing Dashboard for the customer (see section Review Invoices Received in this document). The customer can make the appropriate actions as per below (see section Action Invoices Received in this document).
- The first time the customer receives an eInvoice from a particular supplier they will need to allocate the invoice to an expense account. All future eInvoices from this supplier are then automatically allocated to this expense account.
- The customer can then authorise the eInvoice to be pushed into your book. At this authorisation stage, you also get the chance to auto send invoices up to a certain amount e.g. you set a rule that all invoices for a certain supplier under $50.00 will automatically go into your Book. This enables all future eInvoices up to that amount to automatically get sent through to your Book (auto approval) and therefore will not be required to be manually authorised.
- The automation rule can be changed under the Receive Bills menu item (see above section Setting Rules to Automate Bills Received).
- Once authorised, the invoice will appear in your book.
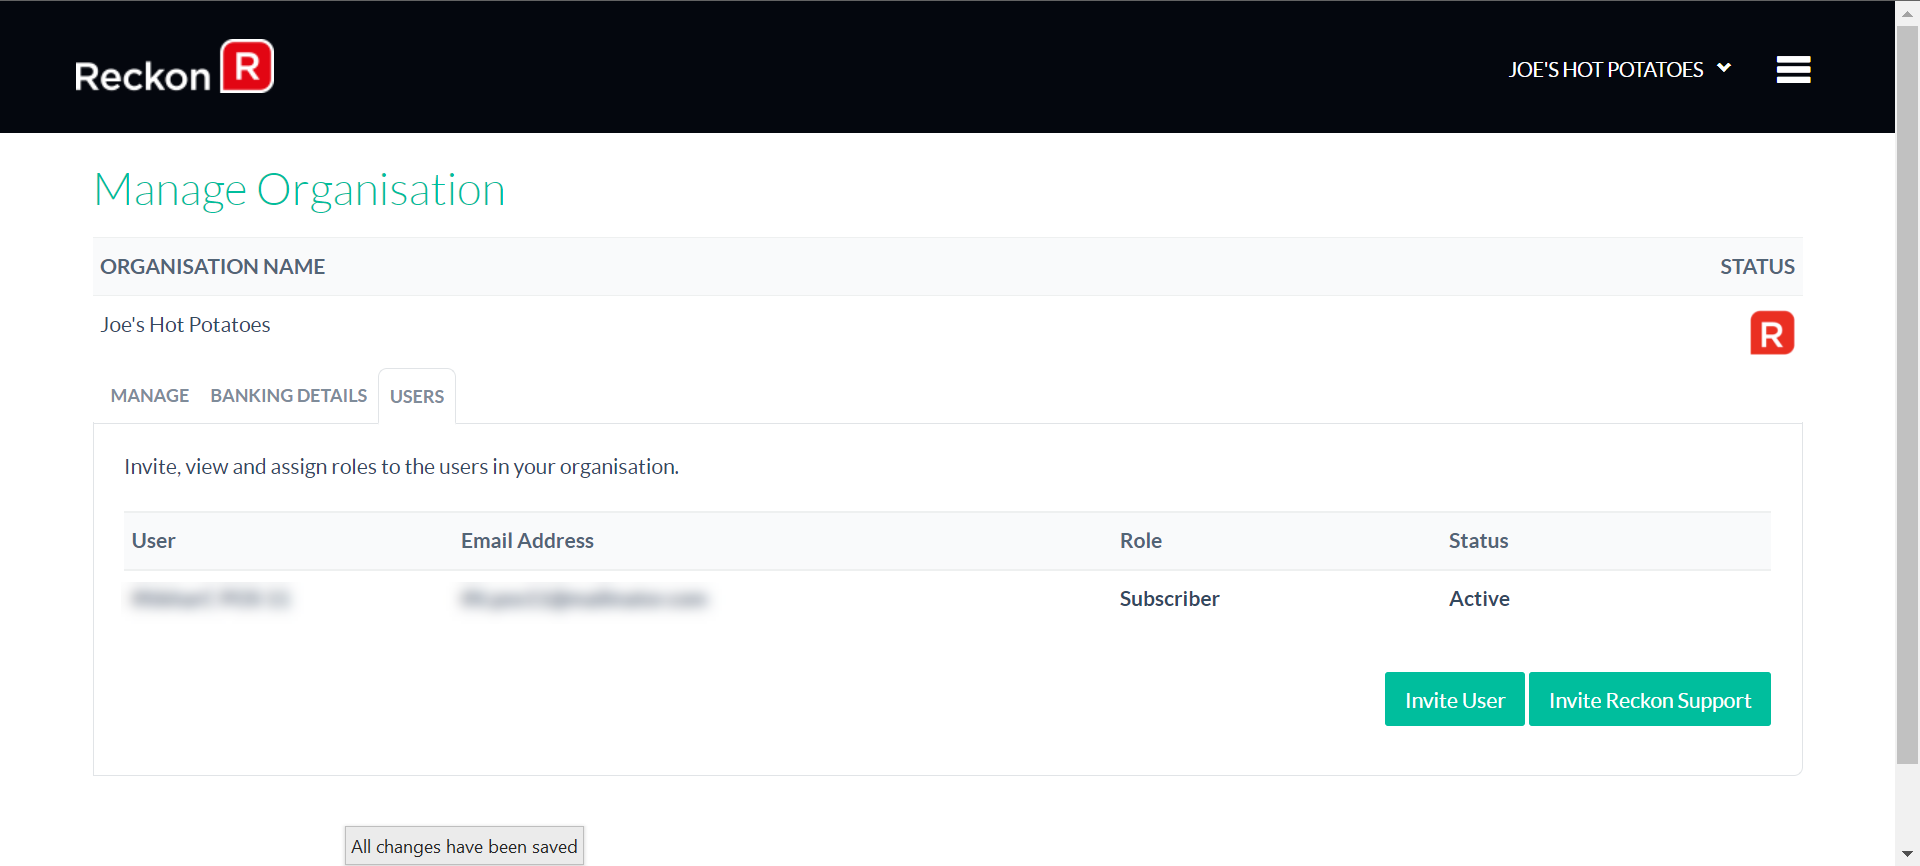
Manage organisations
To manage your Organisation, including managing users and more:
- Go to the menu
- Click Manage Organisation
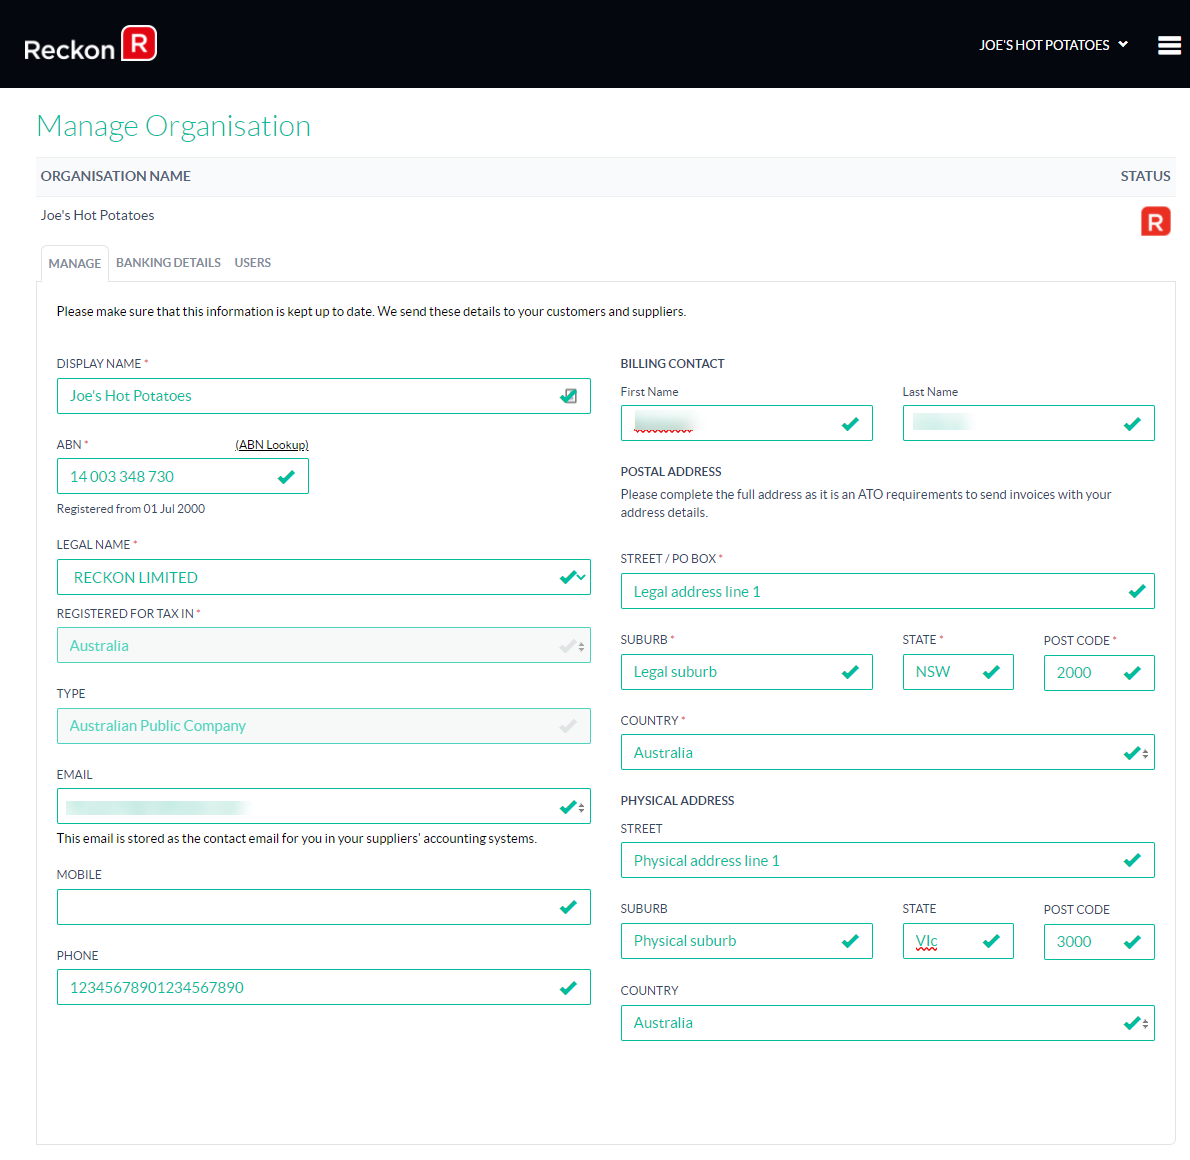
Manage
In the Manage tab, the information in this view is filled out during the initial onboarding registration process for that entity.
You can update entity details on this tab but please note it will not update the details in your Reckon One Book. If the details need to be updated in your book, please log in to Reckon One.
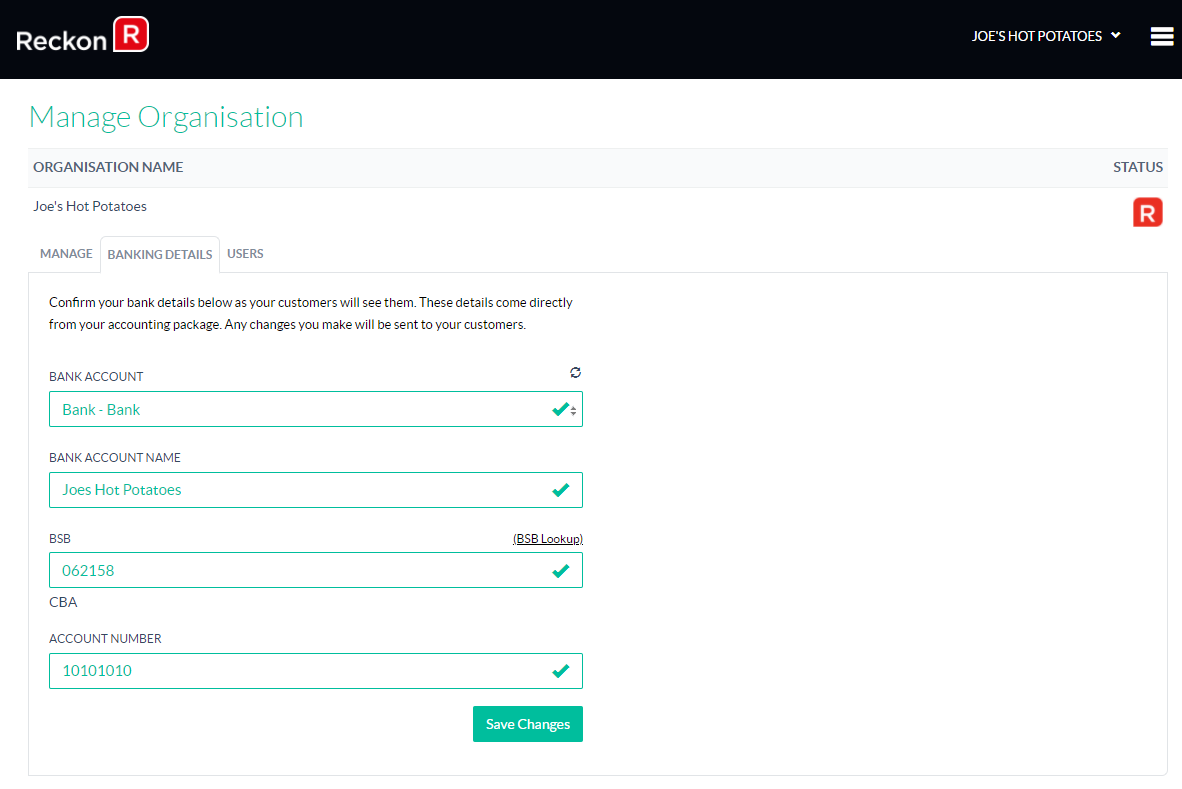
Banking details
You can update your dank details on this page. Please note that the details will not update the bank account in your book.
Users
In the Users tab, you will be able to invite another user (your staff/accountant etc.) to access your organisation.
You can also invite Reckon Support if you have any problems we need to solve.
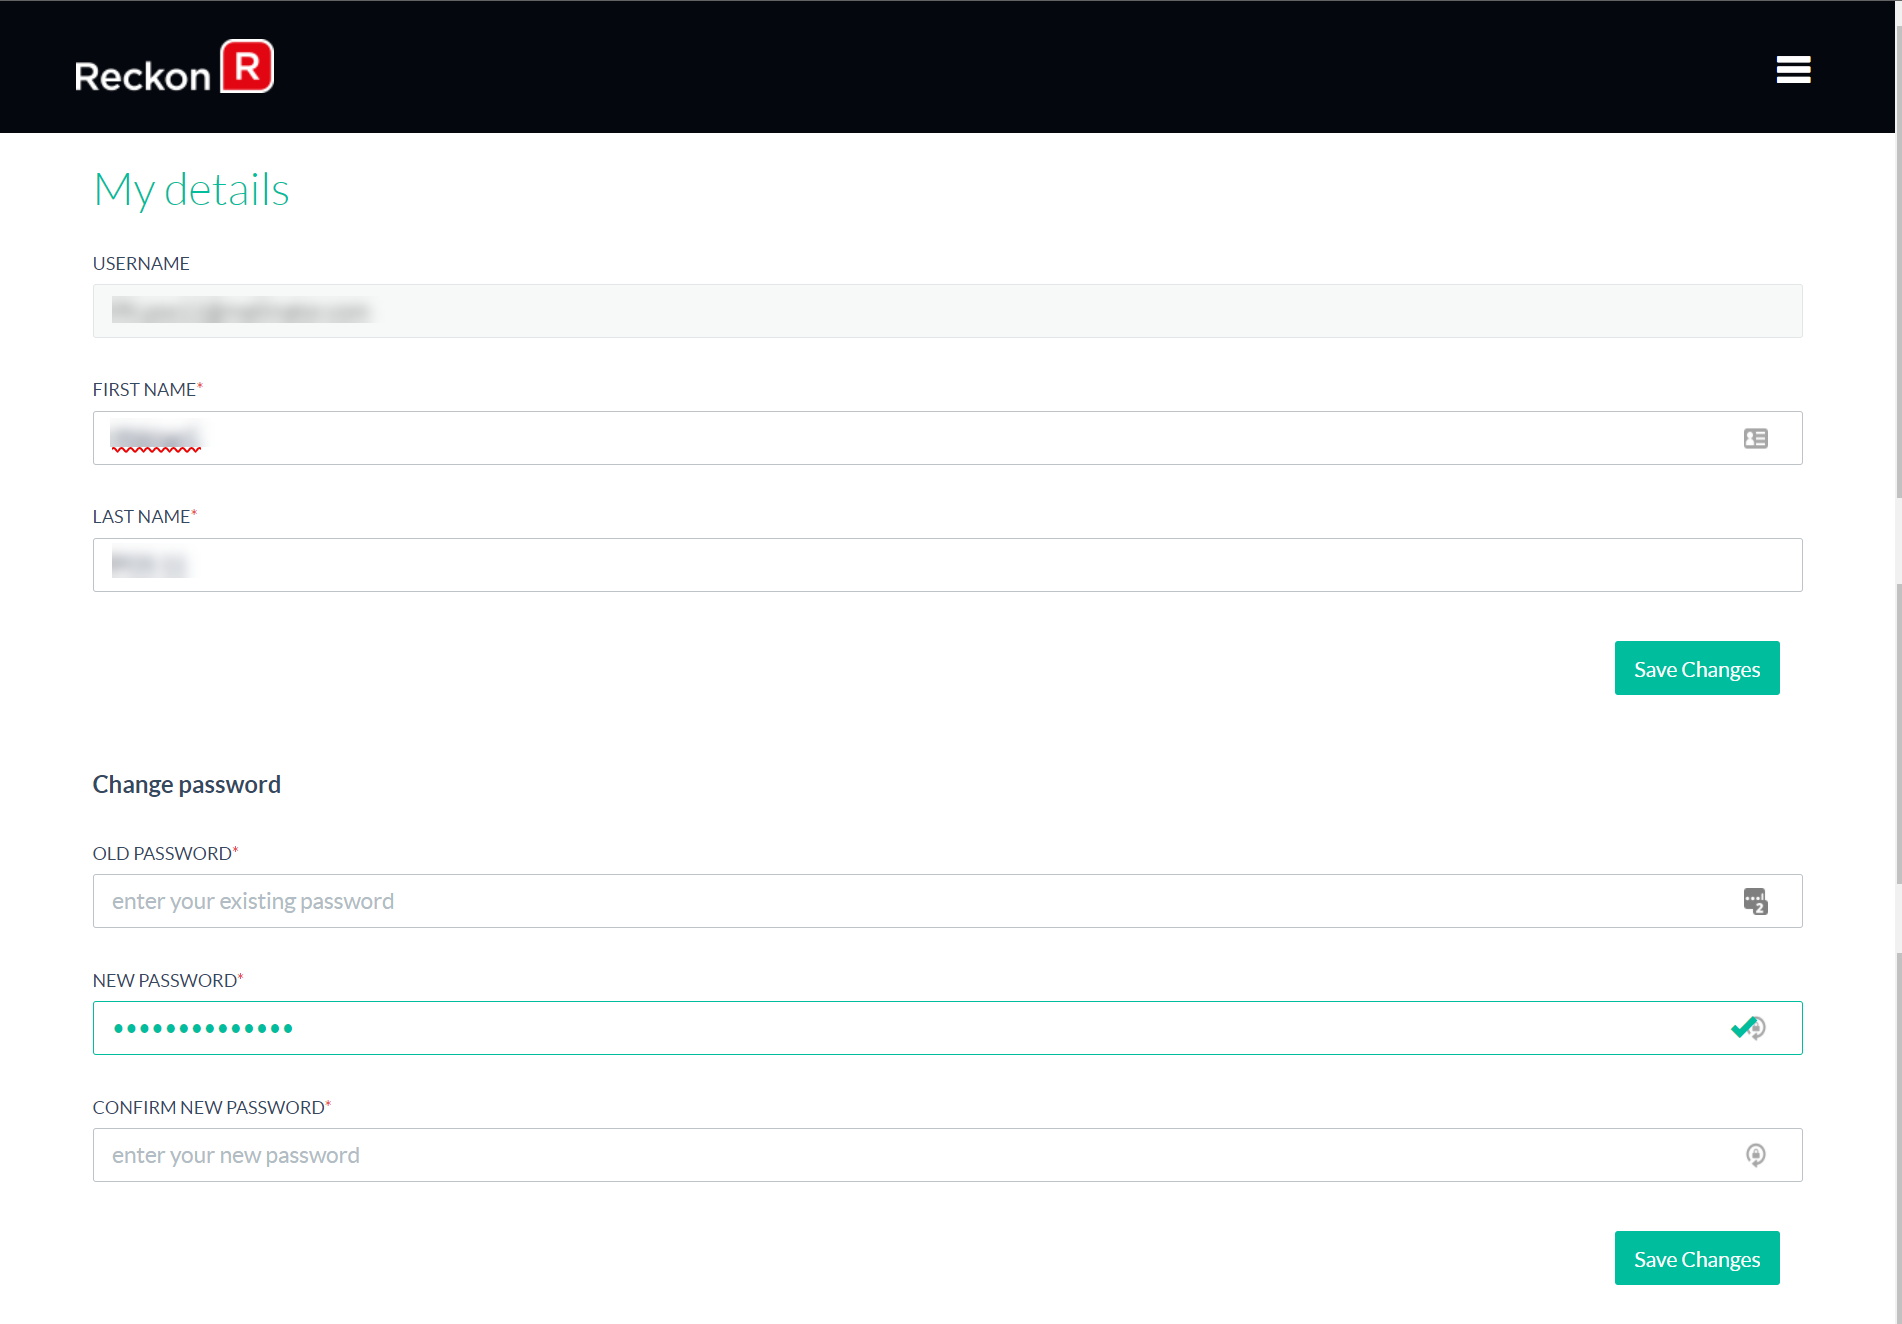
My account
- Go to the menu
- Click My Account
- My Details
- Devices
My details
You can change your name and password in this page.
Devices
You can view the Devices you have used to log in to the Reckon eInvoicing.

Need more help?
Ask the Reckon Community at: https://community.reckon.com/categories/reckonone
Or
Log a Support Ticket: https://www.reckon.com/au/support/