Table of Contents
Adding JobKeeper Allowance pay items in Reckon Accounts
How-to Video
Overview
In order to process JobKeeper payment, a minimum of three (3) ATO mandated allowance pay items need to be added to your company file. This document will guide you to how setup these pay items in Reckon Accounts.
JOBKEEPER-START-FNXX/JK-ST-FNXX
This payroll item is used to indicate the first JobKeeper fortnightly period for which the subsidy is payable. "XX” refers to the fortnightly period from which the payment first started.
The JobKeeper Start Fortnight is required to inform the ATO from which fortnight the subsidy is to be reimbursed. The JobKeeper Start Fortnight may be reported once or continue to be reported in subsequent Pay Events but must not be forward-dated. For simplicity, in our examples, we are going to use JOBKEEPER-START-FNXX allowance once only.
Click here to find out about the Fortnight numbers (FN).
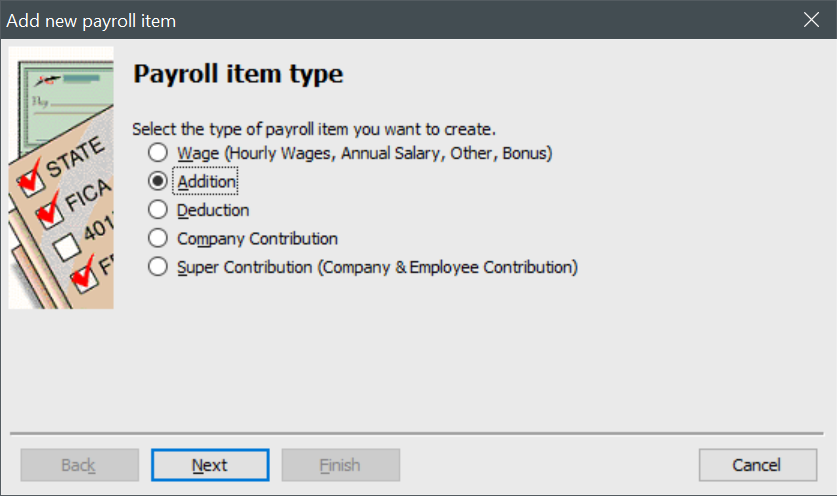
To create this item, you will need to:
- Go to Lists > Payroll Item List
- Click on Payroll Item drop-down menu > New.

- Choose Addition in Payroll item type window and click Next.
- Type the name as JOBKEEPER-START-FNXX (used in this example) OR JK-ST-FNXX in Name used in payments and payroll reports window and click Next
You will need to replace "XX" according to the JobKeeper reporting period your pay date falls in. In the below screenshot, we have used the first fortnight's FN number (01) as an example.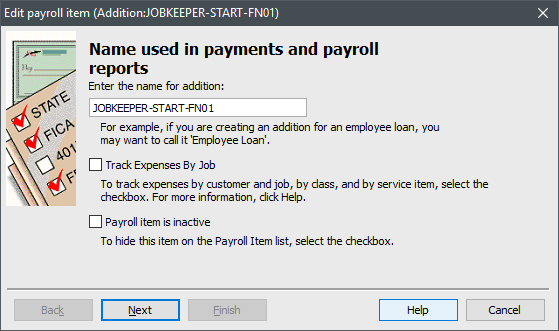
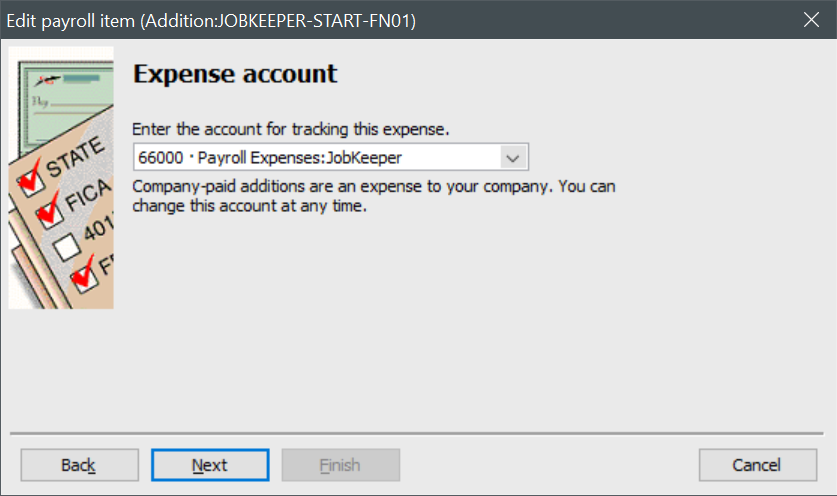
- Choose your Expense account in Expense account window. You might want to use an existing Expense account or create a new account to track the transactions.
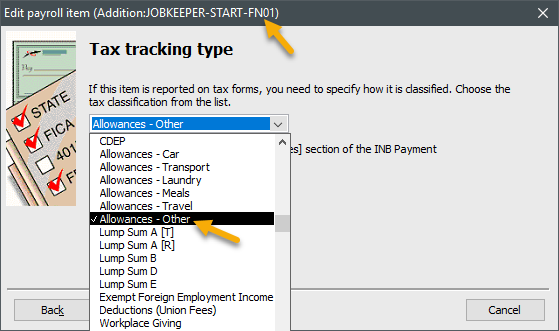
- Choose Allowances - Other in Tax tracking type window.
- You will not select PAYG or State Payroll Tax for this item in Taxes window. This payroll item is used to indicate the beginning of JobKeeper Payment of eligible employee/s.
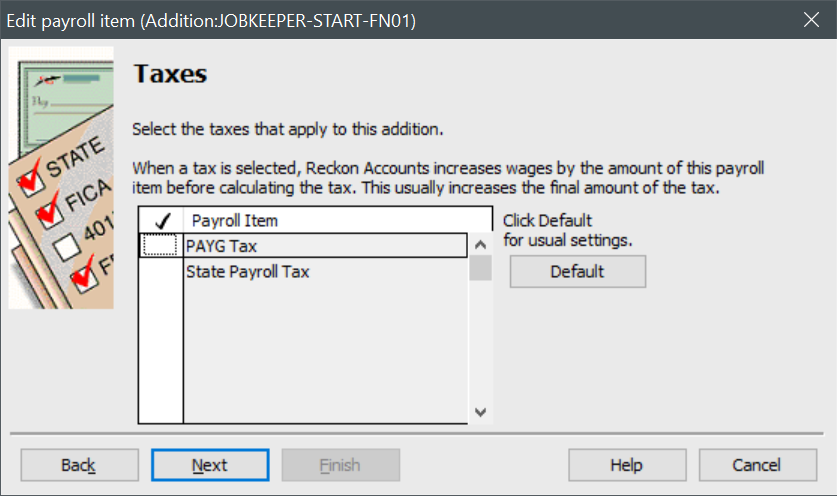 As the amount for a START item will be $0.00, tax is irrelevant.
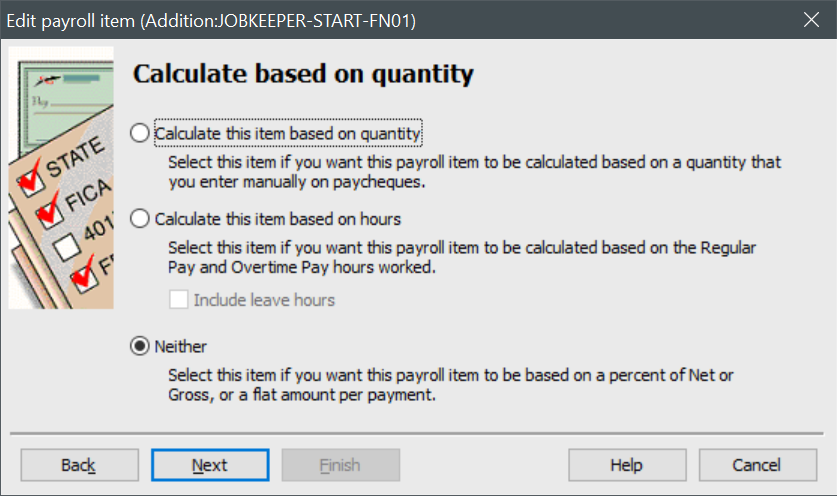
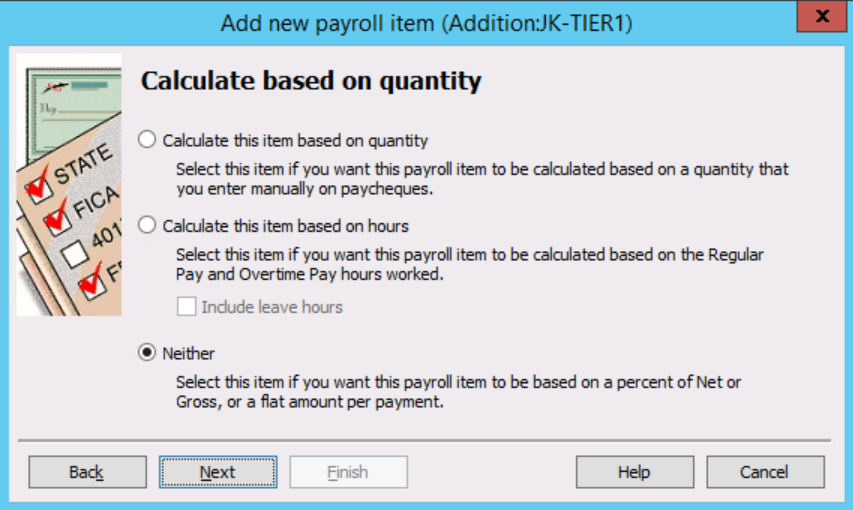
 - Choose Neither in Calculate based on quantity window.
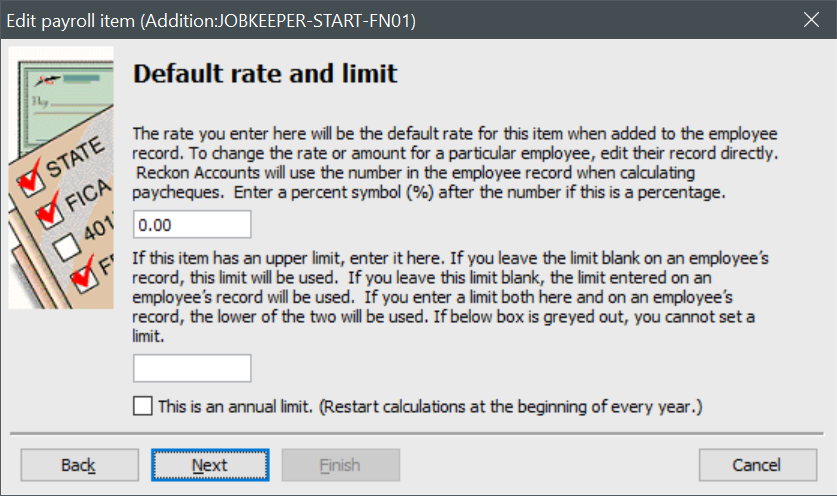
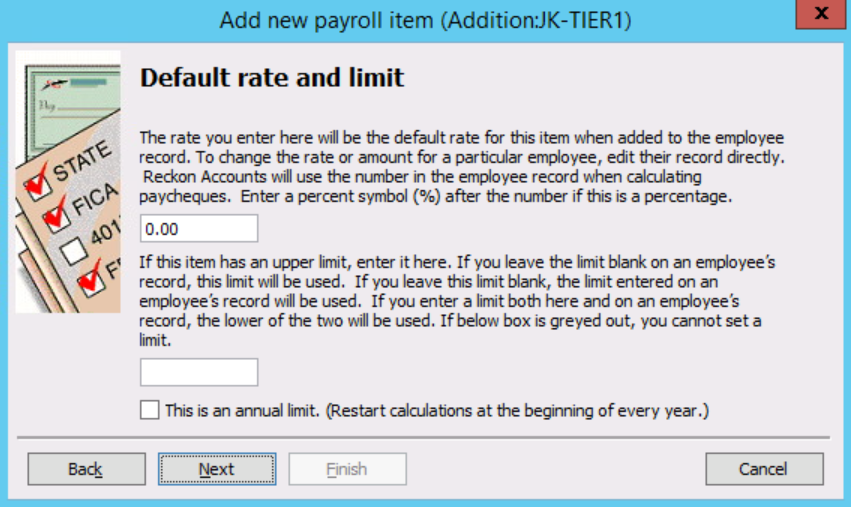
- Enter 0 for the rate in Default rate and limit window.
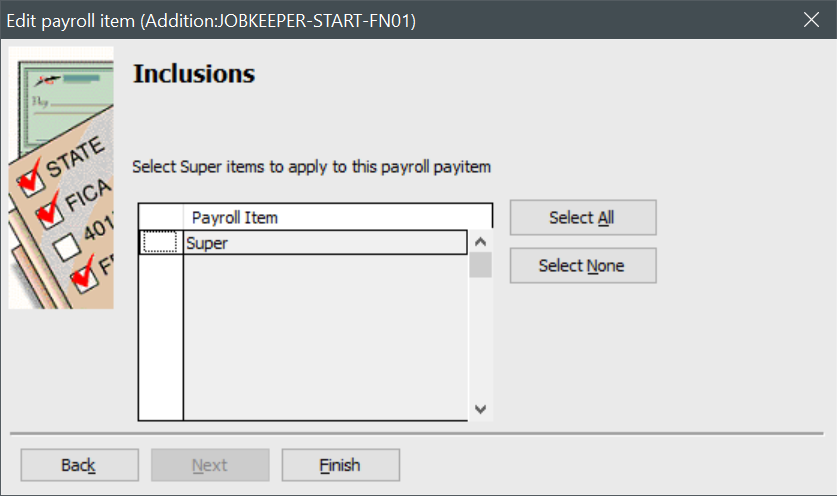
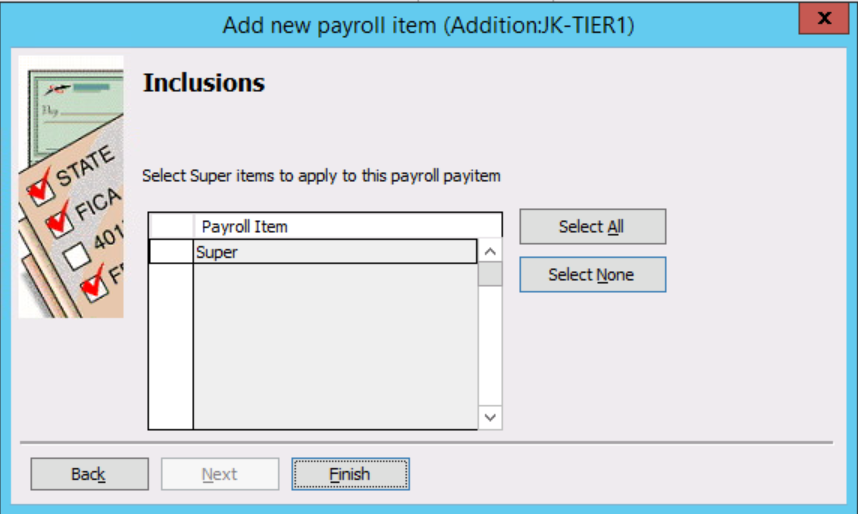
- Do not select any Super item/s in Inclusions window.
- Click Finish to complete setting up this payroll item.
JK-TIERX
This allowance item is used to determine which JobKeeper tier the employee falls into. "X" referes to the tier number, so for example if an employee is Tier 1, the item will be named JK-TIER1.
o create this item, you will need to:
- Go to Lists > Payroll Item List
- Click on Payroll Item drop-down menu > New.
- Choose Addition in Payroll item type window and click Next.
- Type the name as JK-TIERX (You will need to replace X with the relevant tier, either 1 or 2) in Name used in payments and payroll reports window and click Next.
You will need to replace "XX" according to the JobKeeper reporting period your pay date falls in. In the below screenshot, we have used the first fortnight's FN number (01) as an example.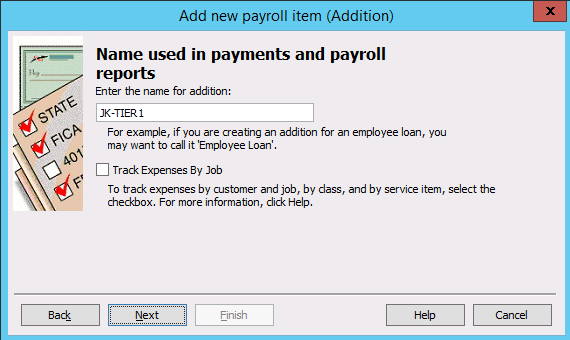
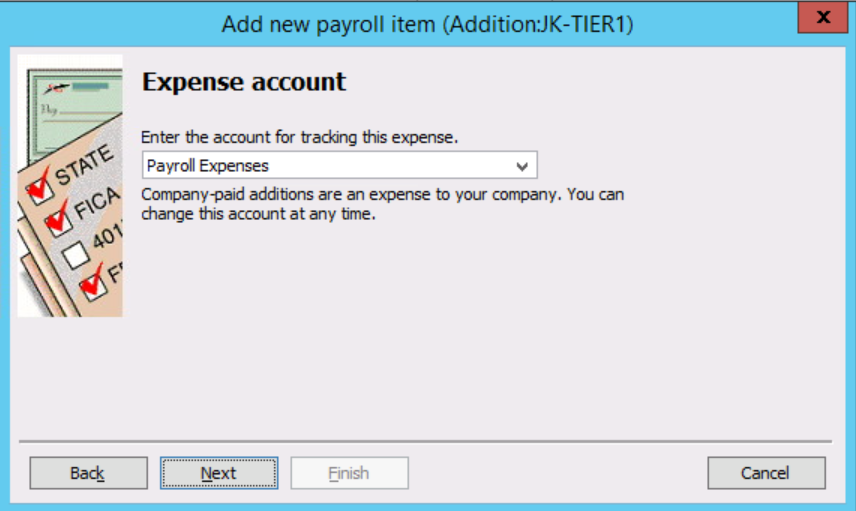
- Choose your Expense account in Expense account window. You might want to use an existing Expense account or create a new account to track the transactions.
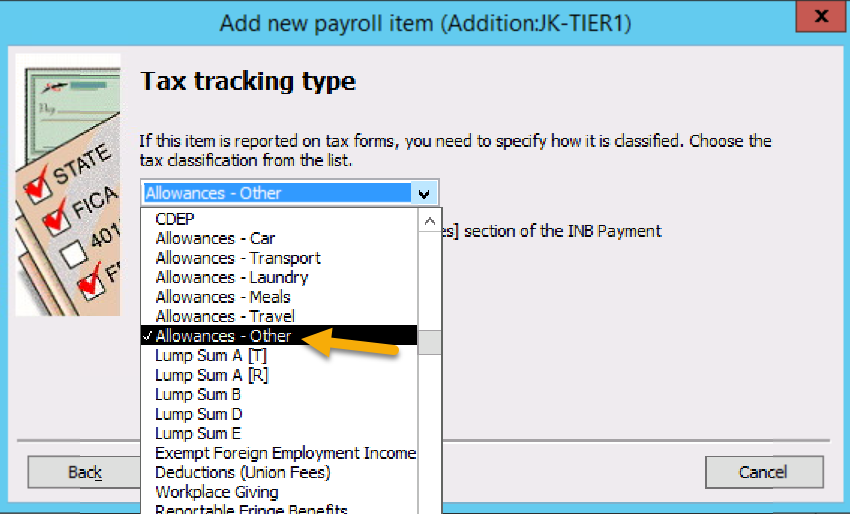
- Choose Allowances - Other in Tax tracking type window.
- You will not select PAYG or State Payroll Tax for this item in Taxes window. This payroll item is used to indicate the beginning of JobKeeper Payment of eligible employee/s.
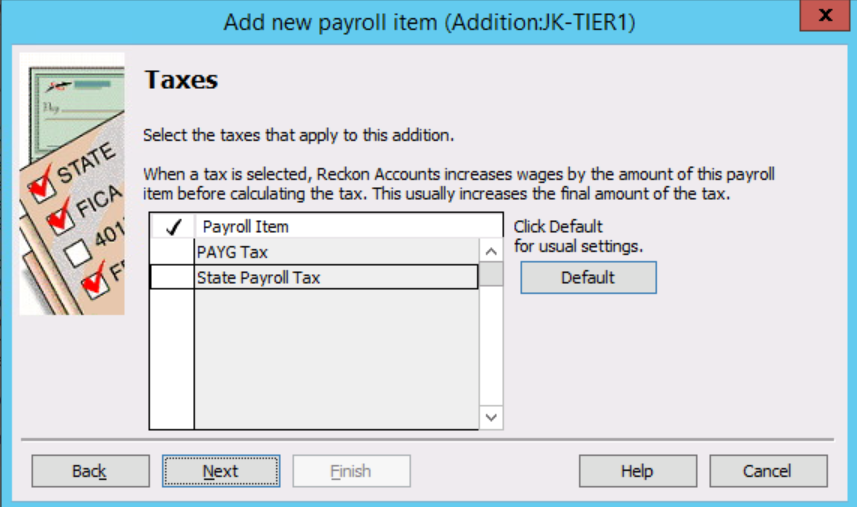 As the amount for a START item will be $0.00, tax is irrelevant.
 - Choose Neither in Calculate based on quantity window.
- Enter 0 for the rate in Default rate and limit window.
- Do not select any Super item/s in Inclusions window.
- Click Finish to complete setting up this payroll item.
JOBKEEPER-TOPUP
This payroll item is used to indicate the Gross amount of JobKeeper payment.
To create this item, you will need to:
- Go to Lists > Payroll Item List.
- Click on Payroll Item drop-down menu > New.
- Choose Addition in Payroll item type window and click Next.

- Type the name as JOBKEEPER-TOPUP in Name used in payments and payroll reports window and click Next.

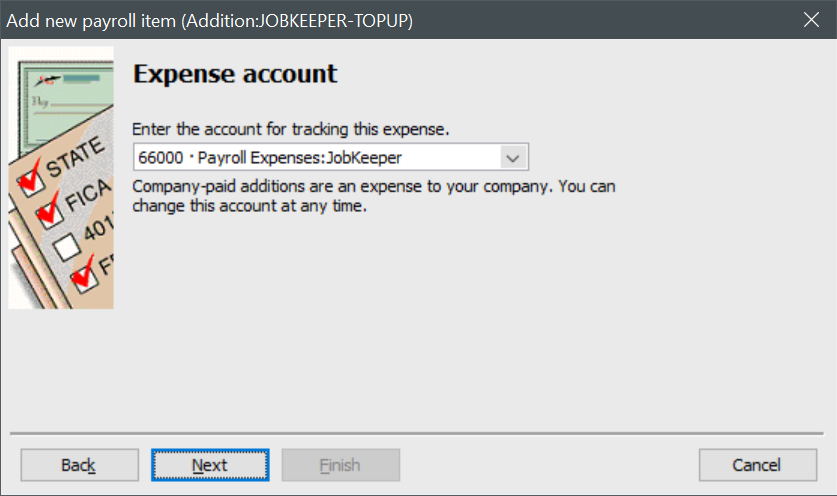
- Choose your Expense account in Expense account window. You might want to use an existing Expense account or create a new account to track the transactions.
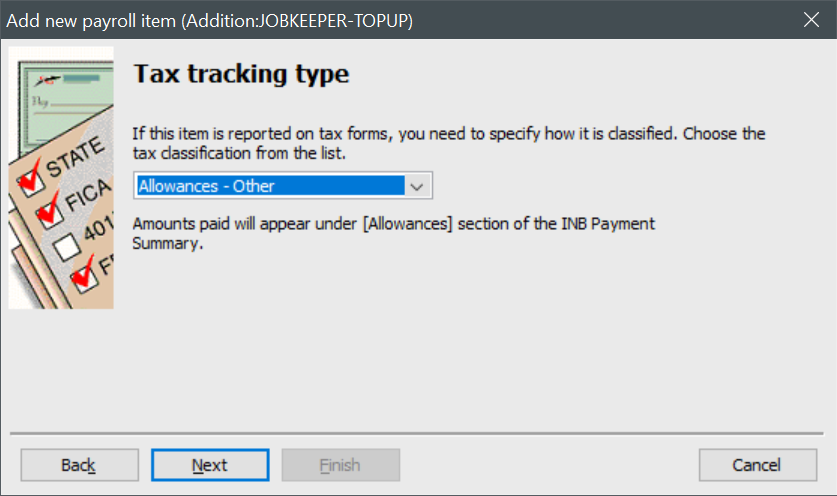
- Choose Allowances - Other in Tax tracking type window.
- From the Taxes window, you will need to:
- Select PAYG Tax as the JobKeeper payments are taxable.
- Depending on your state, State Payroll Tax might not be applicable (for example, SA exempts Payroll Tax for JobKeeper payments, as of 20/04/20). Please check your State's requirement to know if you need to select State Payroll Tax.

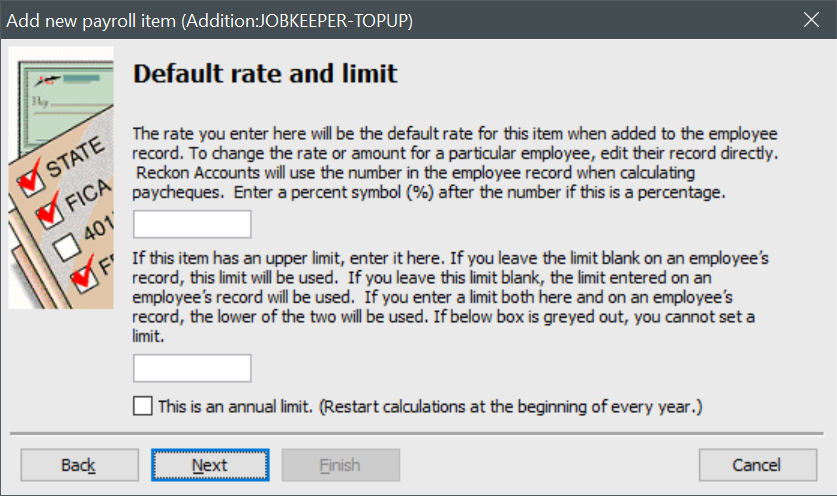
- Choose Neither in Calculate based on quantity window as you will need to enter the amount manually.

- Leave the rate and limit blank in Default rate and limit window.
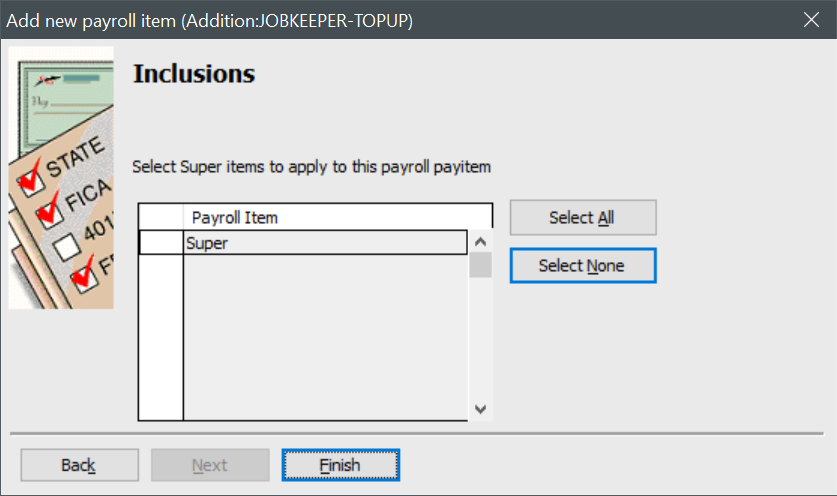
- Super is not mandatory for JobKeeper Payments. An employer can choose if they wish to pay Super on JobKeeper payments.
- Click Finish to complete setting up this payroll item.
JOBKEEPER-FINISH-FNXX/JK-FI-FNXX
This allowance is used to indicate any exit of eligibility or termination of the employee. "XX” refers to the final fortnightly period to which the payment applies. The ATO must be informed of the fortnight from which the JobKeeper payment no longer applies. The JobKeeper Finish Fortnight may be reported once or continue to be report in subsequent Pay Events but must not be forward-dated. For simplicity, in our examples, we are going to use JOBKEEPER-FINISH-FNXX allowance once only.
Click here for information on JobKeeper Fortnight numbers.
To create this item, you will need to:
- Go to Lists > Payroll Item List.
- Click on Payroll Item drop-down menu > New.
- Choose Addition in Payroll item type window and click Next.

- Type the name as JOBKEEPER-FINISH-FNXX (used in this example) OR JK-FI-FNXX in Name used in payments and payroll reports window and click Next.
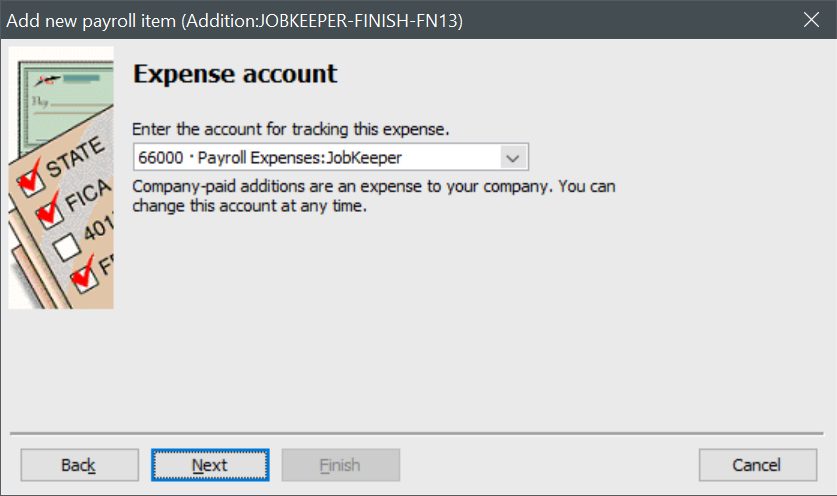
You will need to replace "XX" according to the JobKeeper reporting period your pay date falls in. In the below screenshot, we've used the last Fortnight's FN number (13) as an example.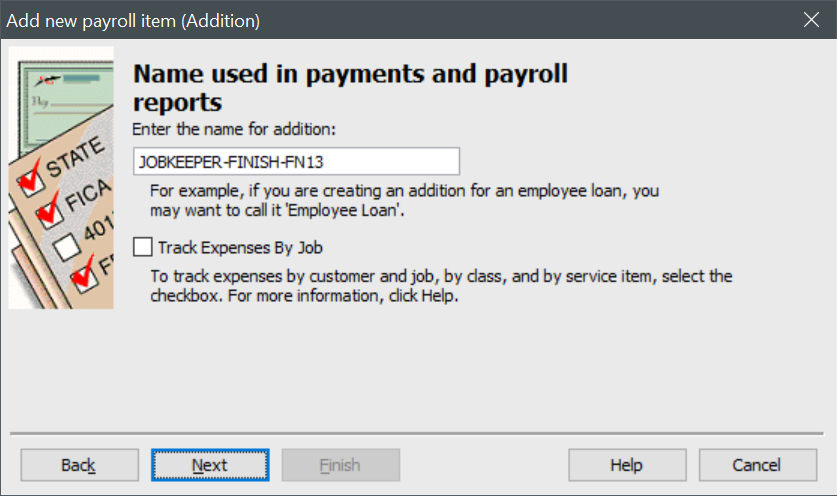
- Choose your Expense account in Expense account window. You might want to use an existing Expense account or create a new account to track the transactions.
- Choose Allowances - Other in Tax tracking type window.

- You will not select PAYG or State Payroll tax for this item in Taxes window. This payroll item is used to indicate the end of JobKeeper Payment of eligible employee/s.
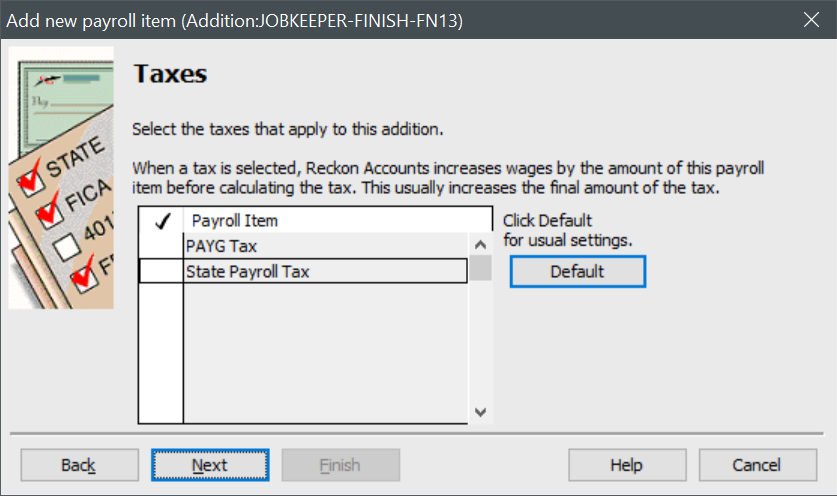 As the amount for a FINISH item will be $0.00, tax is irrelevant.
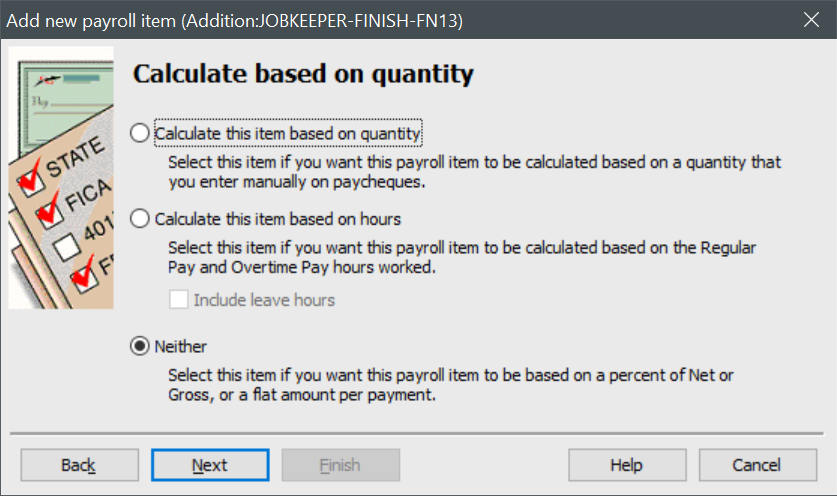
 - Choose Neither in Calculate based on quantity window.
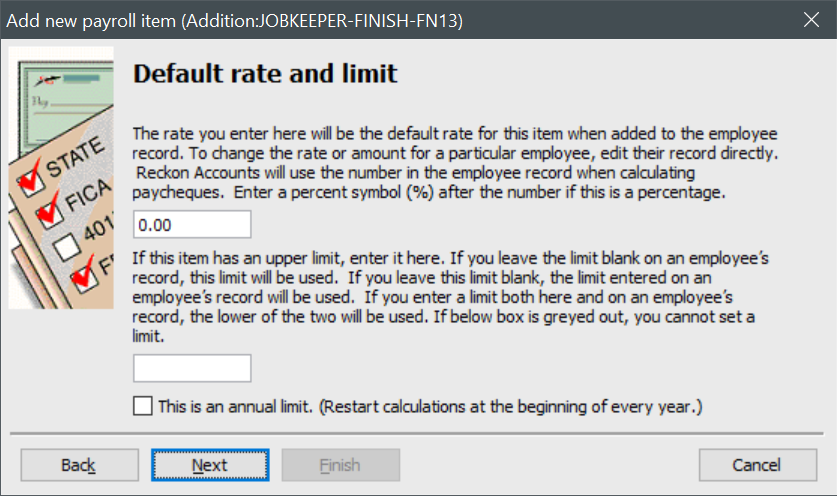
- Enter 0 for the rate in Default rate and limit window.
- Do not select any Super item/s in Inclusions window.

- Click Finish to complete setting up this payroll item.