Table of Contents
Choose details to include on invoices in Reckon One
Learn how to customise the information you want to appear on invoices in Reckon One, including company, customer and invoice details, and extra notes, payment information and terms and conditions. You can customise this for any invoice template you use.
Company information
To customise the company information displayed on an invoice template:
- Go to Settings (cog icon in top right corner), General, then Manage templates.
- From the Template dropdown, select the template you wish to customise.
- Select the Content tab.

- Click on the arrow next to Header to expand the section.
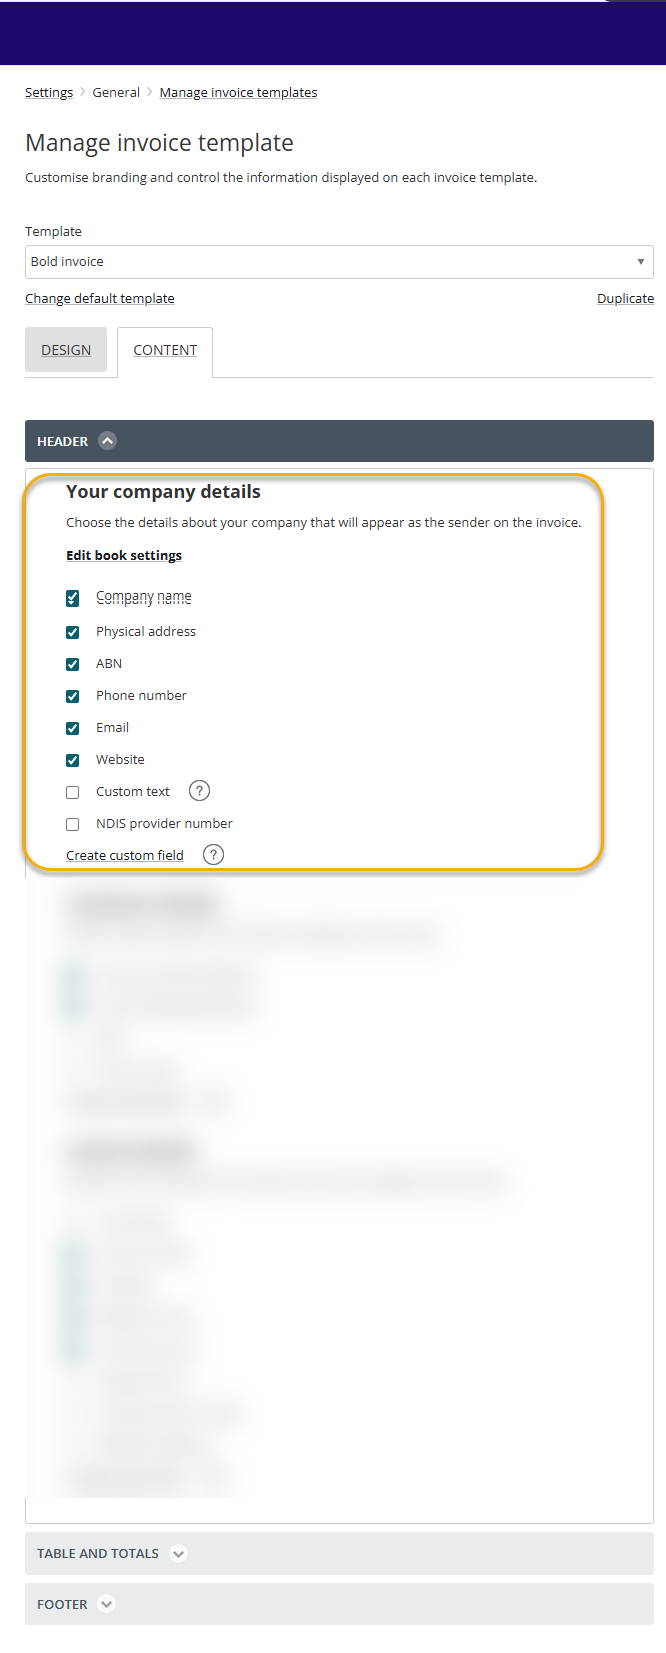
- In the Your company details section, select or deselect the checkboxes to include or exclude certain information from appearing on invoices using the selected template. The information will populate based on the details saved in your Book settings.
- (Optional) Enter text in the Custom text field if there is some extra company information you want to display on invoices using this template.
- (Optional) Select Create custom field to add another field to your Book settings and have it display on invoices using this template. You’ll need to go and populate this field in the Book settings. Learn more about custom fields.
- To see your changes in the preview, click Refresh preview in the top right. You can also click Print to see how the invoice will appear printed.
- To save your changes, click Save.
If the company information you see in the Preview is incorrect, edit your Book settings.
Customer details
To customise the customer details displayed on an invoice template:
- Go to Settings (cog icon in top right corner), General, then Manage templates.
- From the Template dropdown, select the template you wish to customise.
- Select the Content tab.

- Click on the arrow next to Header to expand the section.
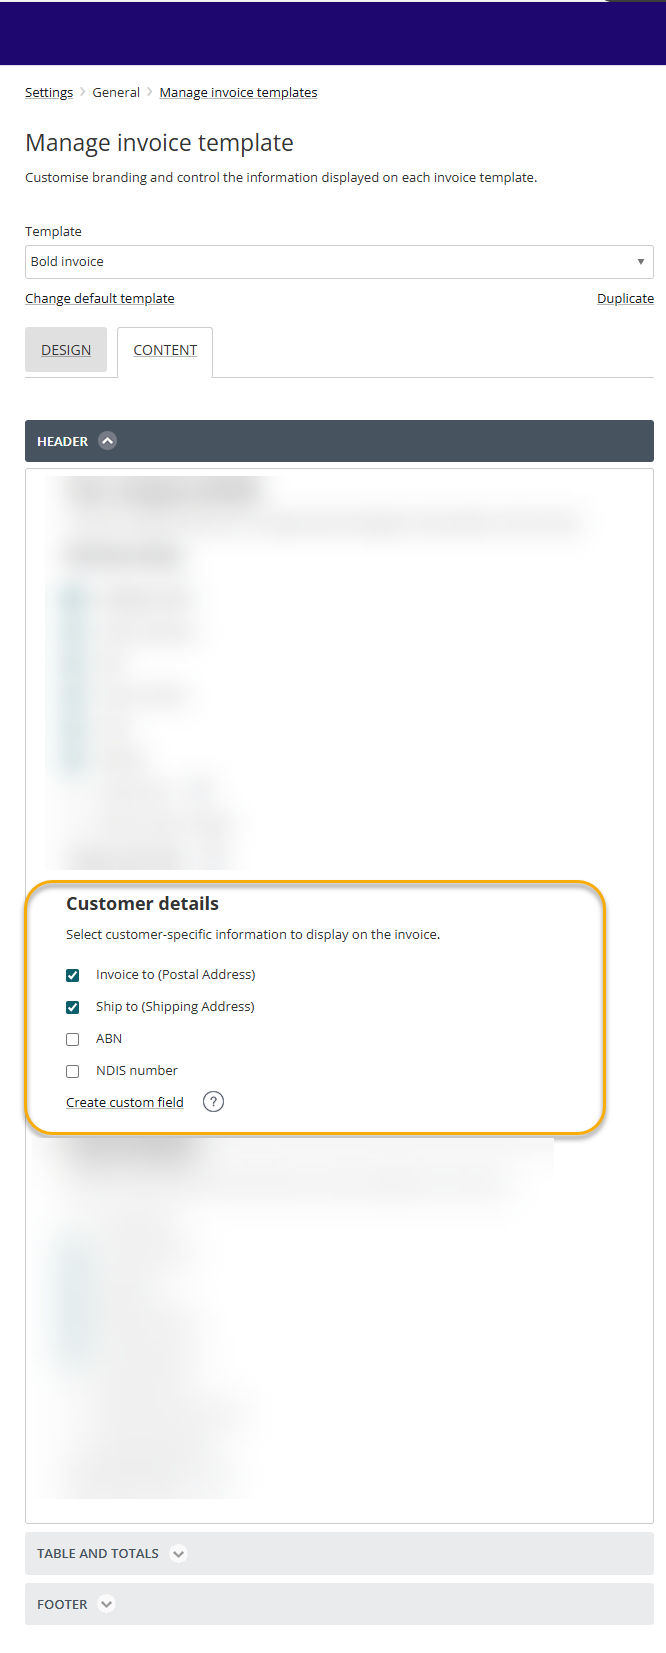
- In the Customer details section, select or deselect the checkboxes to include or exclude certain information from appearing on invoices using the selected template. The information will populate based on the details saved in the customer’s record in Reckon One.
- (Optional) Select Create custom field to add another field to your customer record and have it display on invoices using this template. You’ll need to go and populate this field in the customer’s record. Learn more about custom fields.
- To see your changes in the preview, click Refresh preview in the top right. You can also click Print to see how the invoice will appear printed.
- To save your changes, select Save.
Invoice-related information
To customise the invoice-related information that’s displayed on an invoice template:
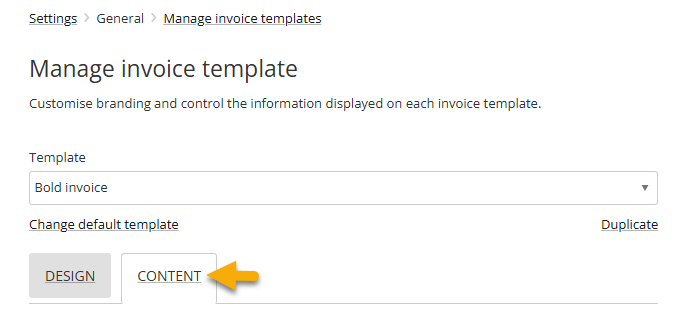
- Go to Settings (cog icon in top right corner), General, then Manage templates.
- From the Template dropdown, select the template you wish to customise.
- Select the Content tab.
Invoice details (e.g. date, due date, payment terms, invoice discount)
- In the Content tab, click on the arrow next to Header to expand the section.
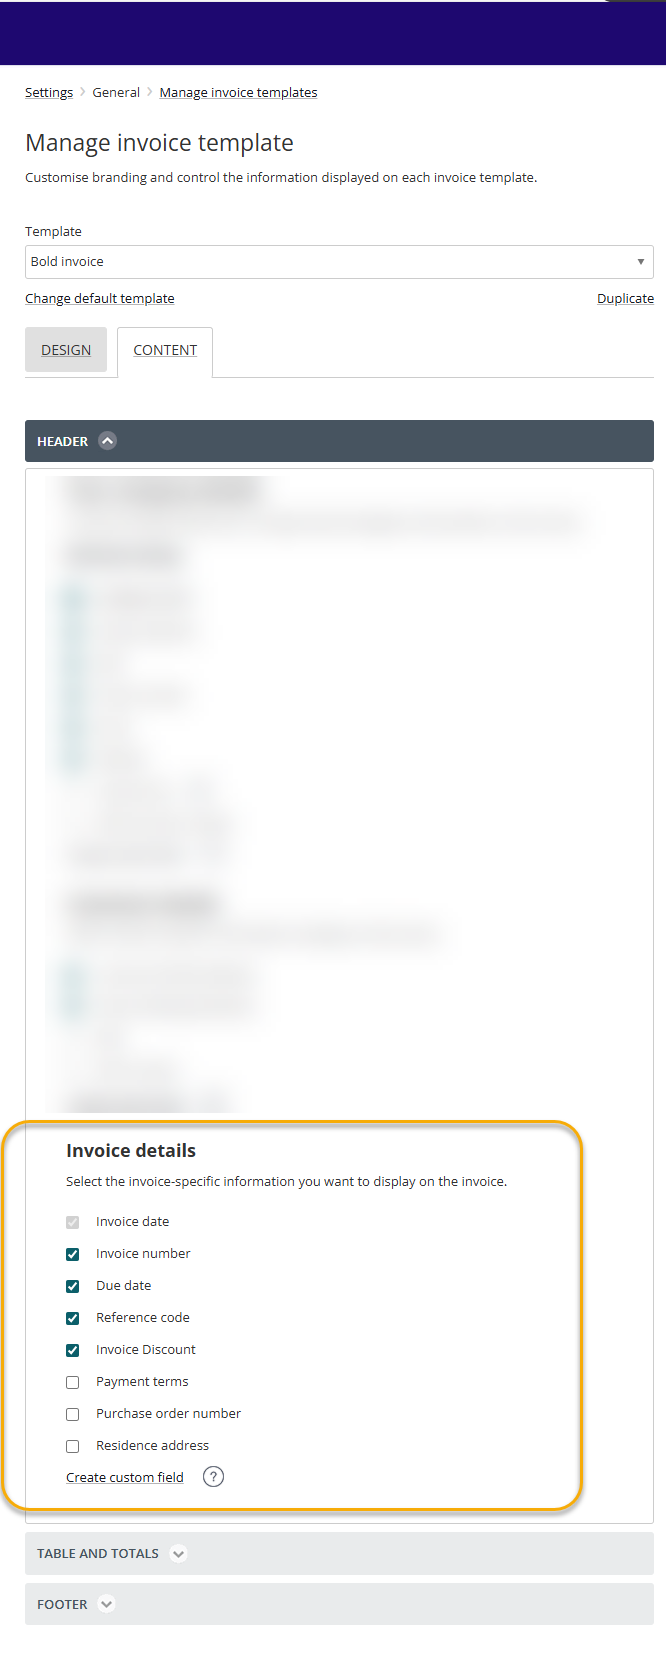
- In the Invoice details section, select or deselect the checkboxes to include or exclude certain information from appearing on invoices using the selected template. The information will populate based on the details saved in the invoice in Reckon One.
- (Optional) Select Create custom field to add another field to your invoice creation screen and have it display on invoices using this template. Learn more about custom fields.
- To see your changes in the preview, click Refresh preview in the top right. You can also click Print to see how the invoice will appear printed.
- To save your changes, click Save.
Details of goods and services sold (columns in the invoice table)
- In the Content tab, click on the arrow next to Table and totals to expand the section.
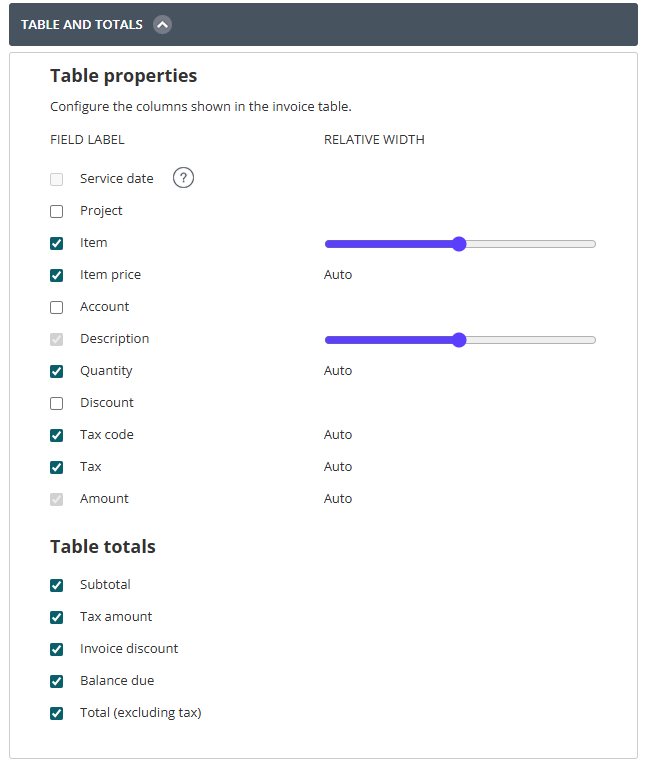
- Select or deselect the checkboxes to include or exclude certain information from appearing on invoices using the selected template. The information will populate based on the details saved in the invoice in Reckon One.
- (Optional) Use the Width slider to change the width of columns.
- To see your changes in the preview, click Refresh preview in the top right. You can also click Print to see how the invoice will appear printed.
- To save your changes, click Save.
Notes, payment guidance and terms and conditions
To include notes, payment guidance and terms and conditions on an invoice template:
- Go to Settings (cog icon in top right corner), General, then Manage templates.
- From the Template dropdown, select the template you wish to customise.
- Select the Content tab.

- Click on the arrow next to Footer to expand the section.
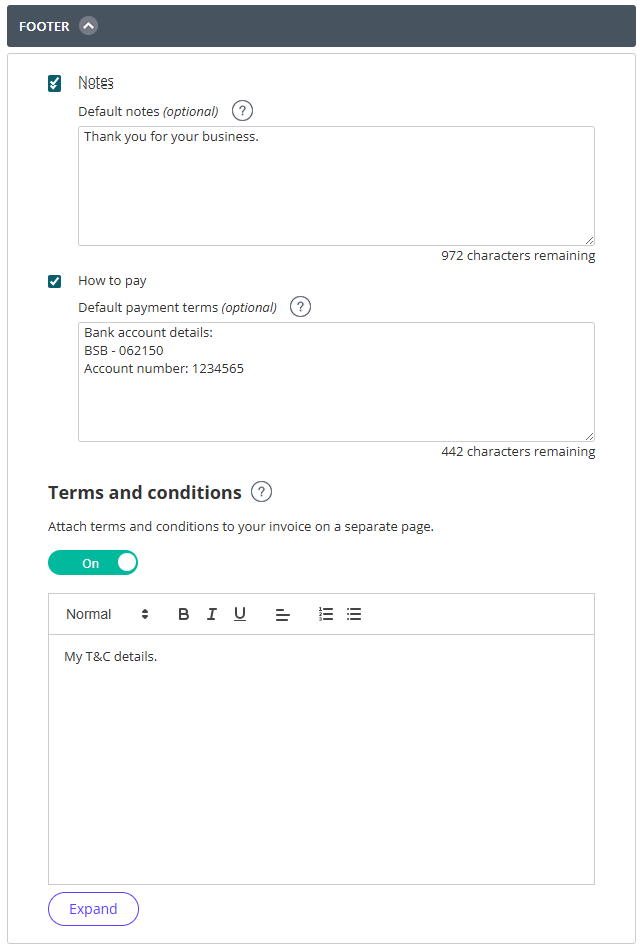
- Select or deselect the checkboxes to include or exclude notes and ‘How to pay’ fields from appearing on invoices using the selected template.
- (Optional) Switch the Terms & conditions toggle on if you wish to include terms and conditions on the invoice. If switched on, enter the terms and conditions text.
- To see your changes in the preview, click Refresh preview in the top right. You can also click Print to see how the invoice will appear printed.
- To save your changes, click Save.
Read more
- Learn how to customise the look and feel of your invoice template
- Learn how to change your default invoice template
- Learn more about how custom fields work