Table of Contents
Record leave for an employee in Reckon One
Learn how to record an employee’s leave in Reckon One so it’s ready to pay when you create a pay run.
Before you start
Each Leave request is approved as soon as you save it, so there’s no approval step. To record leave, you’ll need the Manage leave permission. Find out more about permissions in creating a new role for a user in Reckon One.
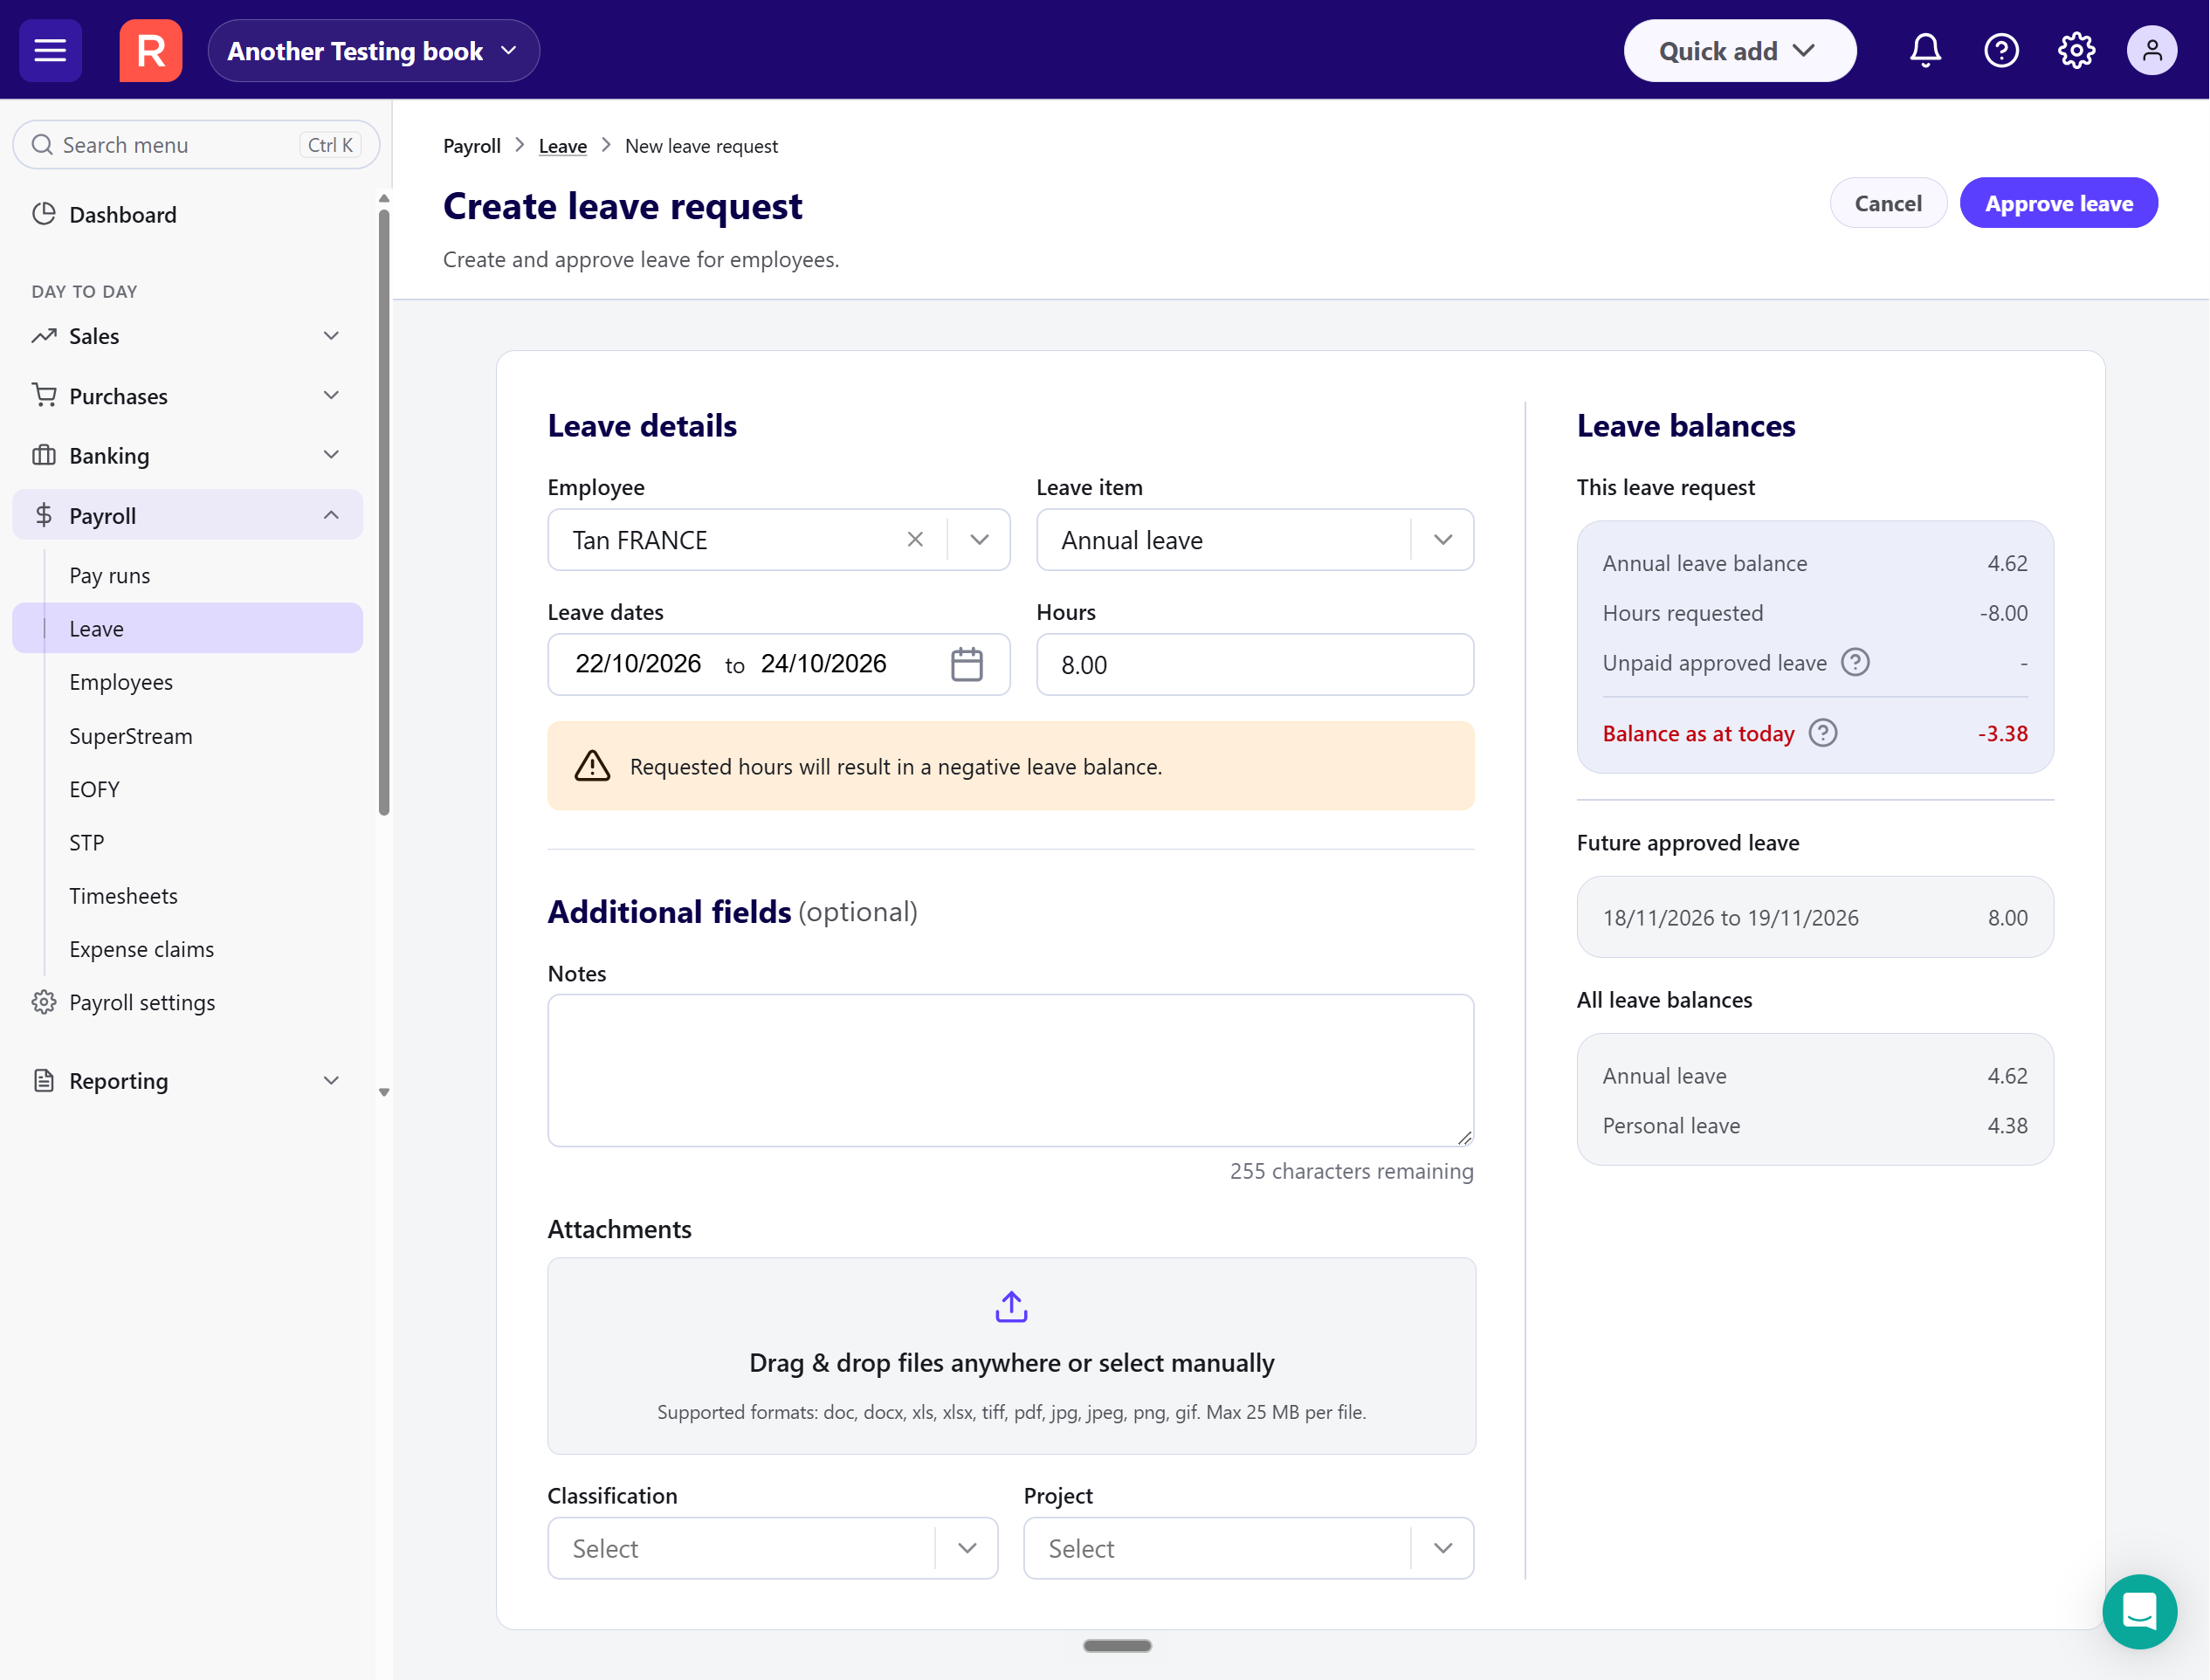
Record leave
- In the Payroll menu, select Leave.
- Click Create leave.
- Select the employee in the Employee field.
- Select the type of leave in the Leave item field. The types of leave that will be visible depend on which leave has been set up for that employee, as well as Other leave.
- Select the first and last day of leave in the Leave dates field. You can pick past dates if you’re recording leave that’s already been taken or future dates for leave that is yet to be taken.
- Hours will be automatically added to the leave request based on the selected Leave dates and the employee's standard weekly hours. Manually change the Hours as needed.
- (Optional) Enter any notes in the Notes field.
- (Optional) Drag and drop any attachments, like a medical certificate, or click select manually to choose a file. Each file can be up to 25 MB.
- (Optional) Select a Customer, Classification or Project. You’ll only see these fields if you have active customers, have classifications turned on, or have projects on your plan.
- Click Approve leave.
How are the hours calculated?
Reckon One automatically calculates the hours based on the employee’s standard weekly hours stored in their profile.
The calculation assumes the employee works 5 days per week, Monday to Friday. The employee’s standard weekly hours are divided by 5, with the resulting hours allocated to each weekday within the selected date range.
For example, an employee with standard hours of 38 hours per week would have 7.6 hours allocated to each weekday, resulting in 38 hours for a full Monday–Friday week.
The hours update automatically when you change the dates. A few things to keep in mind:
- Weekends aren’t counted, but public holidays are, so make sure to adjust the hours yourself around public holidays.
- If the employee doesn’t have standard weekly hours, the hours will show as 0.00.
- For part-time employees or employees who work variable hours, you can override the calculated hours and enter the correct hours manually.
Check the leave balance
Once you’ve picked the employee, leave item and dates, the Leave balances section shows how this leave affects the employee’s balance. Under This leave request, you’ll see:
- [Leave item] balance – the employee’s current balance for this type of leave, for example Annual leave balance. A balance is only displayed for leave types assigned to the employee.
- Hours requested – the hours you’re recording now.
- Unpaid approved leave – approved leave that starts before this leave and hasn’t been paid yet.
- Balance as at today – what’s left once this leave and any unpaid approved leave are taken out. It doesn’t include leave the employee will build up between today and the leave start date. A balance is only displayed for leave types assigned to the employee.
If the leave type is assigned to the employee and has a balance, you’ll see a warning if approving the leave would cause the balance to drop below zero. You can still approve the leave.
You’ll also see any Future approved leave for this leave item, which is any leave ahead of this leave's start date and the employee’s balances for every leave item under All leave balances.
Read more
- Learn how to navigate the leave screen in Reckon One
- Learn how to edit or delete leave in Reckon One
- Learn how to pay recorded leave in a pay run in Reckon One
- Learn how to manage leave items