Table of Contents
Adjust, filter and search within reports in Reckon One
Learn how to adjust reports in Reckon One, so you can tailor what you see in a report. Not all options are available for every report, but we describe the most common ones here.
Filter, sort and search data within a report
Search within the report
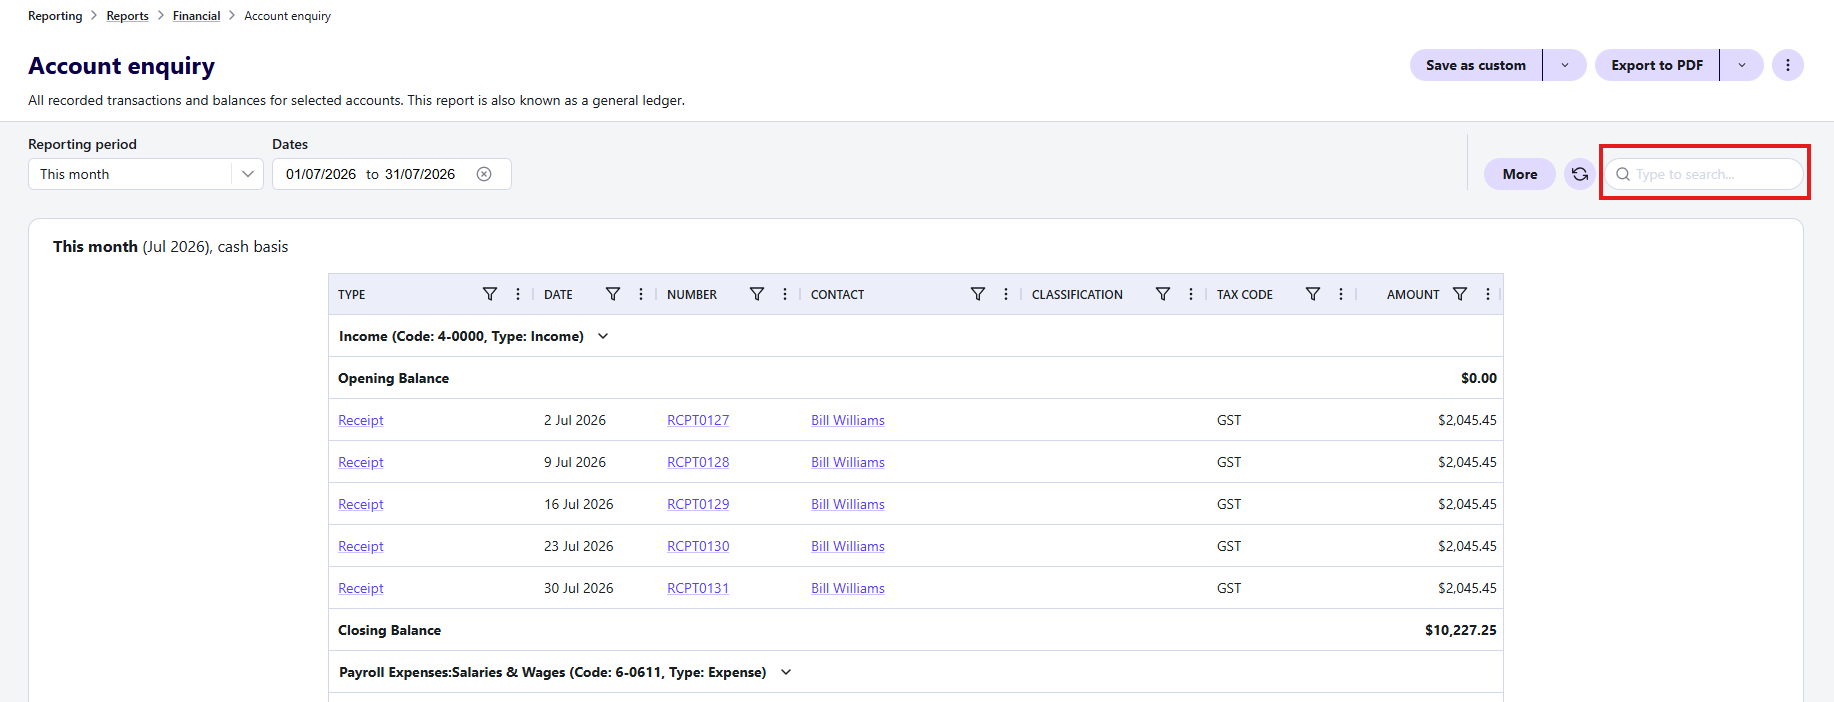
You can search for a specific piece of data within a report such as a reference code, number, or keyword. When you click in the search bar and type, the report will then be filtered to only show line items that match what you typed.
Filter your whole report
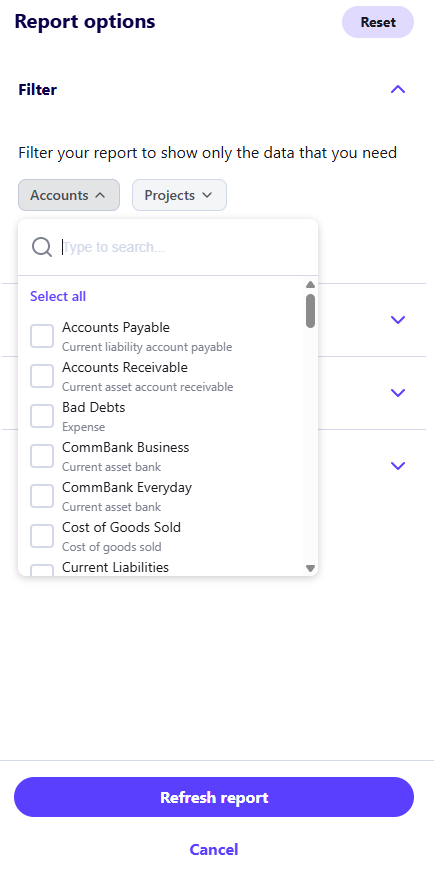
Filter a report to narrow the data that's shown, and see only the data you need. Depending on the report and the features you have enabled in your book, you may be able to filter by item, account, project, customer, supplier, employee, classification, or other types of data.
To use filters:
- In the Reporting menu, select Reports, then click on the report to open it.
- Click More next to the header of the report. This will open the Report options drawer.
- If available for the report, there will be a section called Filter. Click on the down arrow next to it.
- Click on the data you want to filter by e.g. Customers
- Select the specific things you want to filter e.g. the specific customer or customers.
- Click Refresh report.
To change back to the original settings, click Reset in the top right of the drawer.
Filter within columns
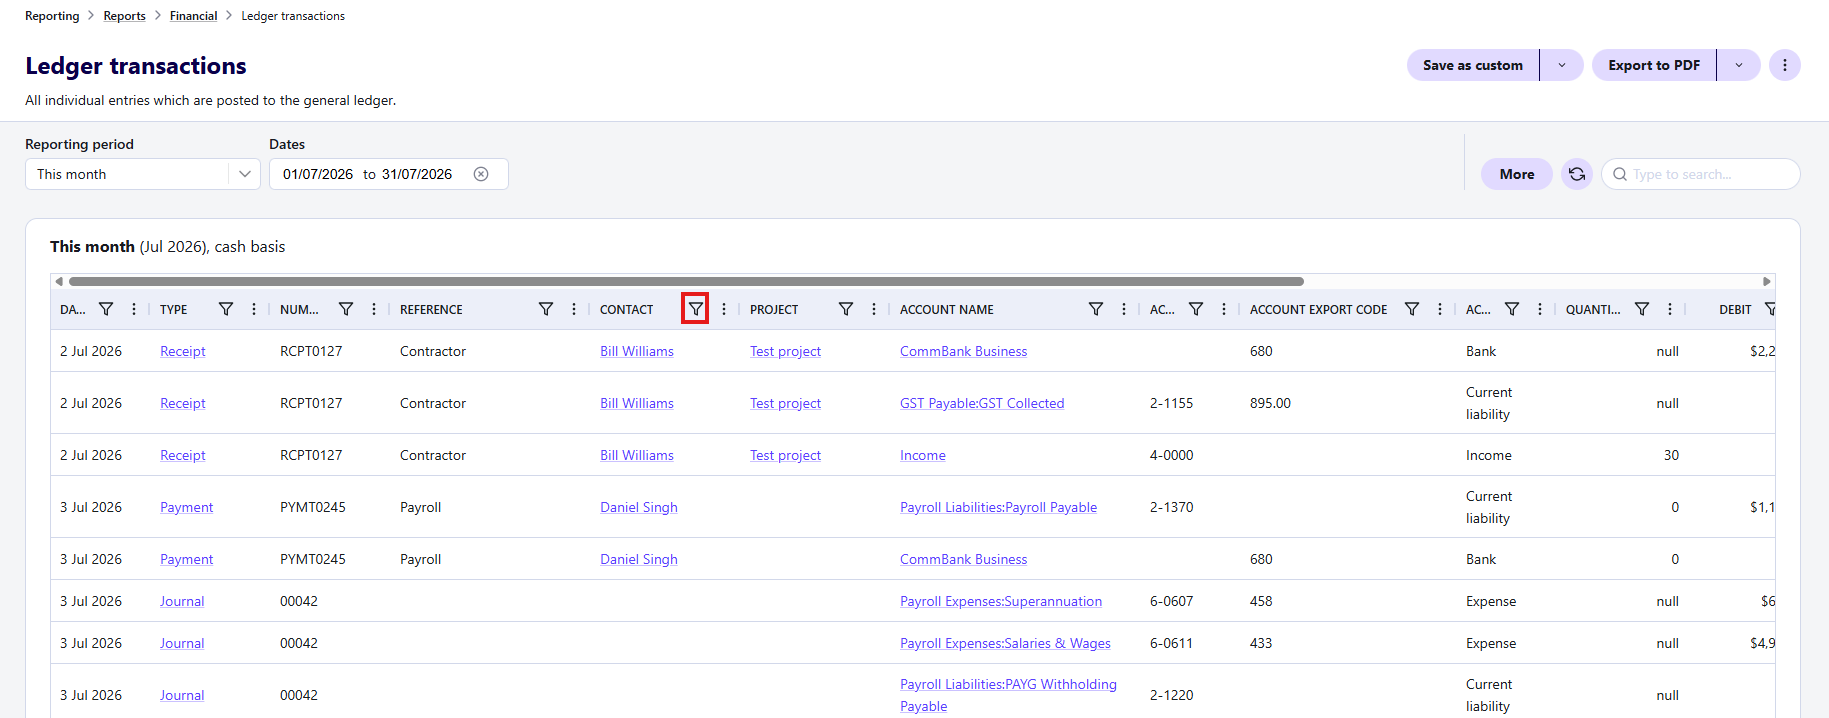
You can quickly filter and narrow down data within individual columns by typing into the field at the top of a column. Data will filter to anything that exactly matches what you type.
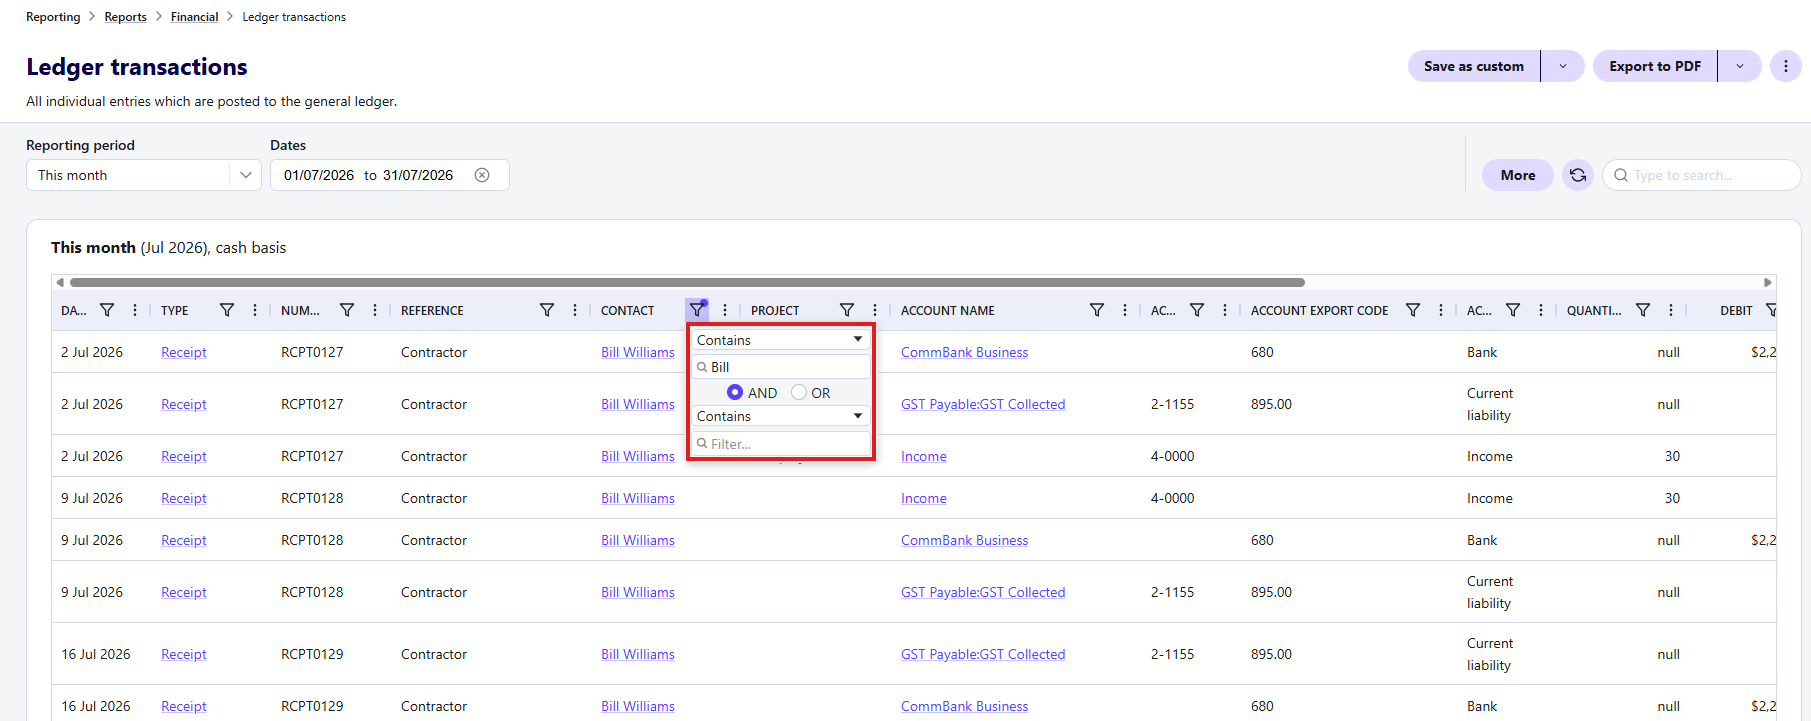
Click on the filter icon next to field to use other parameters for filtering, such as 'contains', 'does not contain', begins with', etc. Select the option and then type what you're filtering for in the search field.
You can filter by more than one thing at a time using the 'And'/'Or' option that appears after you select a parameter for filtering.
Sort data in a column
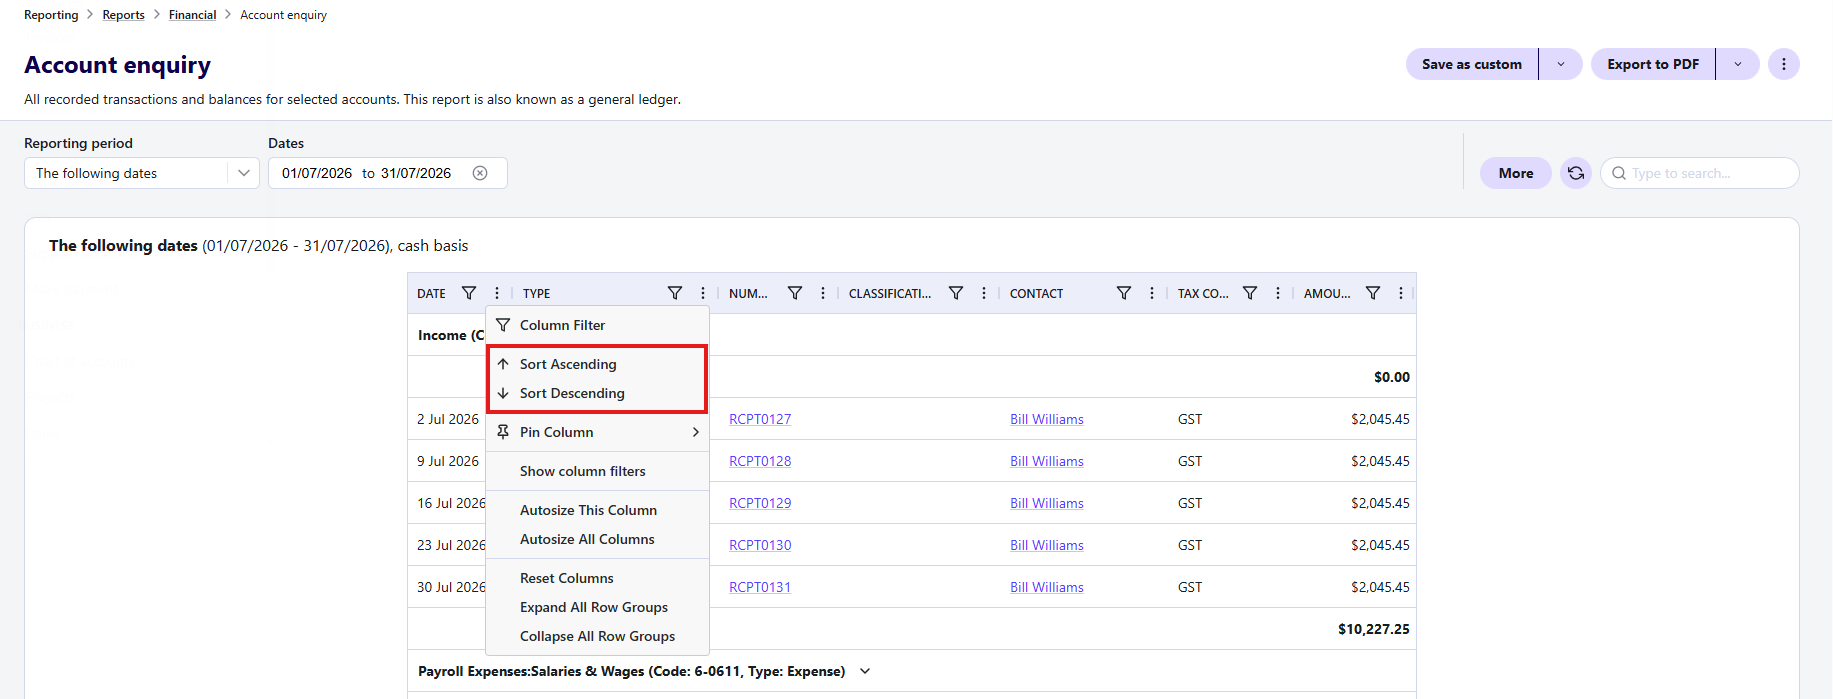
To sort the data in a column, you can:
- click on the column name to first sort by ascending, then descending, then if available, by the default order (which varies between reports).
- click on the column menu (the 3 dots next to the column name), then select the preferred sorting option for the column.There may be extra sorting options in the More menu for some financial reports (e.g. Profit and loss).
Expand or collapse report groupings
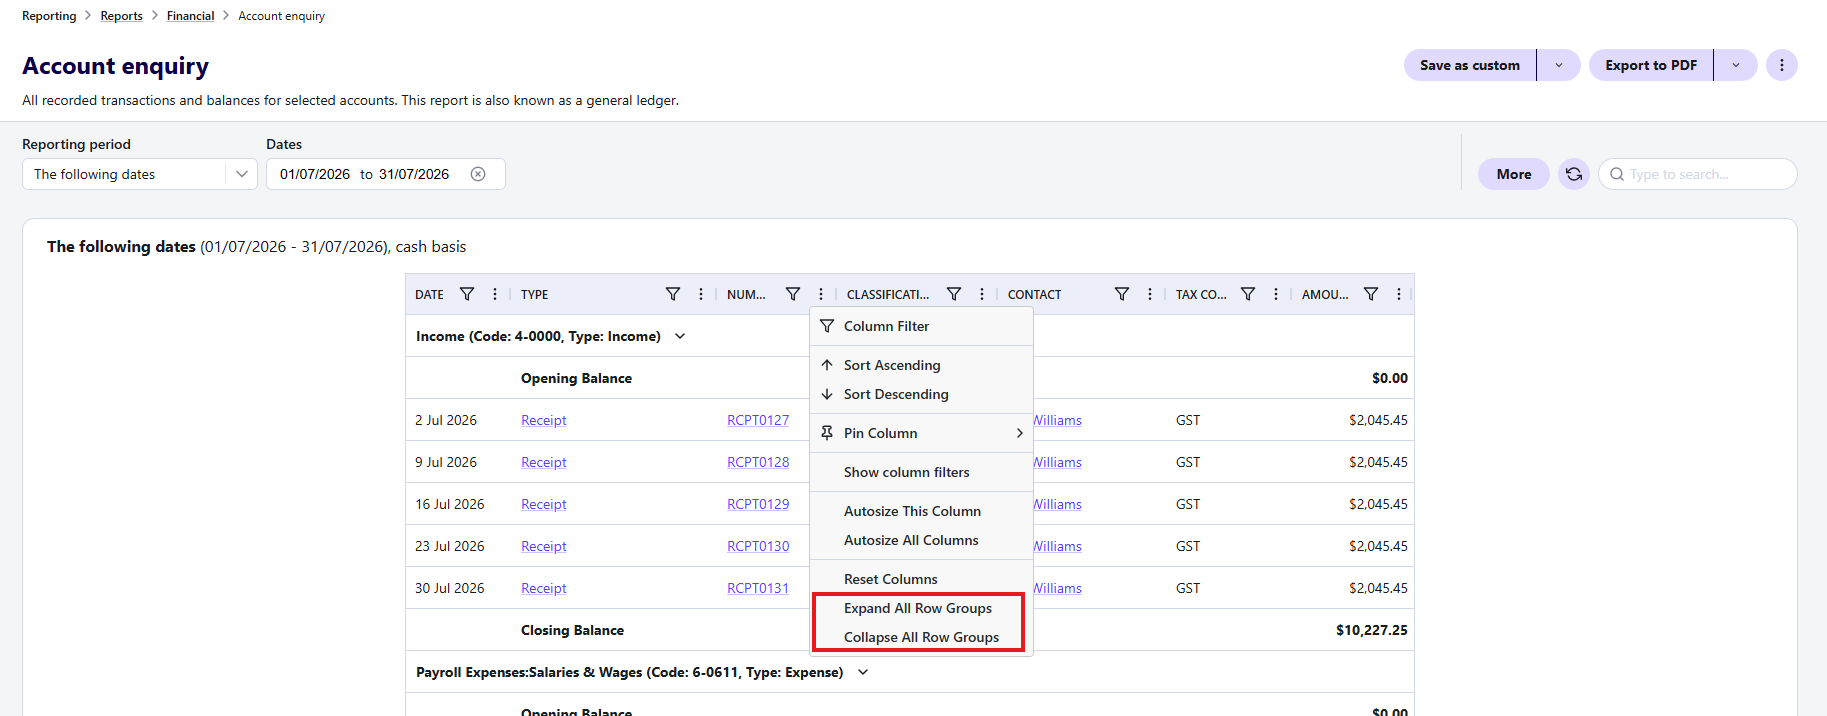
Click on a report grouping to expand or collapse the grouping. You can also expand or collapse all groups at once, by clicking on the column menu (3 dots) and selecting Expand all row groups or Collapse all row groups.
Adjust report columns
Show, hide and reorder columns
To show or hide columns from your report:
- In the Reporting menu, select Reports, then click on the report to open it.
- Click More next to the header of the report. This will open the Report options drawer.
- Click on the down arrow next to Show/hide columns in the drawer.
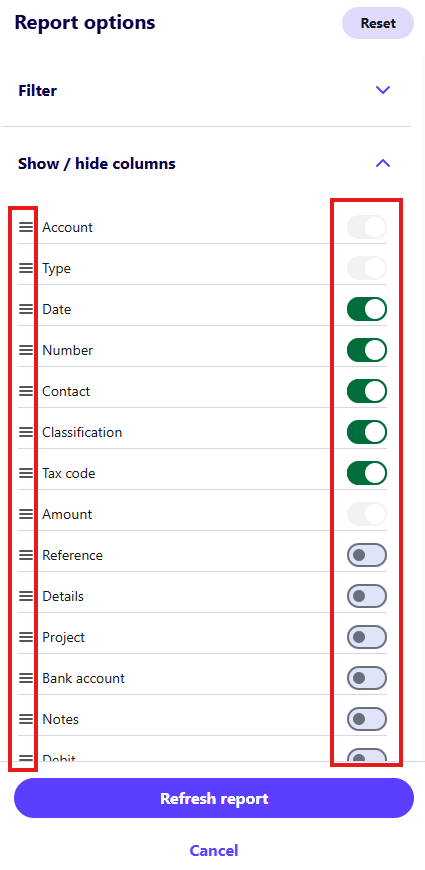
- Click on the toggles to show or hide different columns. Columns that are showing on the report will have a green toggle.
- To reorder columns, click on the column name and drag it to the location you want.
- Click Refresh report.
To change back to the original settings, click Reset in the top right of the drawer.
Resize columns
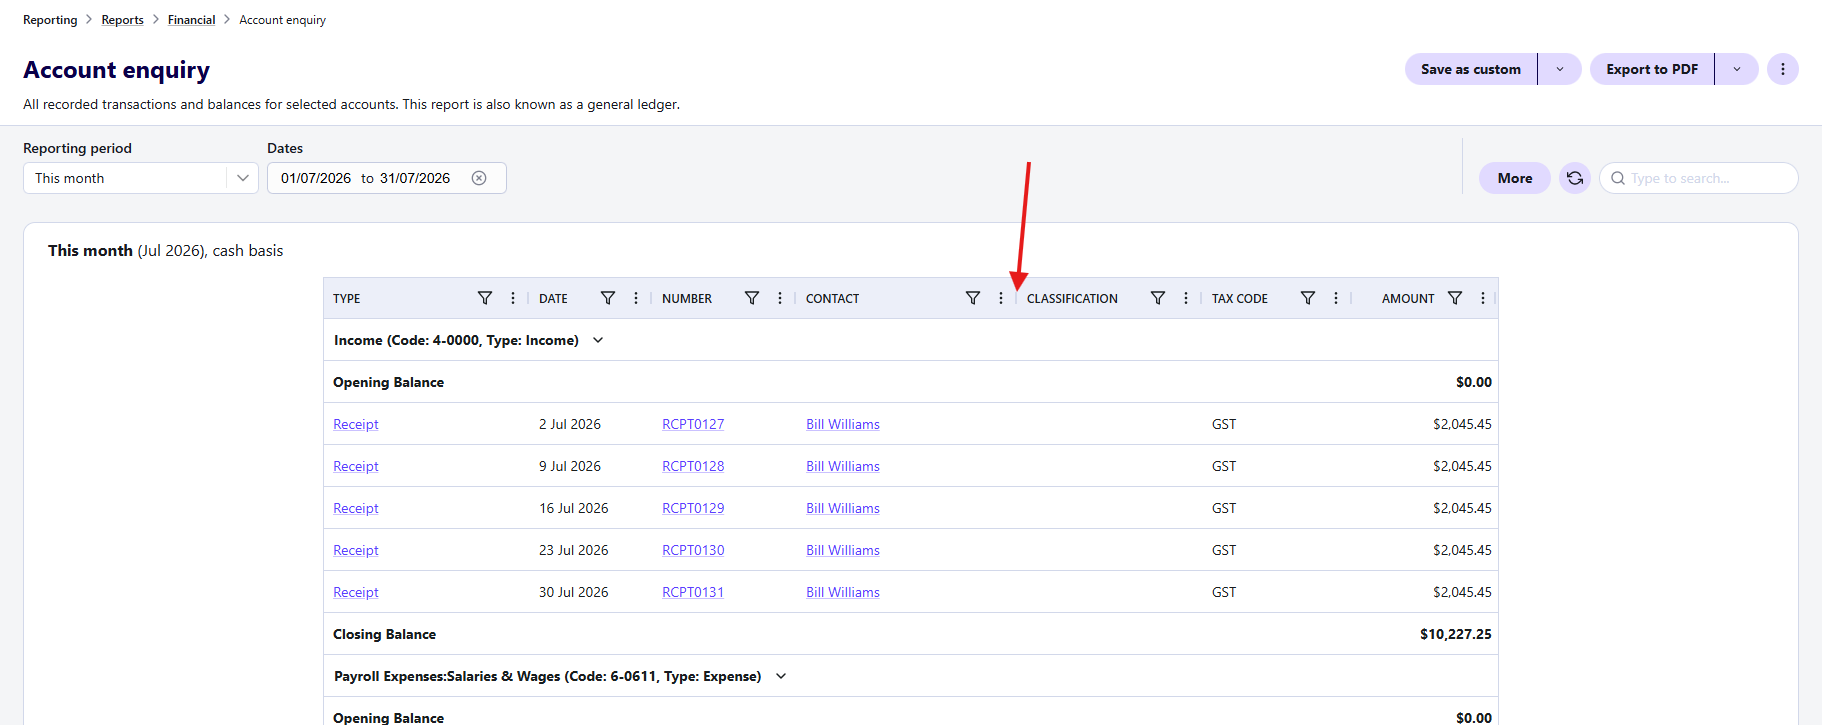
To resize columns, click on the lines between column headers and drag to make columns wider or narrower.
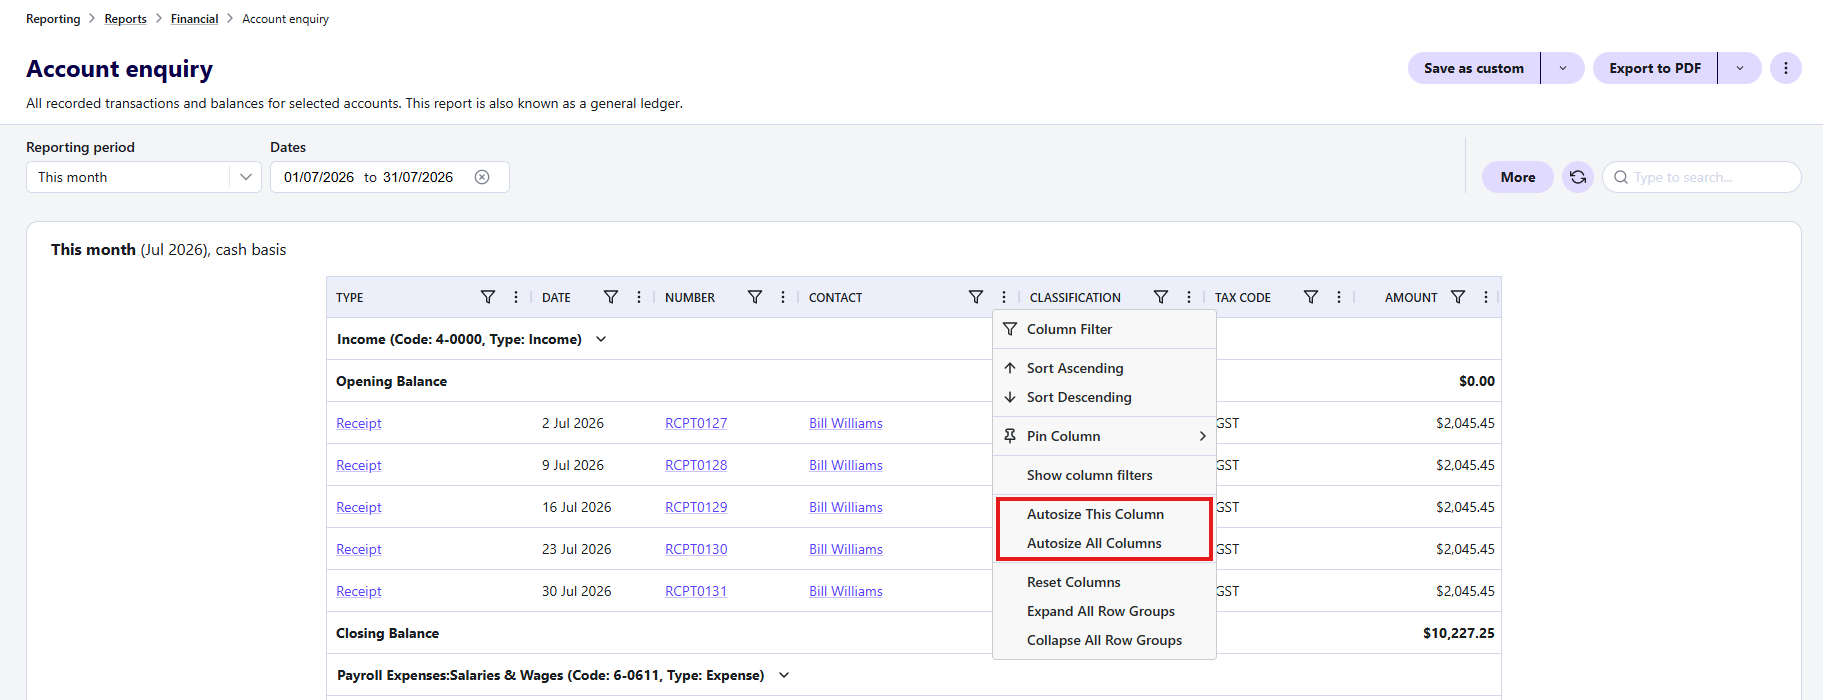
You can also select the column menu (the 3 dots next to the column name) and:
- select Autosize this column to autosize a specific column to the size of the cell contents
- select Autosize all columns to resize all columns to fit the grid width.
Pin columns
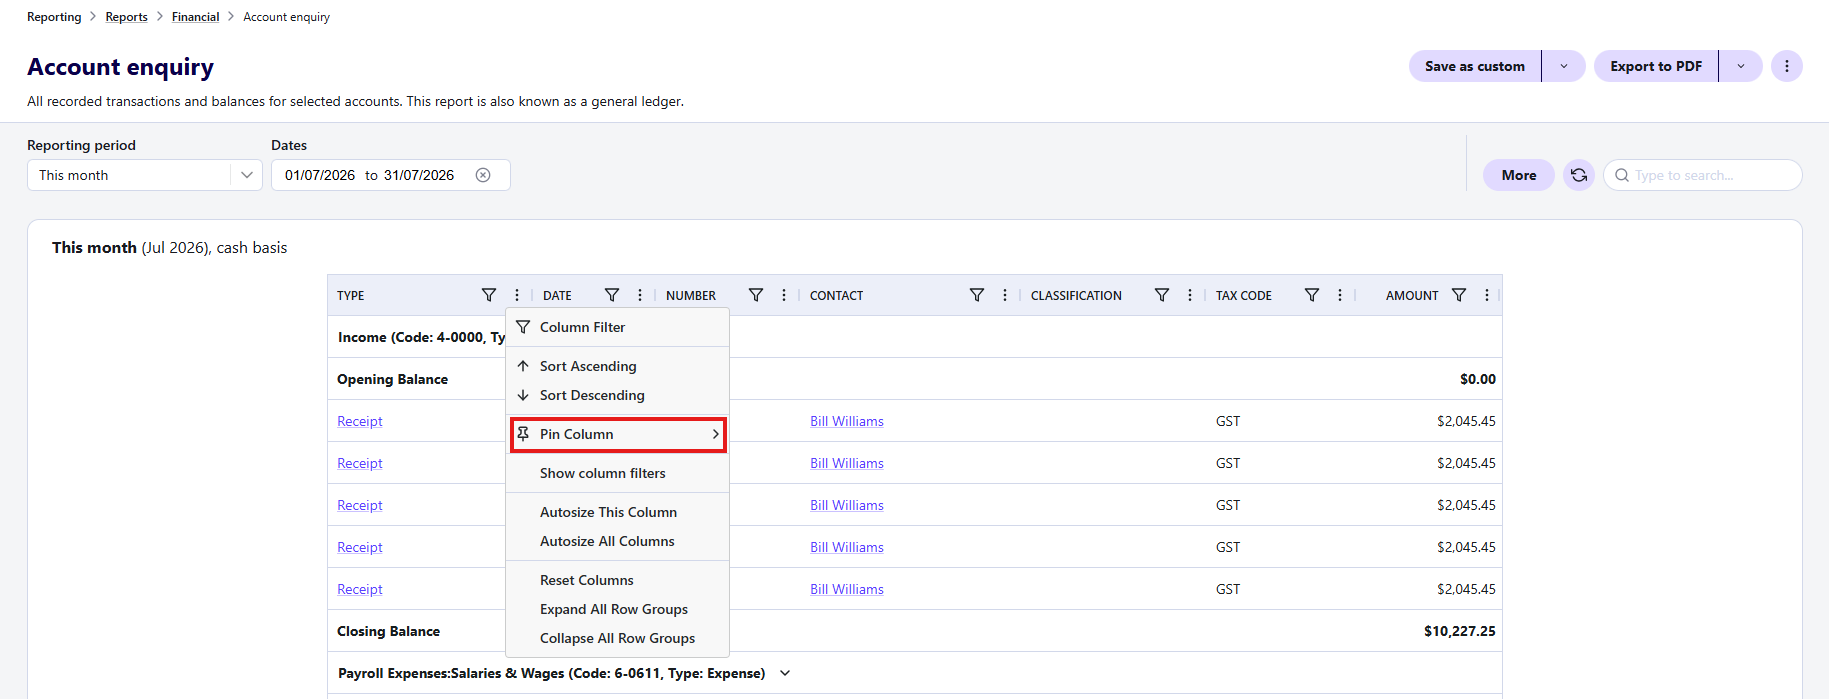
To pin a specific column so that it is always visible as you scroll the report:
- Click on the column menu (the 3 dots next to the column name)
- Select Pin column.
- Select Pin Left.
To unpin a column, click on the column menu (the 3 dots next to the column name), select Pin column, then select No pin.
Adjust display options
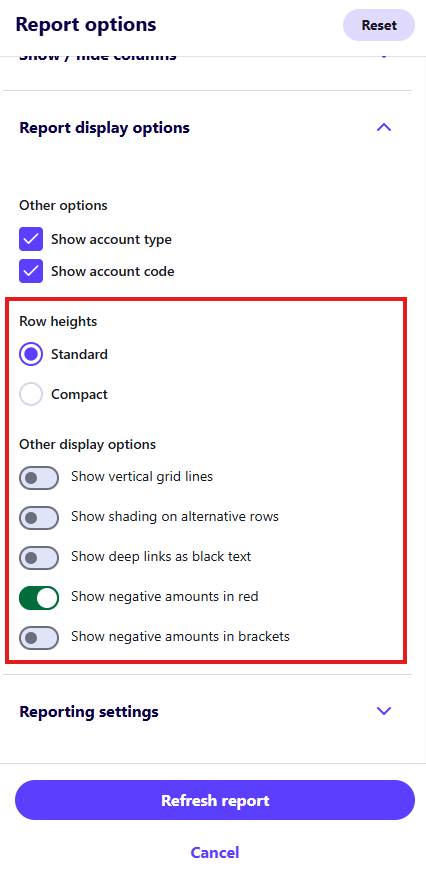
Display options include things like row heights, grid lines, shading and highlighting of negative amounts and links, as well as report-specific options such as display options for sub-accounts.
- In the Reporting menu, select Reports, then click on the report to open it.
- Click More next to the header of the report. This will open the Report options drawer.
- Click on the down arrow next to Report display options in the drawer.
- Click on the buttons to change the options as required. For other display options, click on the toggles to switch an option on or off.
- Click Refresh report.
To change back to the original settings, click Reset in the top right of the drawer.
Change reporting basis
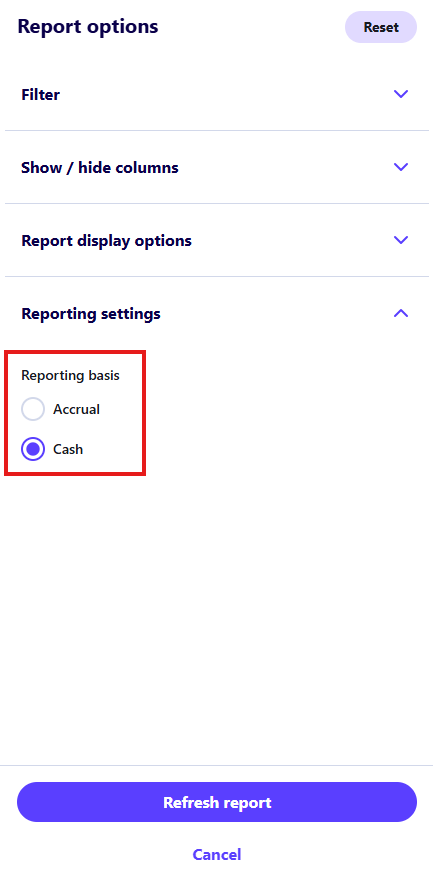
To change the reporting basis (cash or accrual):
- In the Reporting menu, select Reports, then click on the report to open it.
- Click More next to the header of the report. This will open the Report options drawer.
- Click on the down arrow next to Report settings in the drawer.
- Click on the buttons to change the reporting basis.
- Click Refresh report.
To change back to the original settings, click Reset in the top right of the drawer.
Read more
- Learn how to save custom reports in Reckon One